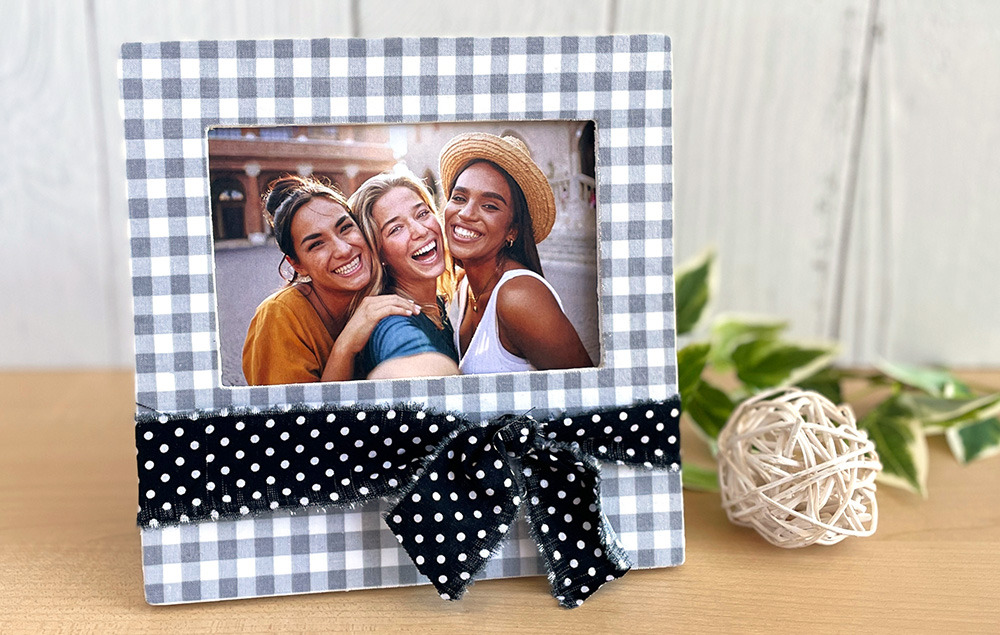
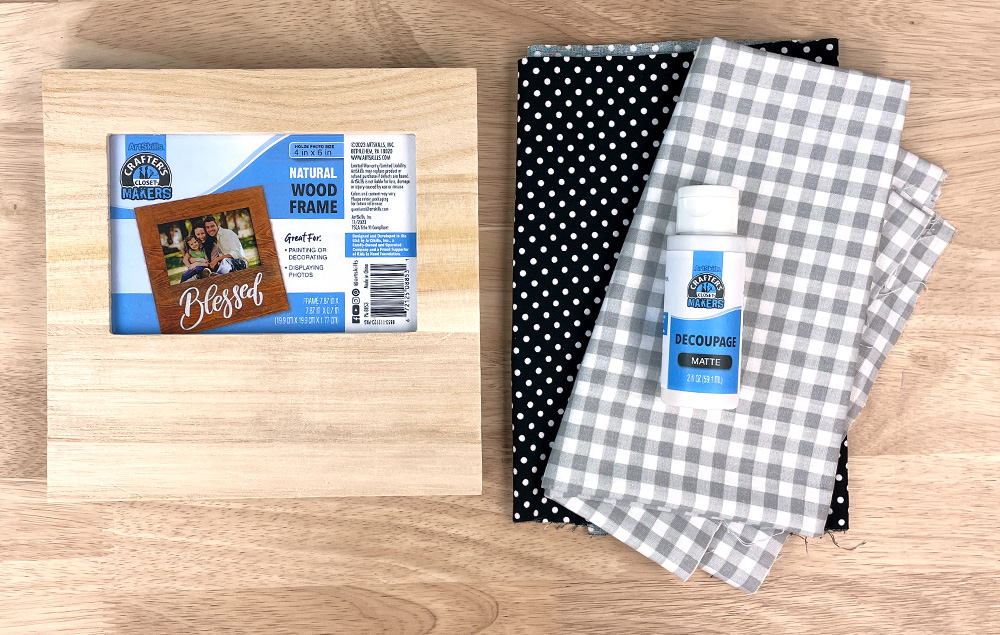
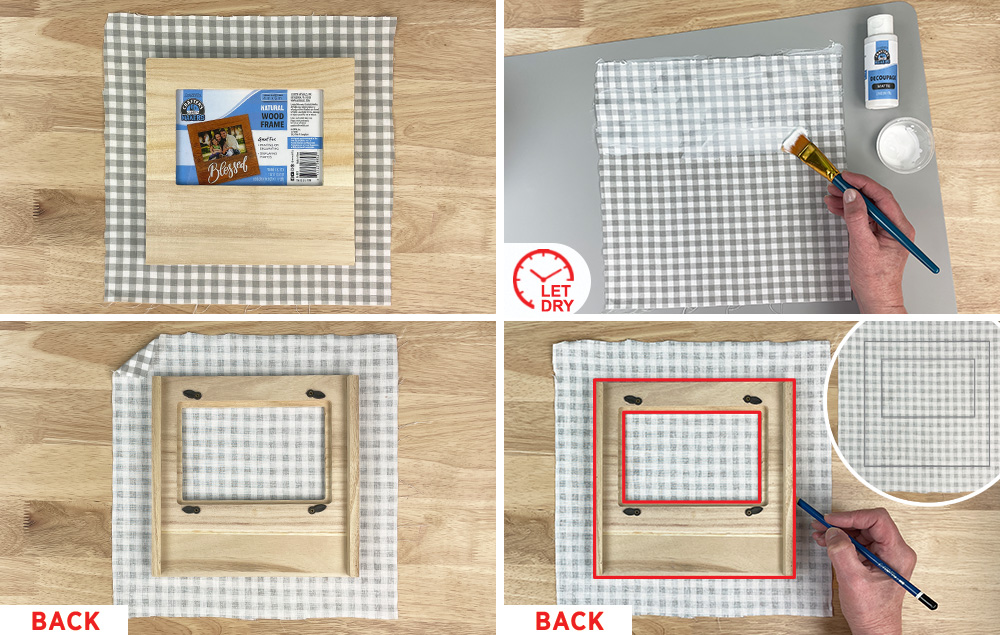
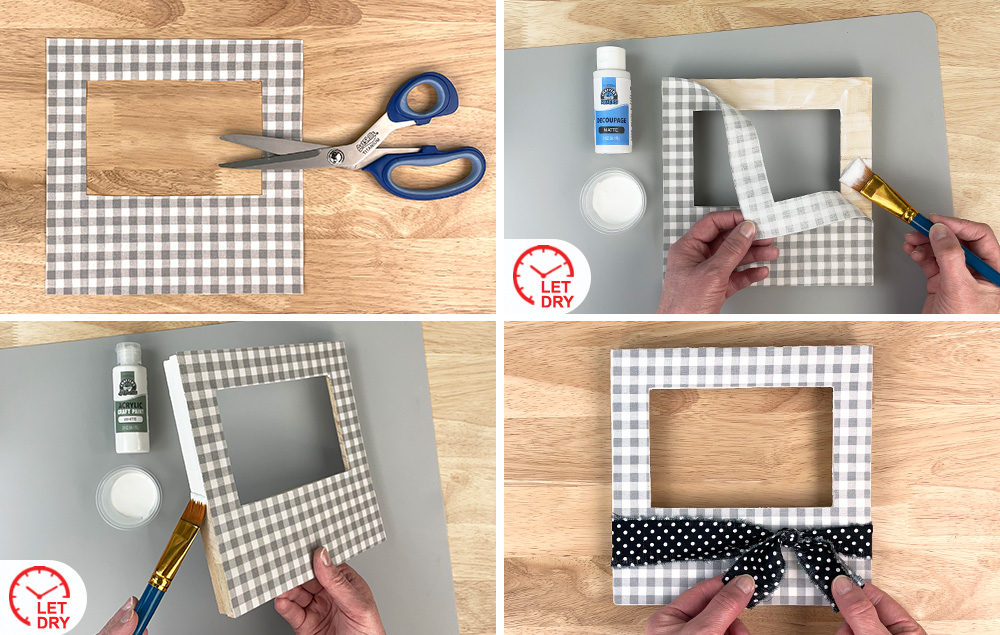
Transform a simple wood frame by adhering fabric, giving it a stylish finish. Complete the look by tying a coordinating fabric scrap into a bow around the frame for a handmade touch!
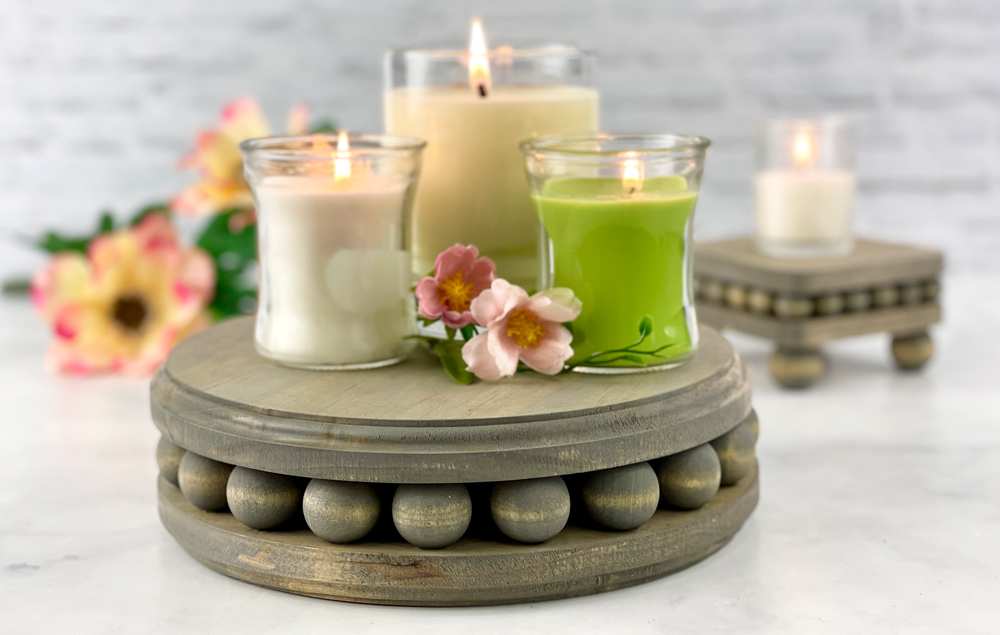
This beautiful DIY wood riser is so simple, but it makes quite an impact! The size is customizable, so you can follow this tutorial to create a wood bead riser suitable to your home decor needs...
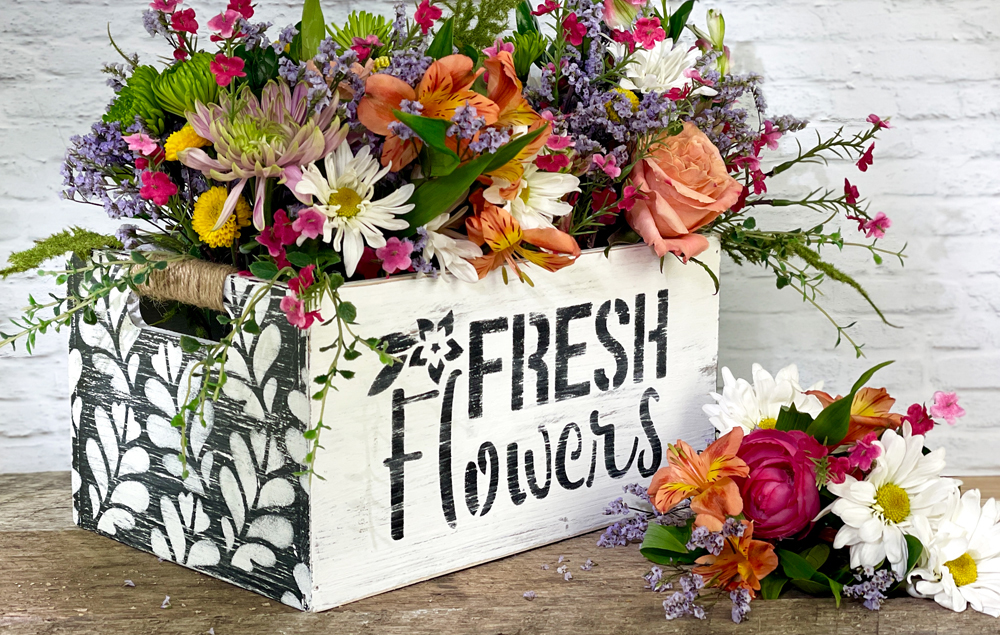
This rustic wood crate is a charming addition to any home decor. With its cut-out handles wrapped in jute, it’s easy to move from room to room. The crate is painted with a distressed finish and stenciled with the words “fresh flowers” and a lovely pattern on each side, making it perfect for any room in your home. Fill it with a DIY flower ...
Transform a simple wood crate into a masterpiece! A delicate wash of paint, charming floral decoupage, and sandpaper-distressed finish combine to create a vintage-inspired aesthetic...