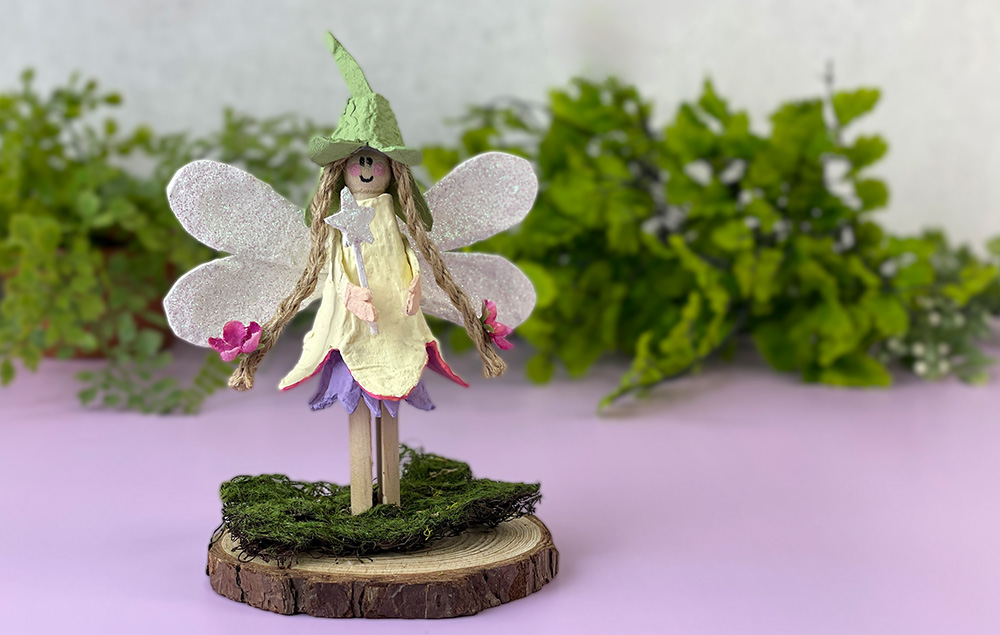
Create a whimsical fairy using recycled egg cartons, jute, and simple craft supplies for a charming, eco-friendly decoration. This sweet fairy features hand-painted details, glittery wings, and a natural wood base—perfect for spring décor or imaginative crafting fun.
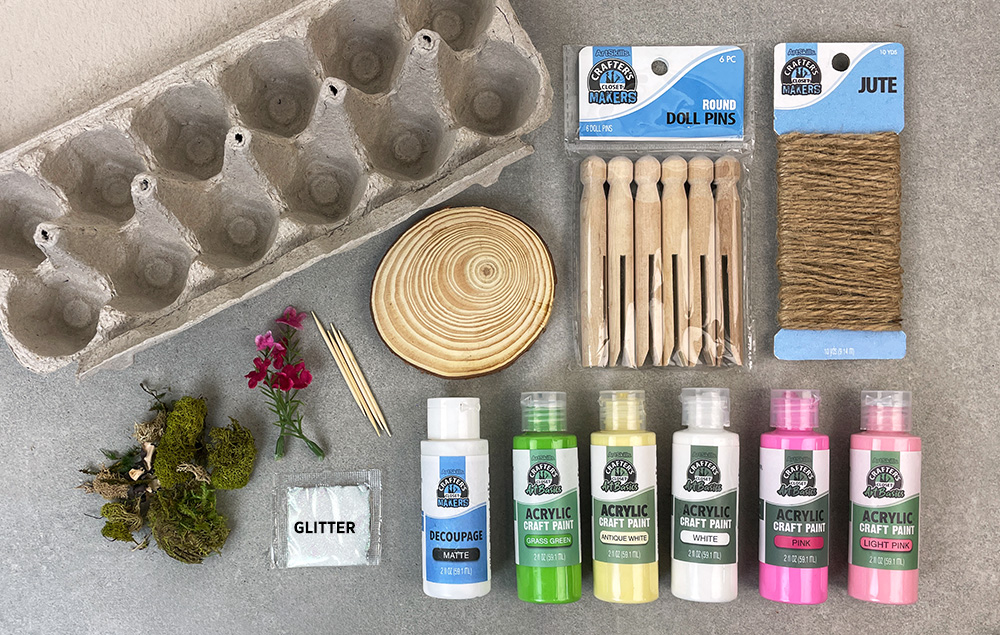
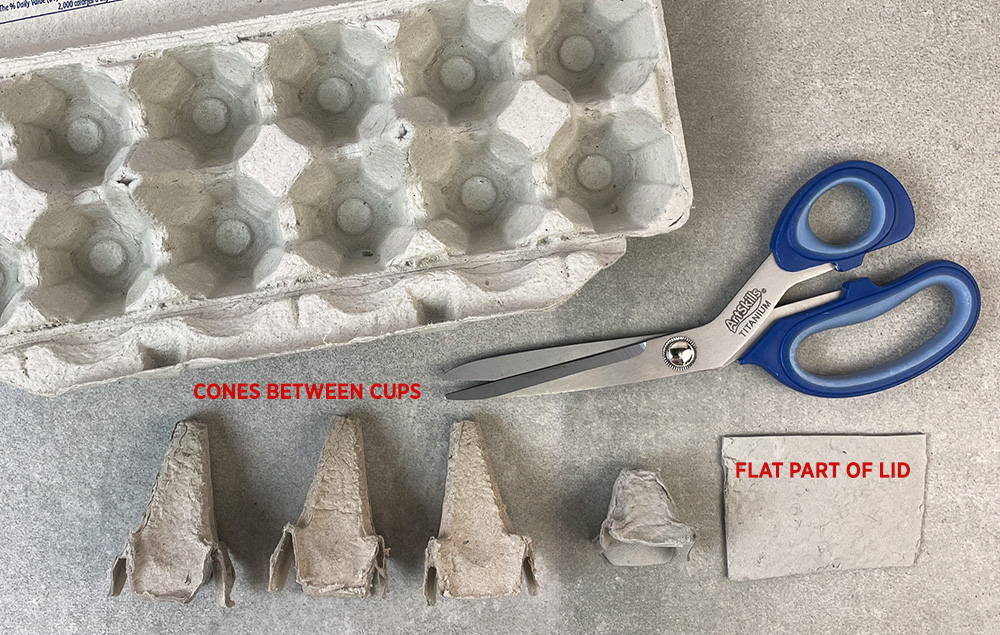
A) Cut out the pieces needed from an egg carton. You’ll need four cone shapes, plus a flat piece from the lid.
STEP 2:
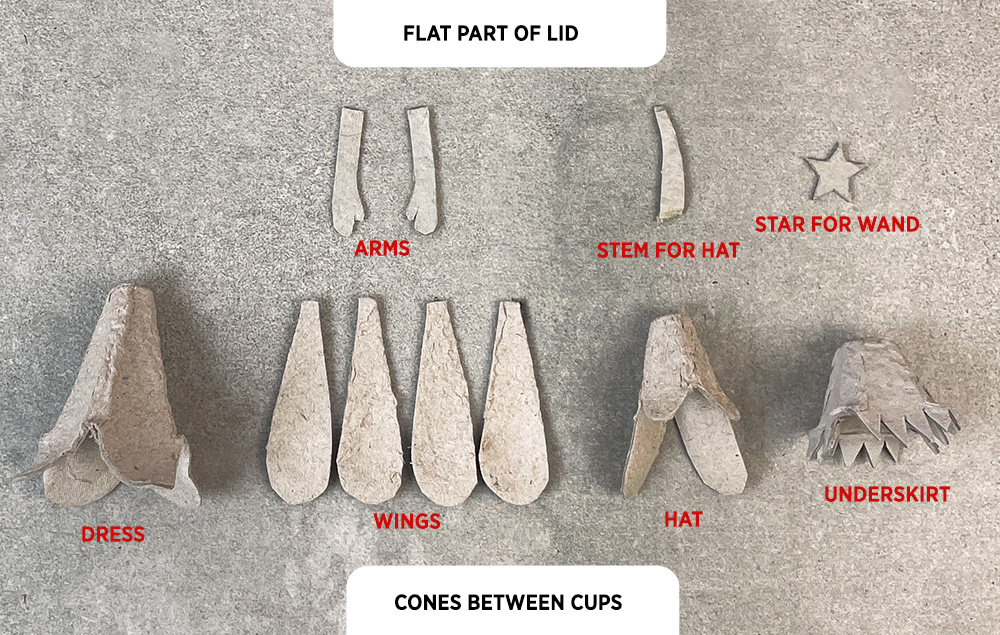
A) Create the needed shapes from the cones. Cut an underskirt, a dress, four wings, a hat with a stem, two arms, and a star for the wand.
STEP 3:
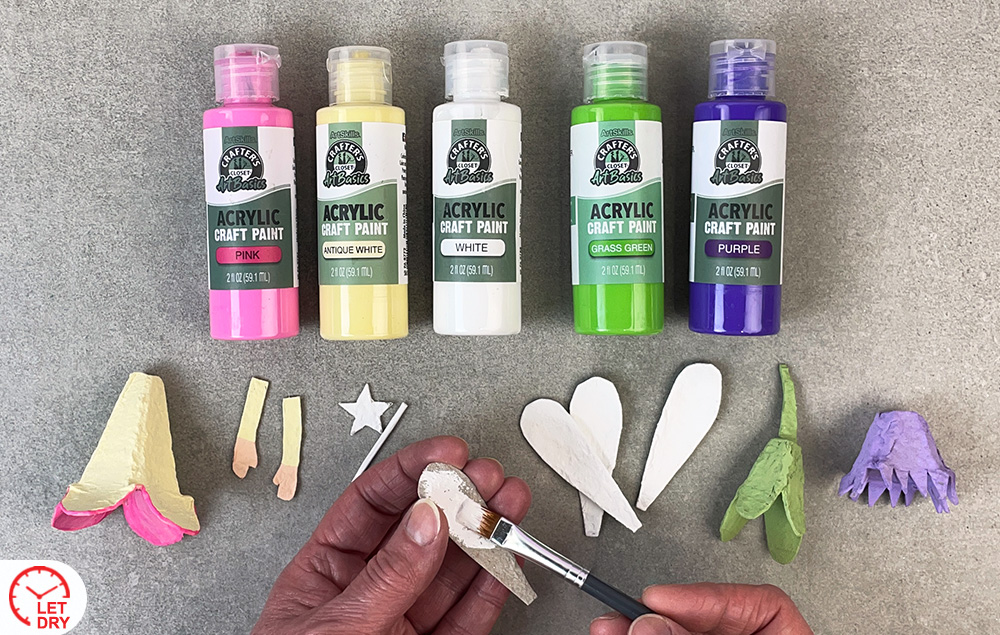
A) Paint the shapes. Use the fairy shown as inspiration or choose your own colors. Note: You’ll also need to paint half of a toothpick for the wand. Let everything dry.
STEP 4:
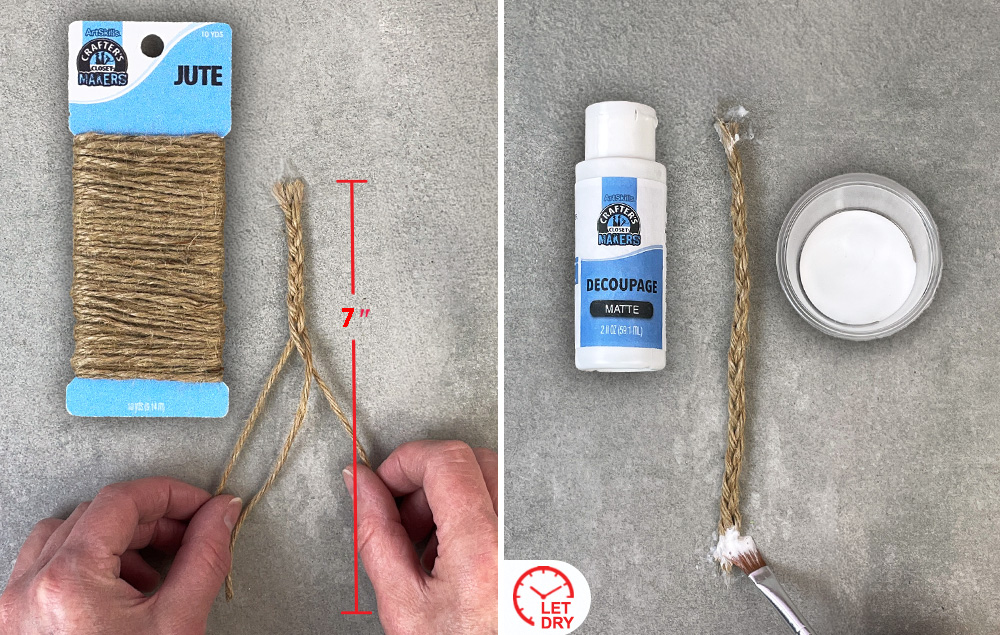
A) Cut three 7" lengths of jute and braid them together.
B) Use a decoupage medium to seal the ends of the braid so it holds together. Let dry.
STEP 5:
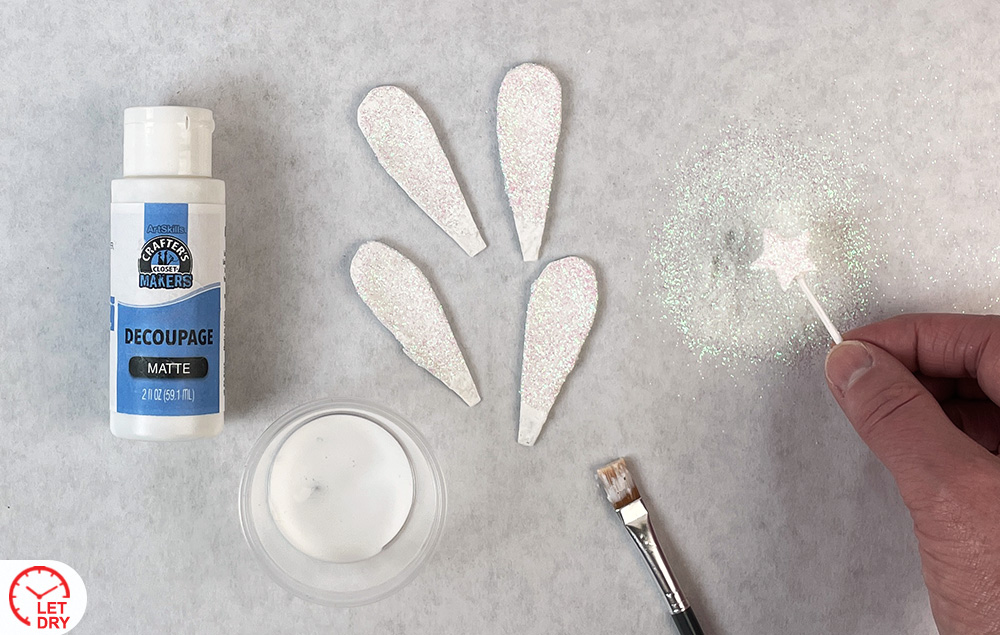
A) Add glitter to the wings and star wand using a decoupage medium. Tip: Don’t apply glitter to the narrow ends of the wings—you’ll be adding glue there in a later step.
STEP 6:
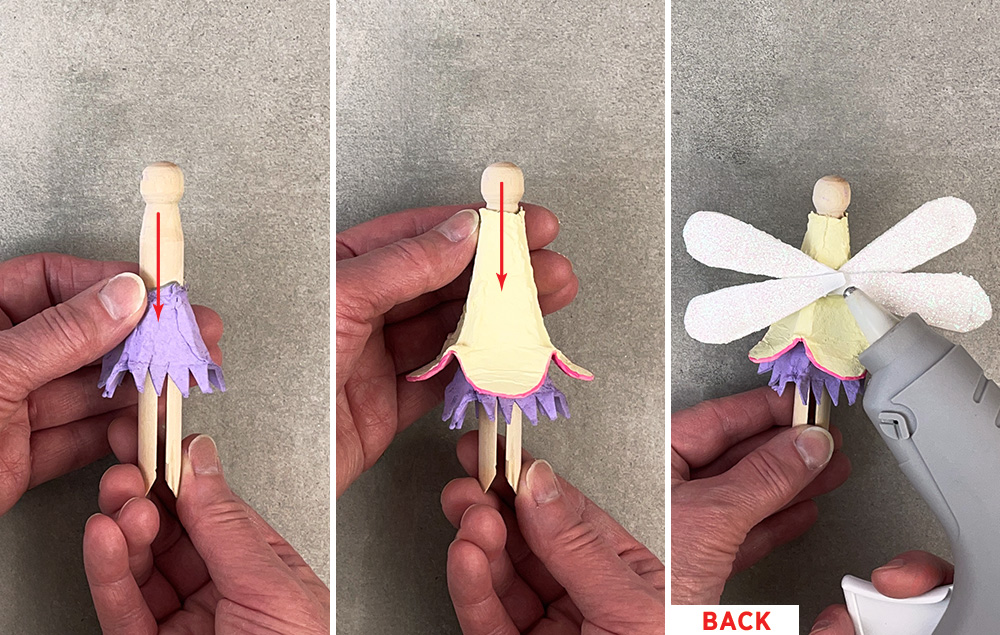
A) Let’s assemble the fairy! Slide the underskirt onto the doll pin.
B) Slide the dress onto the doll pin. The underskirt should just peek out.
C) Hot glue the wings to the back of the fairy’s body.
STEP 7:
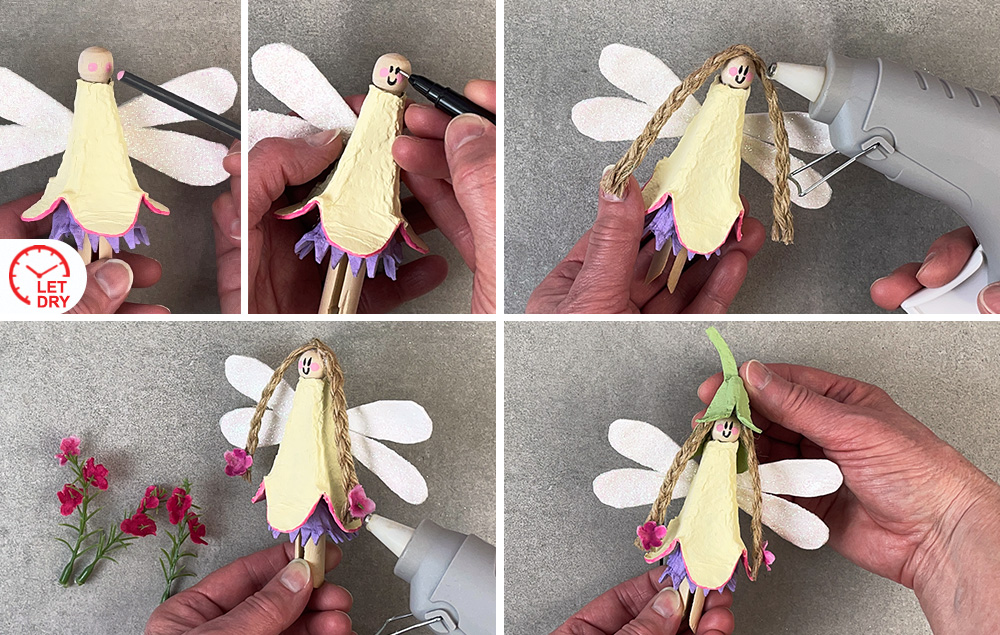
A) To make the fairy’s face, paint on pink cheeks and add eyes and a mouth with a fine black marker.
B) Hot glue the jute hair braid to the top of her head.
C) Hot glue small flowers on the ends of her braids.
D) Hot glue the hat onto her head. Tip: Curl the shorter petals of her cap upwards to help show her face.
STEP 8:
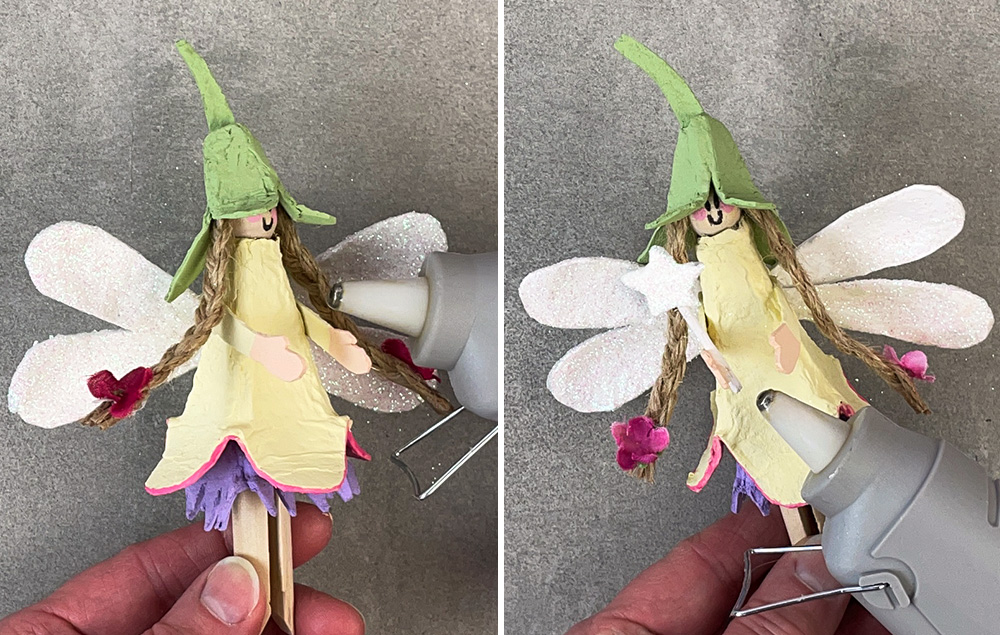
A) Hot glue the arms onto the body.
B) Hot glue the wand onto one of her hands.
STEP 9:
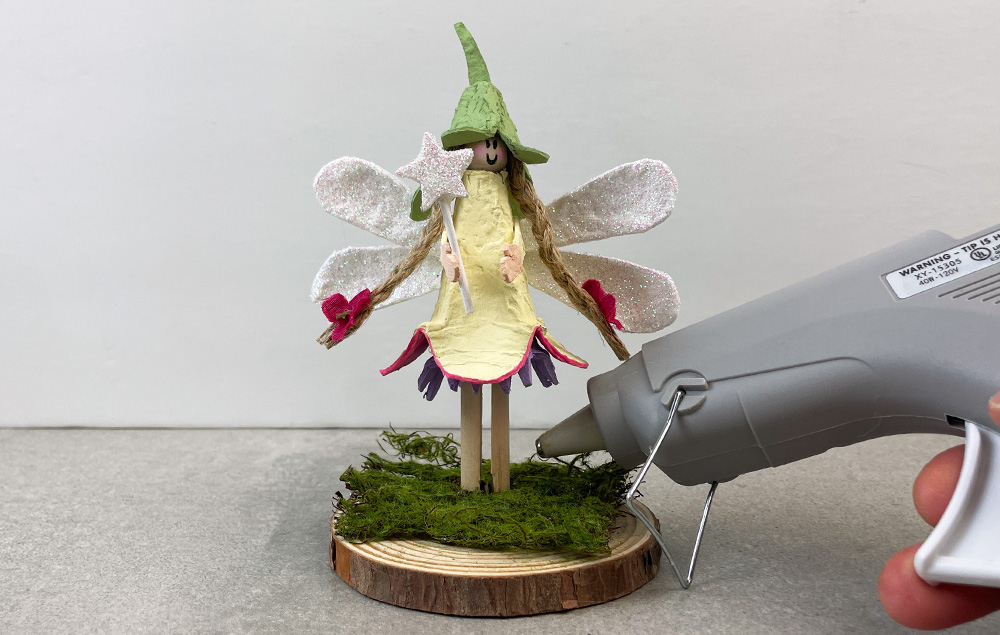
A) Hot glue the bottom of the doll pin to a wood slice, then add moss around her feet.
Transform your leftover Easter egg cartons into enchanting flower fairy lights with this whimsical craft. Painted with watercolors and sprinkled with a touch of glitter, these fairy lights will add a magical glow to any room while repurposing holiday scraps in a creative and eco-friendly way...
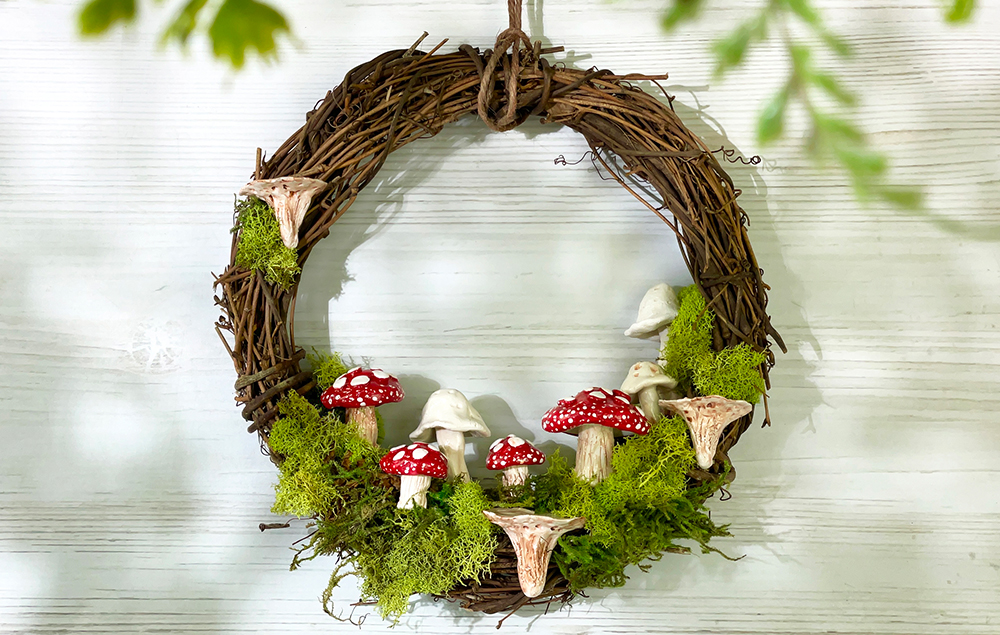
Embrace cottagecore decor this spring with this enchanting mushroom wreath craft. Nestle intricately crafted clay mushrooms amidst lush moss on a grapevine wreath, creating a whimsical woodland scene that adds a touch of charm and natural beauty to your home this season...
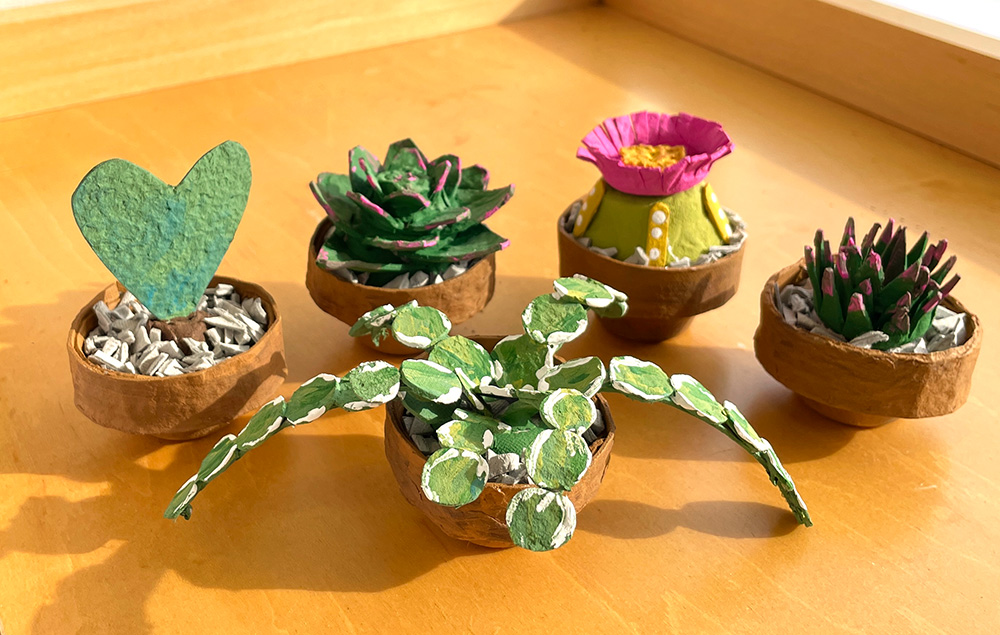
Egg carton succulents are an eco-friendly craft where recycled egg cartons are cut, shaped, and painted to resemble realistic succulent plants. Perfect for Easter when egg cartons are plentiful, this project combines sustainability with charming spring decor...