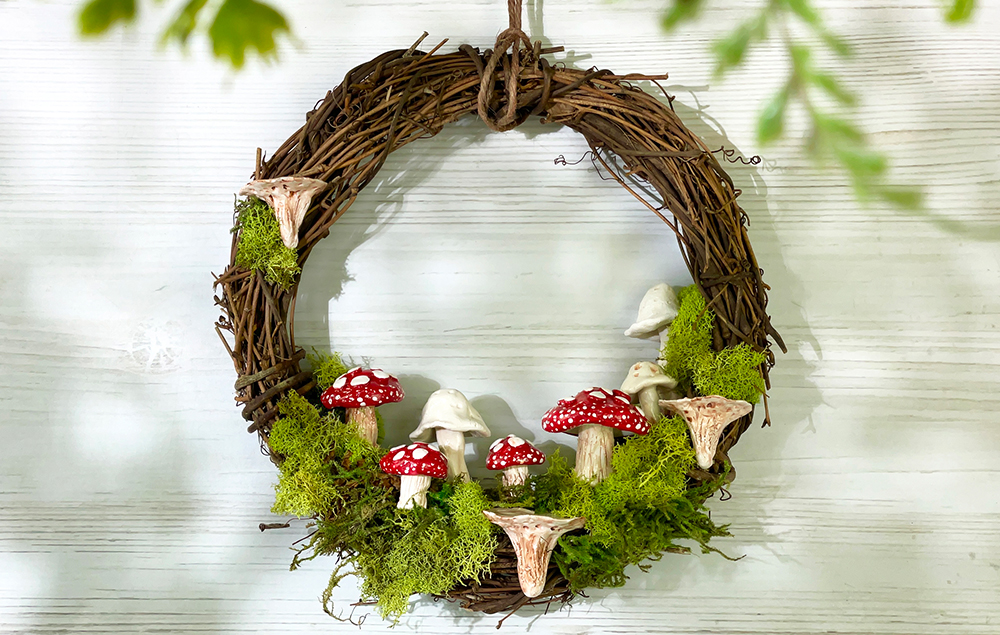
Embrace cottagecore decor this spring with this enchanting mushroom wreath craft. Nestle intricately crafted clay mushrooms amidst lush moss on a grapevine wreath, creating a whimsical woodland scene that adds a touch of charm and natural beauty to your home this season.
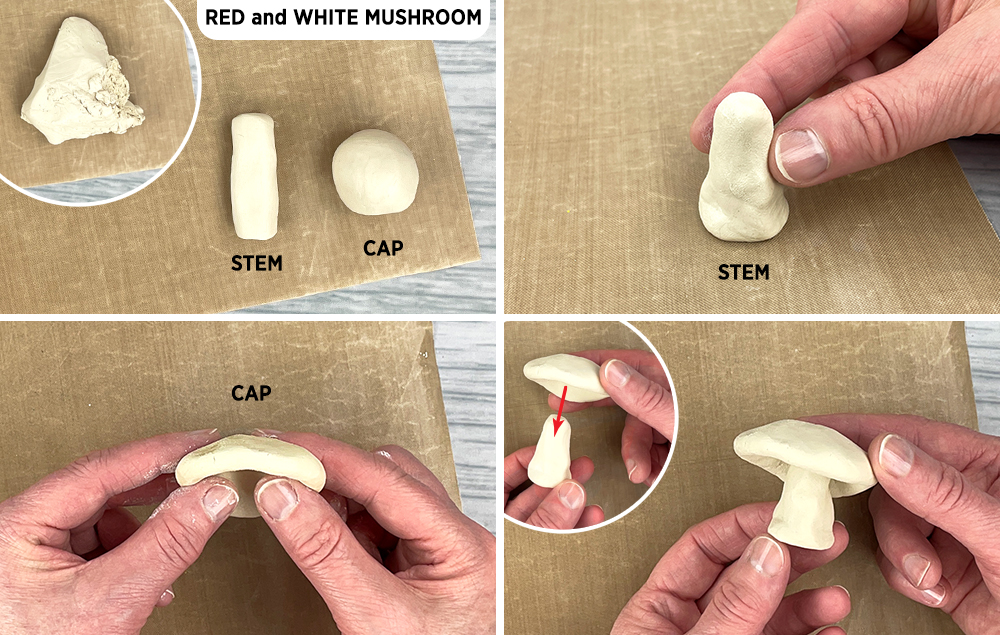
A) Roll a log shape and a ball shape from the air-dry clay. This will be the mushroom stem and cap.
B) Mold the log shape to distort it and add character to the stem.
C) Mold the ball shape into a mushroom cap shape.
D) Press the stem and cap together to make the mushroom.
STEP 2:
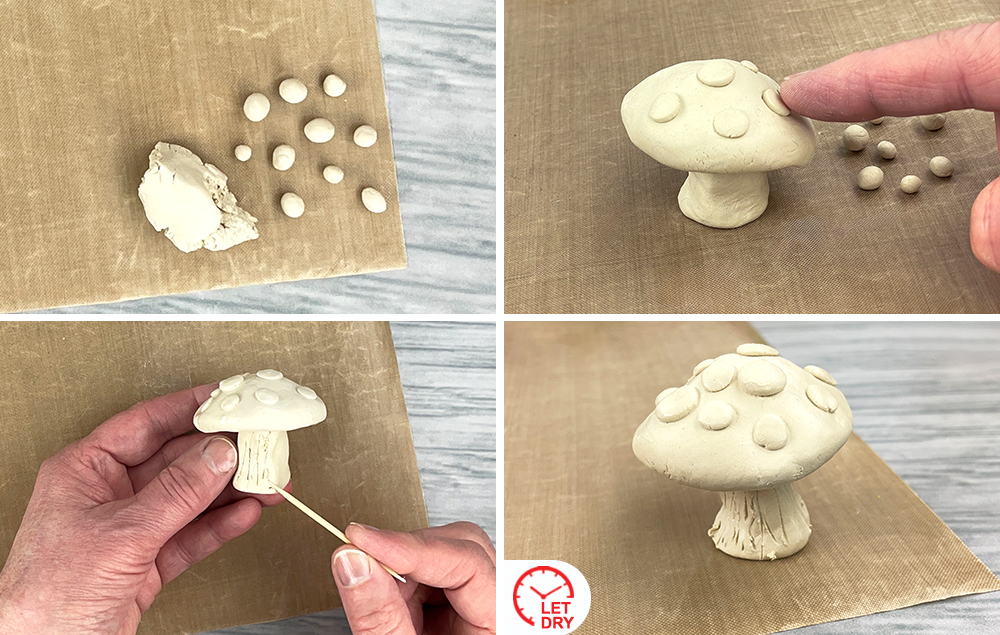
A) Make small clay balls.
B) Press the clay balls onto the mushroom cap to flatten them.
C) Use a toothpick to carve lines in the mushroom stem to add texture.
D) Let the clay mushroom dry thoroughly. Note: Make as many assorted-sized red and white mushrooms as you’d like.
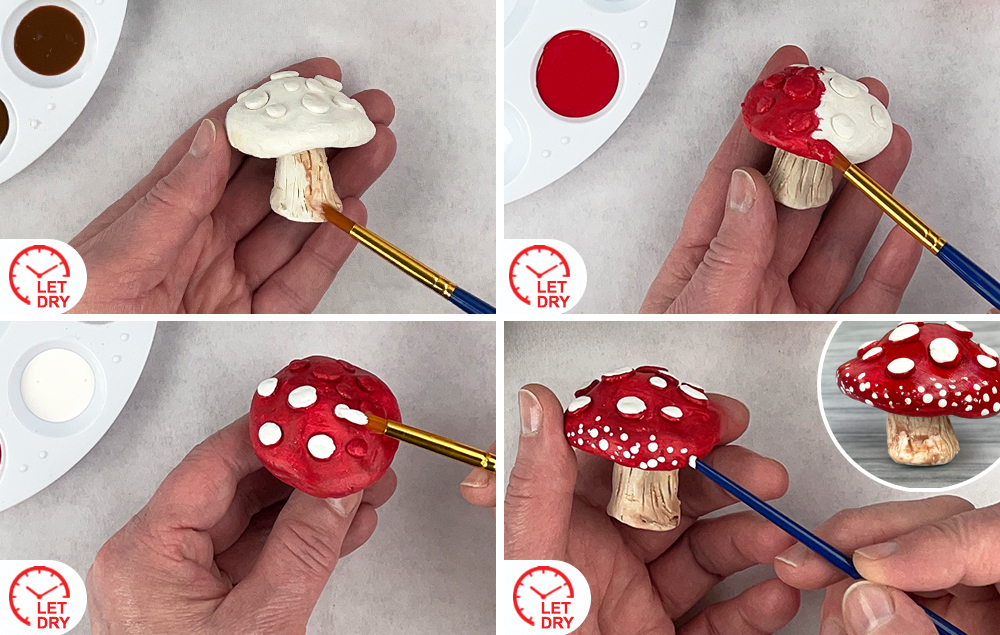
STEP 3:
A) Brush a light coat of brown paint mixed with water over the mushroom stem. Let dry.
B) Paint the mushroom cap red. Let dry.
C) Paint the dots white. Let dry.
D) Use the end of a paint brush dipped in white paint to make small, irregular dots around the bottom edge of the mushroom cap. Let dry.
STEP 4:
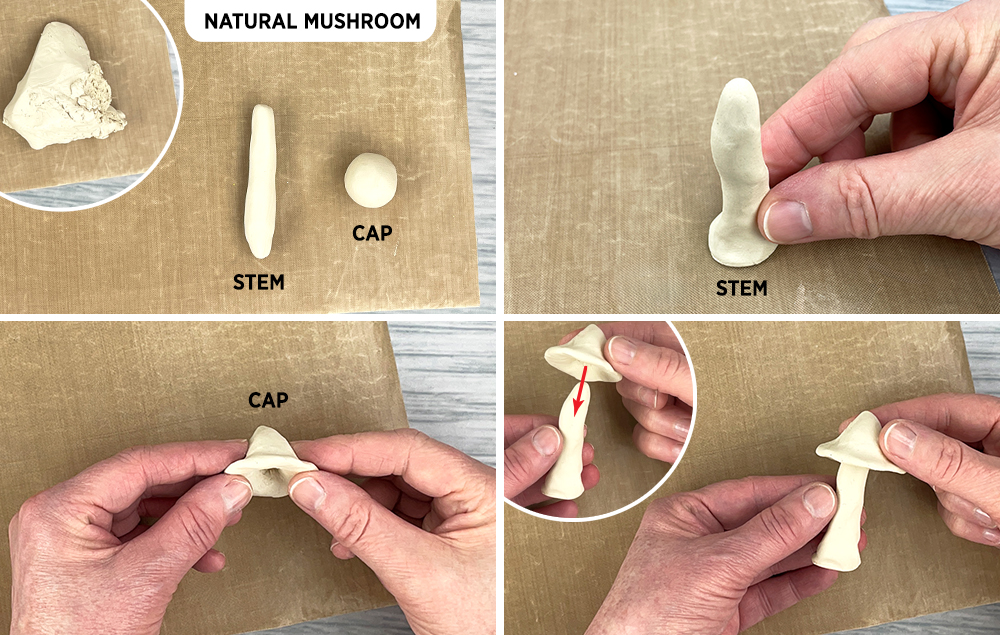
A) Roll a long log shape and a ball shape from the air-dry clay. This will be the mushroom stem and cap.
B) Mold the log shape to distort it and add character to the stem. Mold the bottom of the stem to widen it.
C) Mold the ball shape into a pointy mushroom cap shape.
D) Press the stem and cap together to make the mushroom.
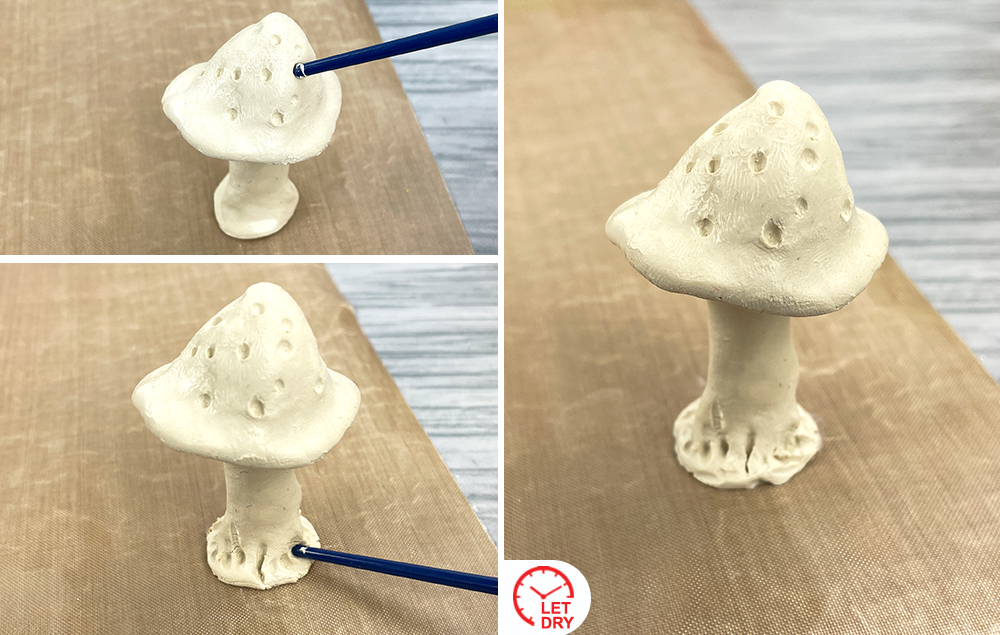
STEP 5:
A) Use the end of a paintbrush to make pockmarks on the cap.
B) Use the end of a paintbrush to add texture to the bottom of the stem.
C) Let the clay mushroom dry thoroughly. Note: Make as many assorted-sized natural mushrooms as you’d like.
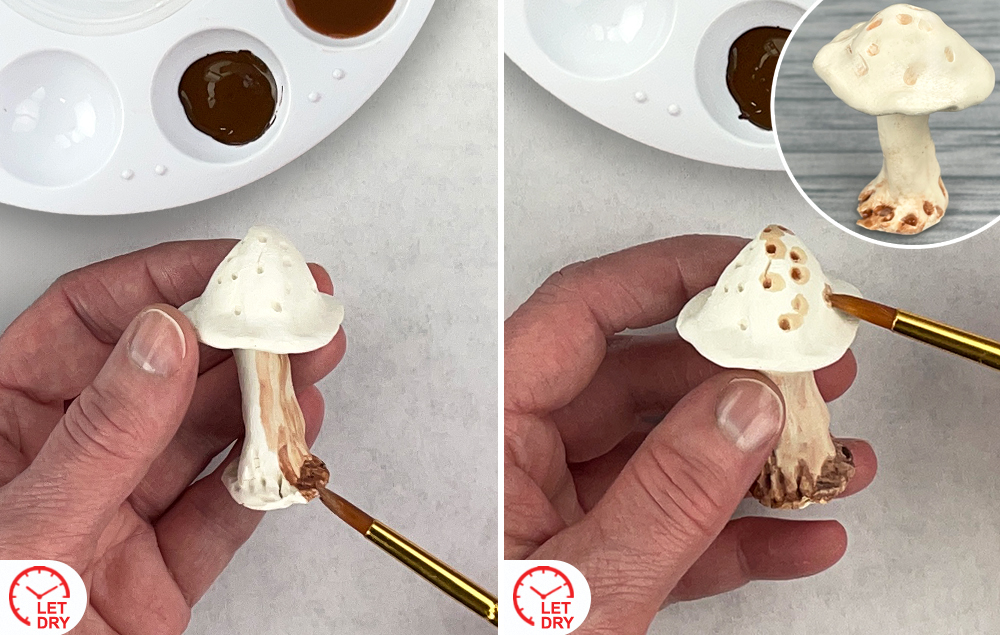
STEP 6:
A) Brush a light coat of brown paint mixed with water over the mushroom stem. Paint the bottom edge a darker brown. Let dry.
B) Add brown paint mixed with water to the pock marks in the mushroom cap. Brush a light coat of water over the rest of the mushroom cap. Let dry.
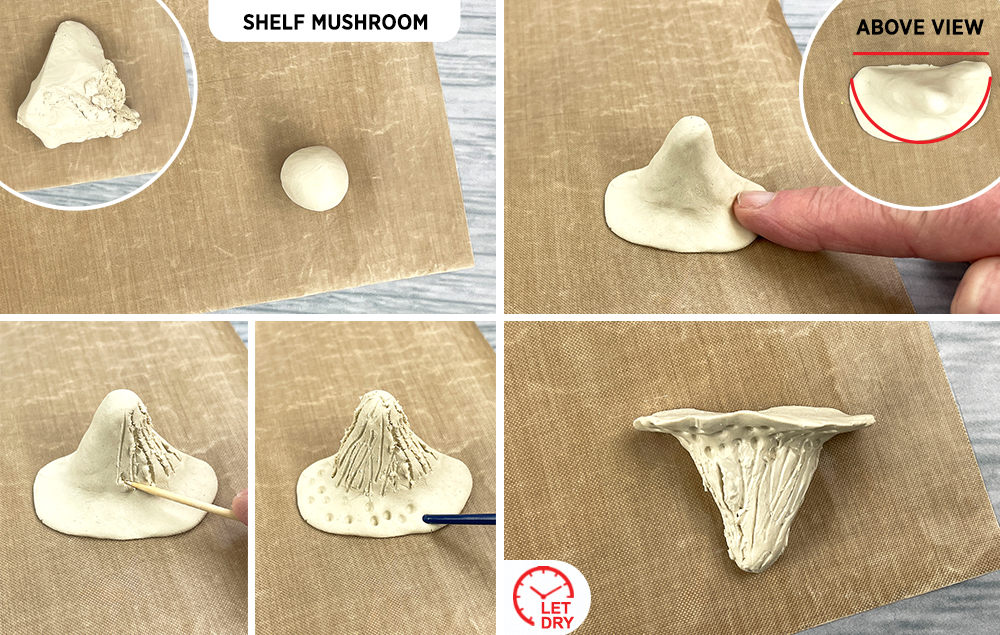
STEP 7:
A) Roll a ball shape from the air-dry clay.
B) Mold the ball shape into an inverted cone and press the wide end to flatten it. The back side of the cone should be flat.
C) Use a toothpick to carve lines in the cone part of the mushroom. Use the end of a paintbrush to make pockmarks on the underside of the mushroom shelf.
D) Let the clay mushroom dry thoroughly. Note: Make as many assorted-sized shelf mushrooms as you’d like.
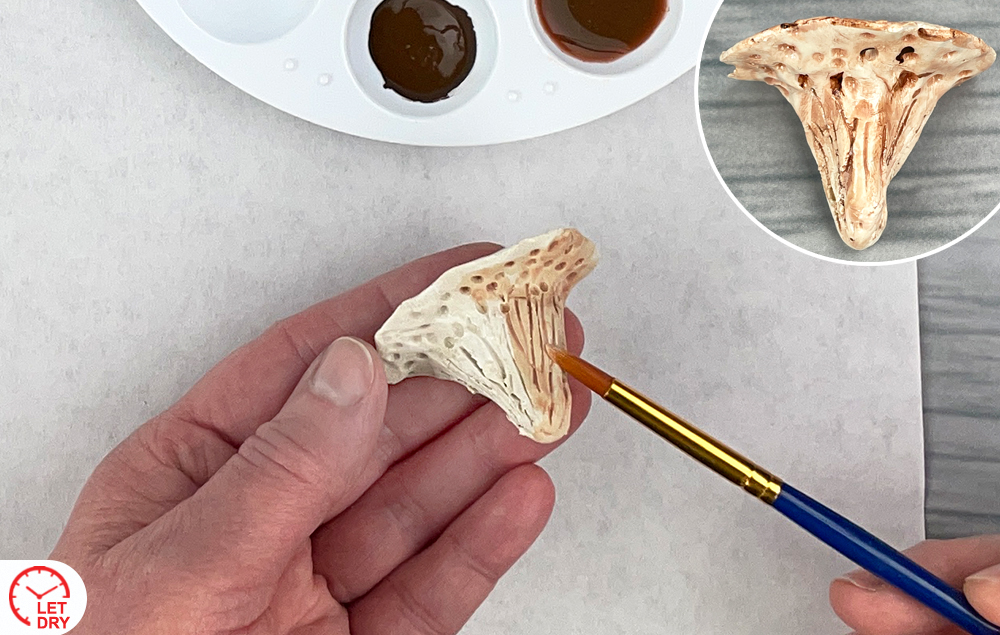
STEP 8:
A) Brush a light coat of brown paint mixed with water over the mushroom. Let dry.
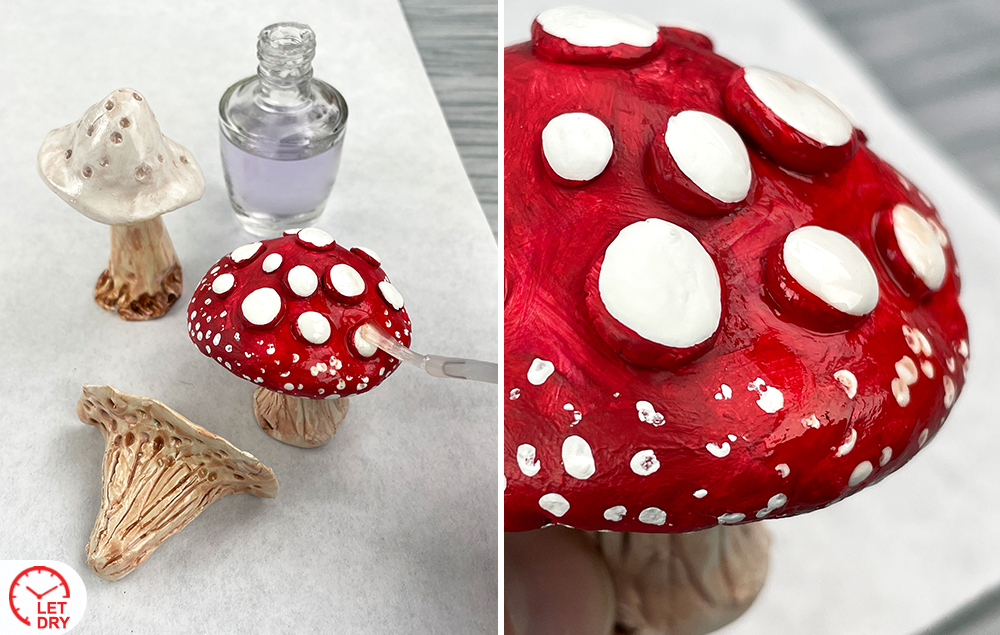
STEP 9:
A) Brush clear nail polish over all the mushrooms. Allow to dry. This will create a glazed look on the mushrooms.
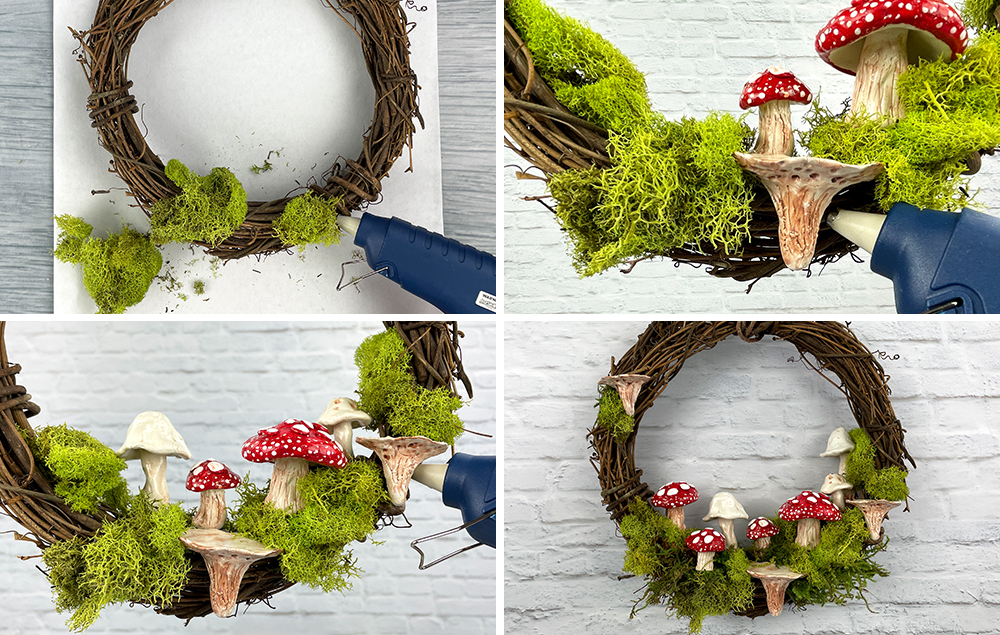
STEP 10:
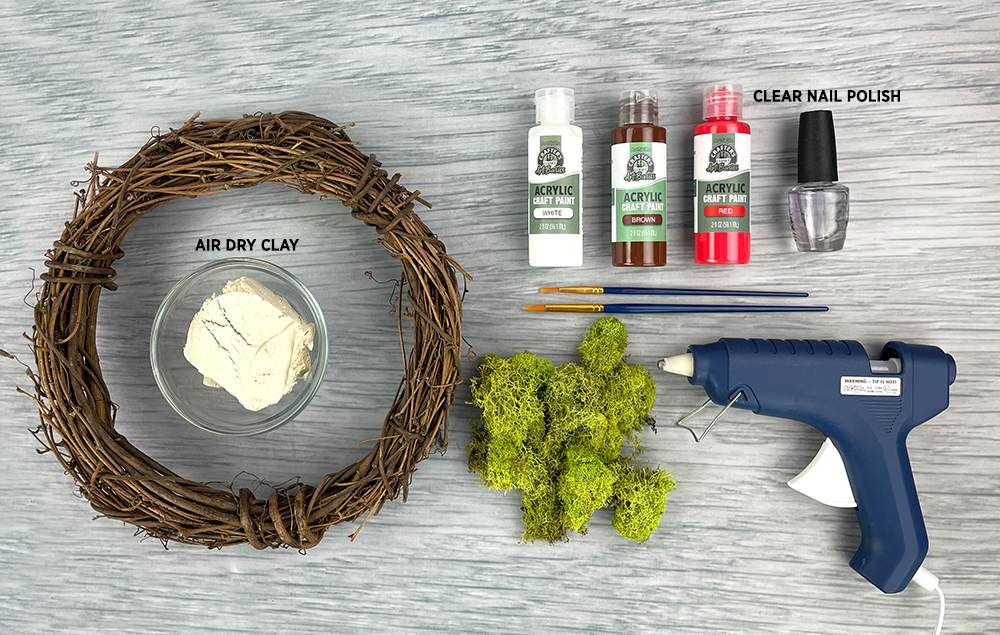
A) Hot glue moss to the grapevine wreath.
B) Hot glue the assorted mushrooms to the grapevine wreath.
C) Continue adding mushrooms and any additional moss to the grapevine wreath.
Transform your leftover Easter egg cartons into enchanting flower fairy lights with this whimsical craft. Painted with watercolors and sprinkled with a touch of glitter, these fairy lights will add a magical glow to any room while repurposing holiday scraps in a creative and eco-friendly way...
You can bring spring indoors with this stylish DIY topiary! Transform an inexpensive terra cotta pot into an elegant, distressed pot with a simple painting technique. Add a touch of spring green with moss. This topiary is fun to make and is a great addition to your home decor...
Create a trendy boho floral wreath for your home! Dried summer flowers bring the outside in. The small size is adorable, but you can use the technique to make a larger statement wreath as well...