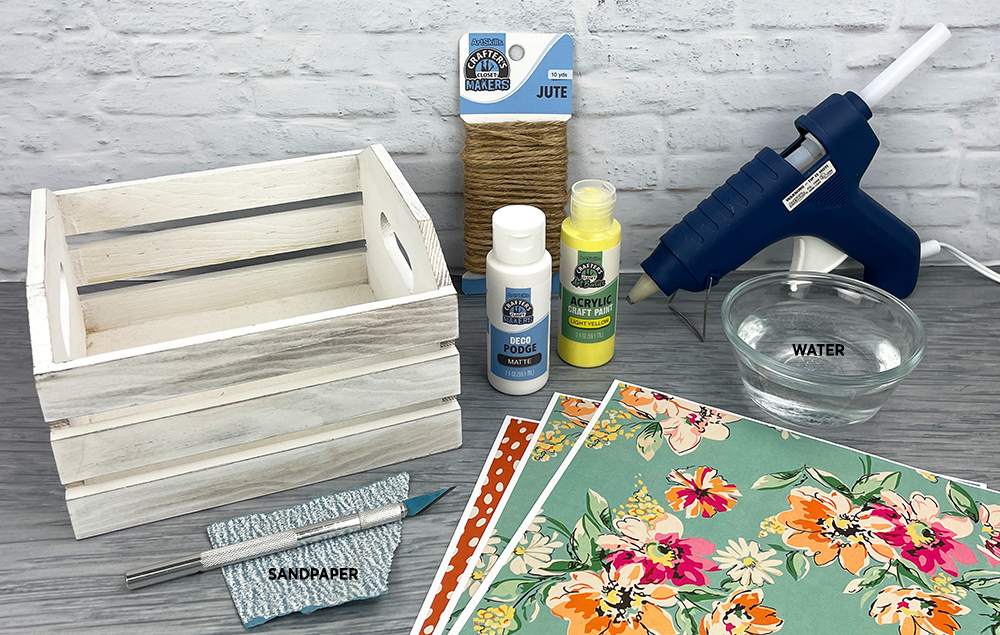
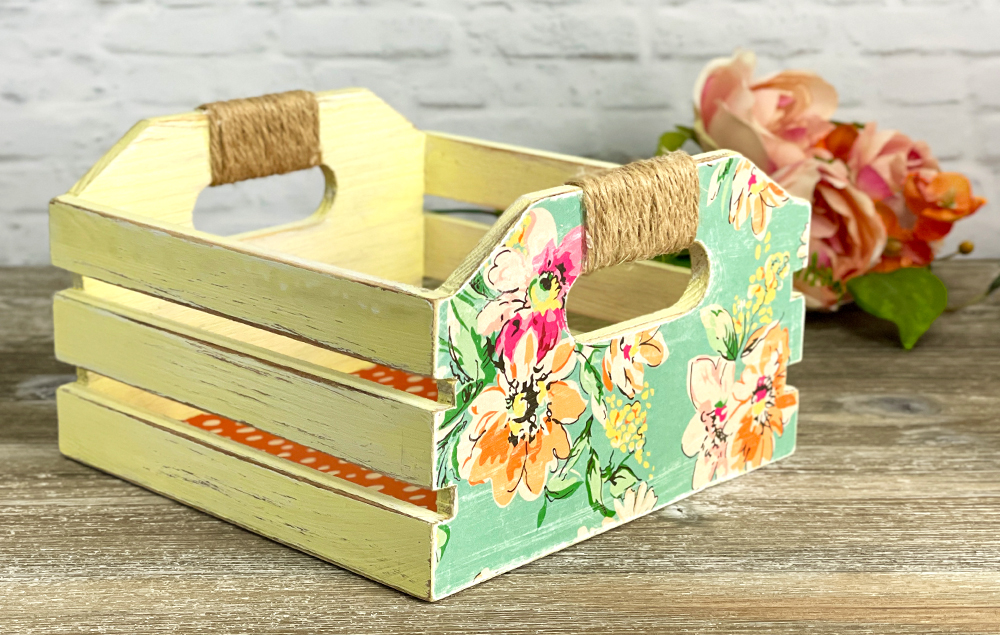
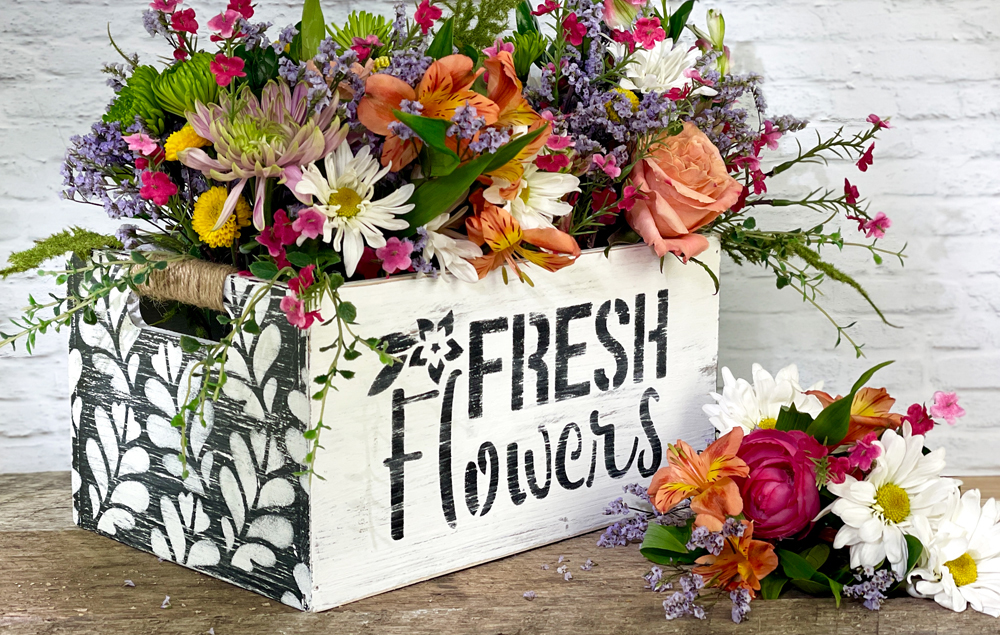
Transform a simple wood crate into a masterpiece! A delicate wash of paint, charming floral decoupage, and sandpaper-distressed finish combine to create a vintage-inspired aesthetic.
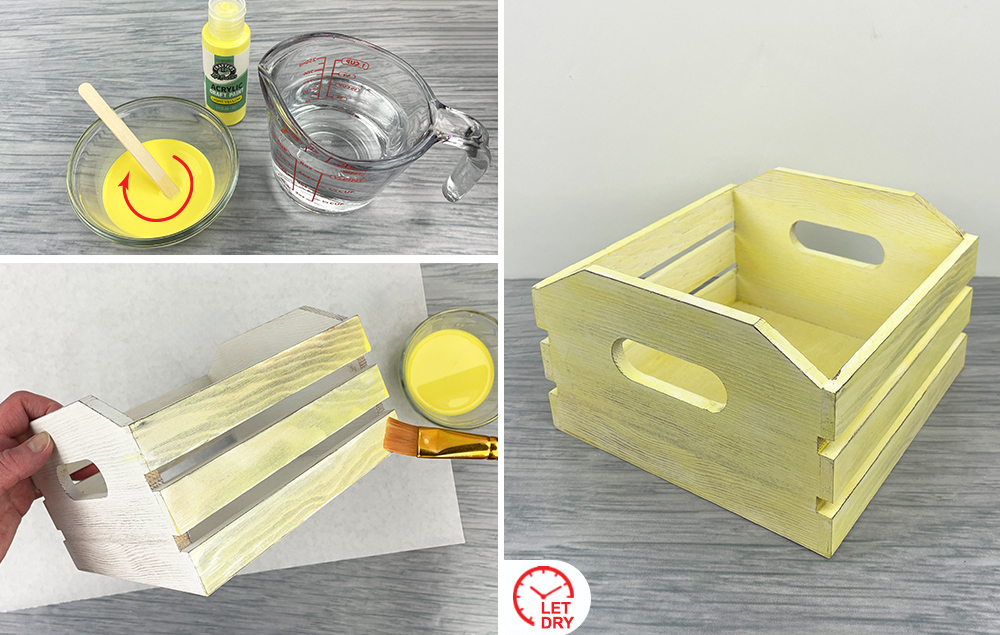
A) Mix about one tablespoon of light yellow paint with about one half cup of water to make a paint wash.
B) Brush the paint wash over the wood crate.
C) Let the wood crate dry.
STEP 2:
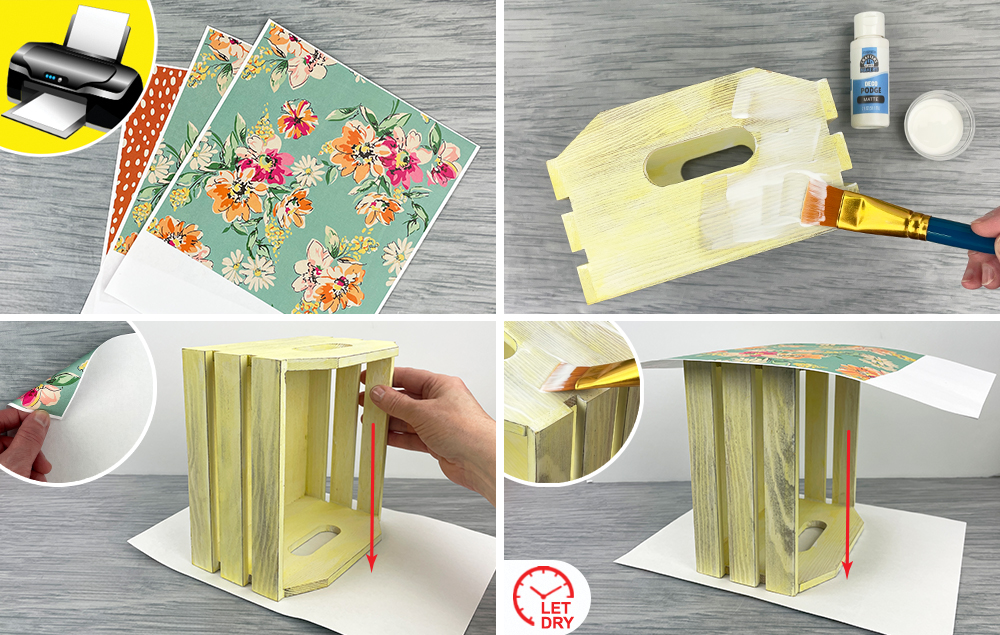
A) Print out the templates. You will need two sheets of floral patterned paper and one sheet of dotted patterned paper.
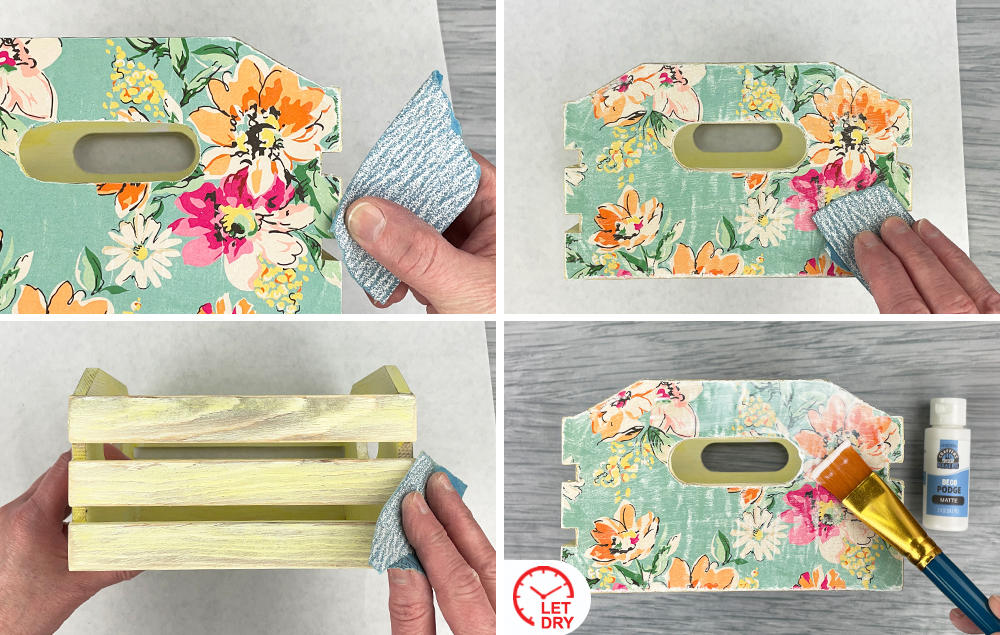
B) Brush deco podge on one side of the wood crate.
C) Set one of the floral patterned papers on the work surface with the patterned side facing down. Set the wet deco podged side of the wood crate onto the back of the floral patterned paper and press to make sure the paper adheres to the wood crate.
D) Repeat Step 2C on the other side of the wood crate. Let both sides dry.
STEP 3:
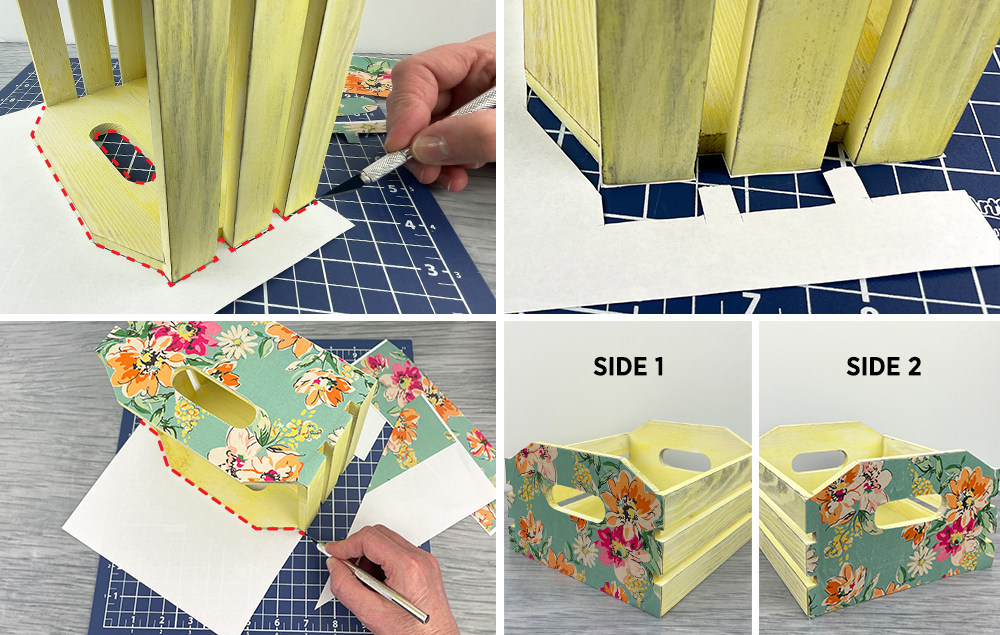
A) Use a project knife to trim the excess paper on one side of the wood crate.
B) Make sure to trim all the nooks and crannies.
C) Flip the wood crate over and trim the excess paper on the other side, as well.
D) The excess paper on both sides of the wood crate should now be trimmed off.
STEP 4:
A) Use sandpaper to distress all the edges of the patterned paper on both sides of the wood crate.
B) Use sandpaper to distress the rest of the patterned paper on both sides of the wood crate.
C) Use sandpaper to distress the paint wash on the wood crate.
D) Apply a coat of deco podge to both sides of the wood crate to seal the patterned paper. Let dry.
STEP 5:
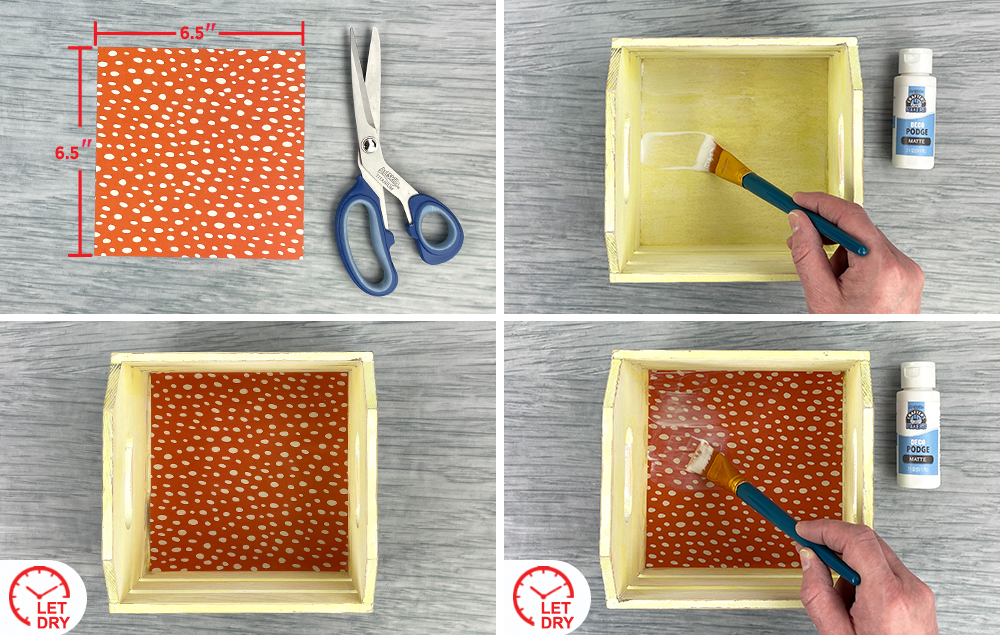
A) Cut a 6 1/2" by 6 1/2" square from the dotted patterned paper.
B) Apply a coat of deco podge to the inside bottom of the wood crate.
C) Set the dotted patterned paper onto the wet deco podge and press to make sure the paper adheres to the wood crate. Let dry.
D) Apply a coat of deco podge to the dotted patterned paper inside the wood crate to seal the paper. Let dry.
STEP 6:
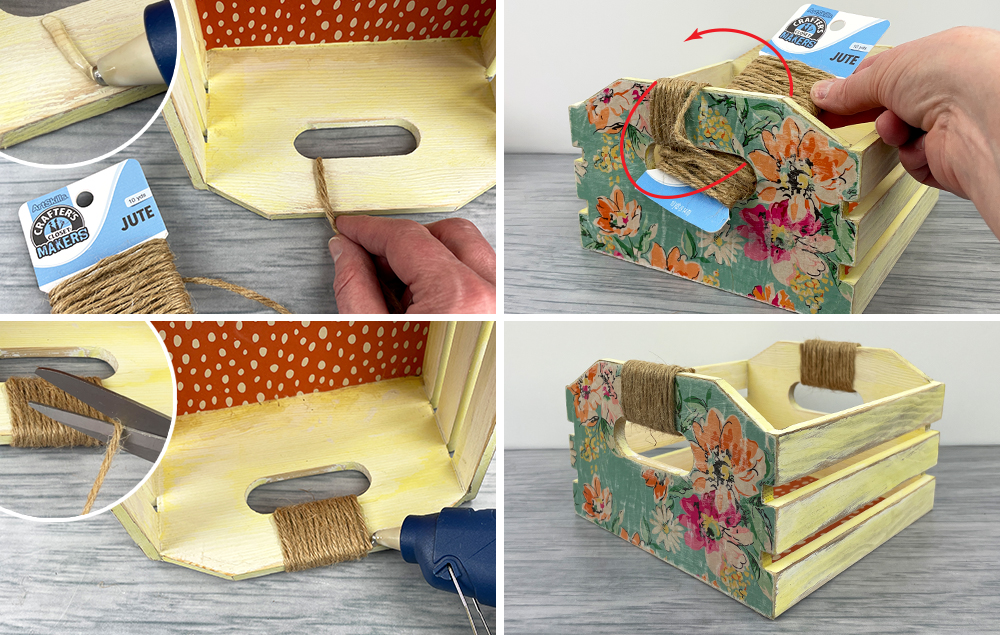
A) Hot glue the end of a piece of jute to the inside handle of the crate.
B) Wrap the jute around the handle.
C) Trim the jute and hot glue the loose end to the inside of the wood crate.
D) Repeat Steps 6A through 6C on the other handle of the wood crate.
This rustic wood crate is a charming addition to any home decor. With its cut-out handles wrapped in jute, it’s easy to move from room to room. The crate is painted with a distressed finish and stenciled with the words “fresh flowers” and a lovely pattern on each side, making it perfect for any room in your home. Fill it with a DIY flower ...
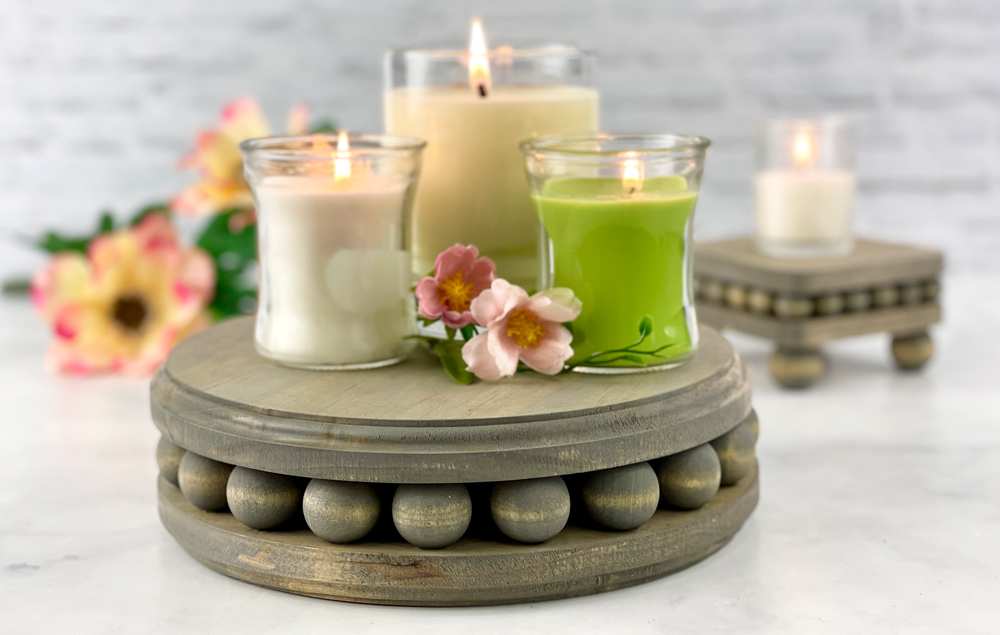
This beautiful DIY wood riser is so simple, but it makes quite an impact! The size is customizable, so you can follow this tutorial to create a wood bead riser suitable to your home decor needs...