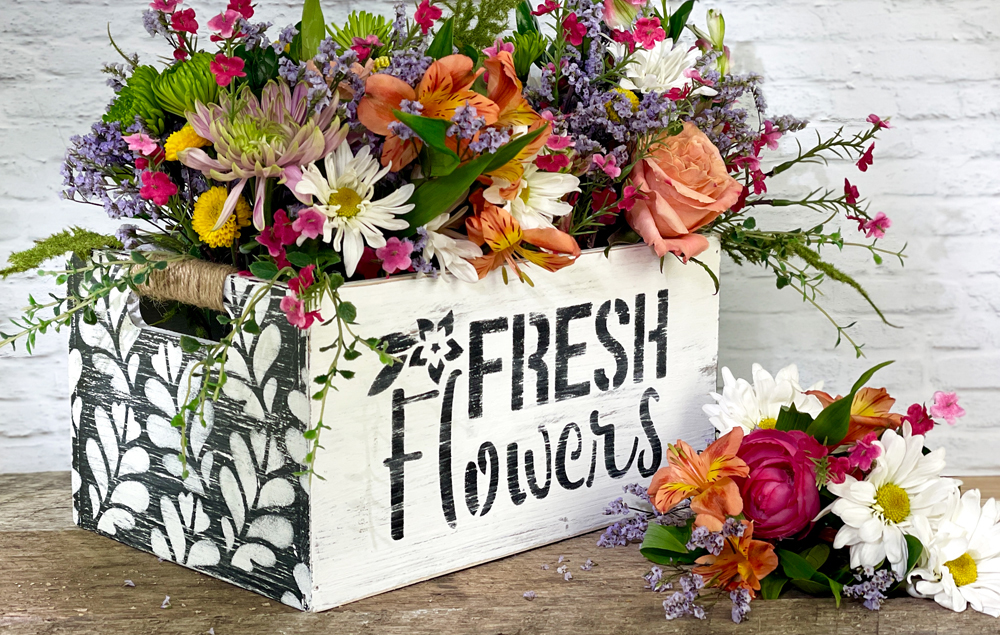
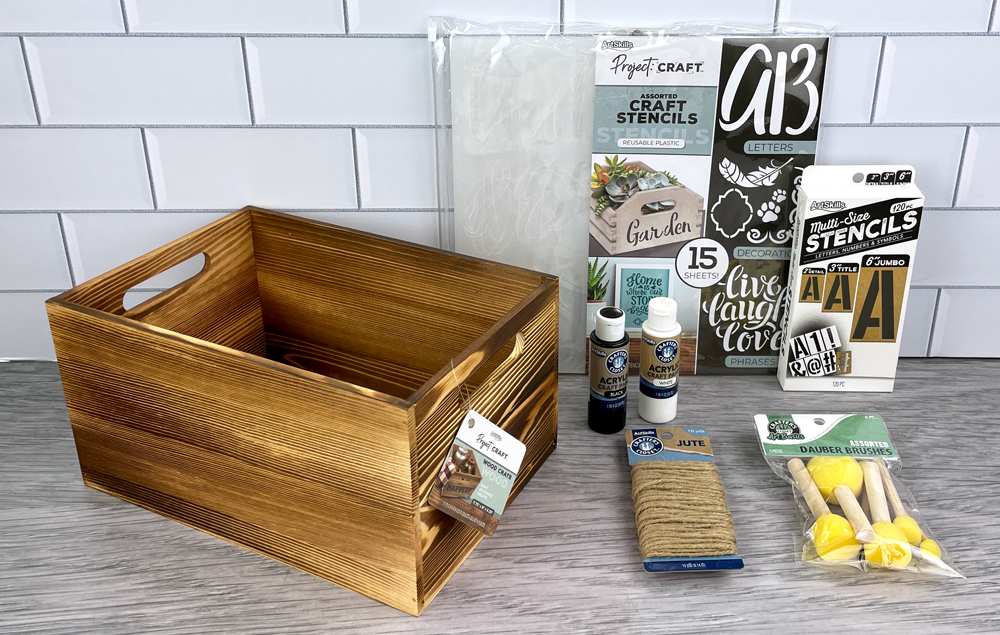
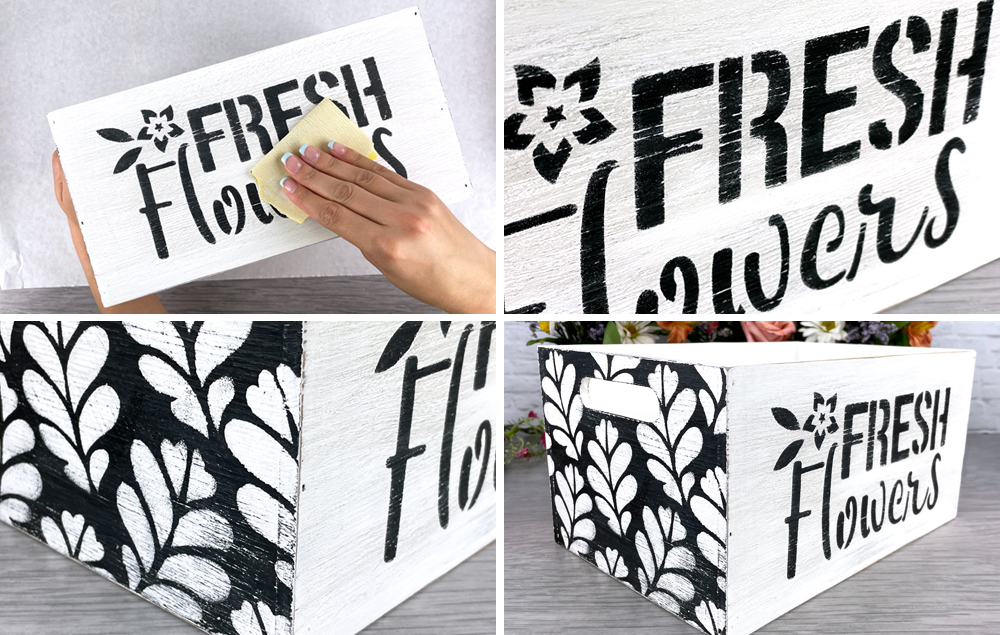
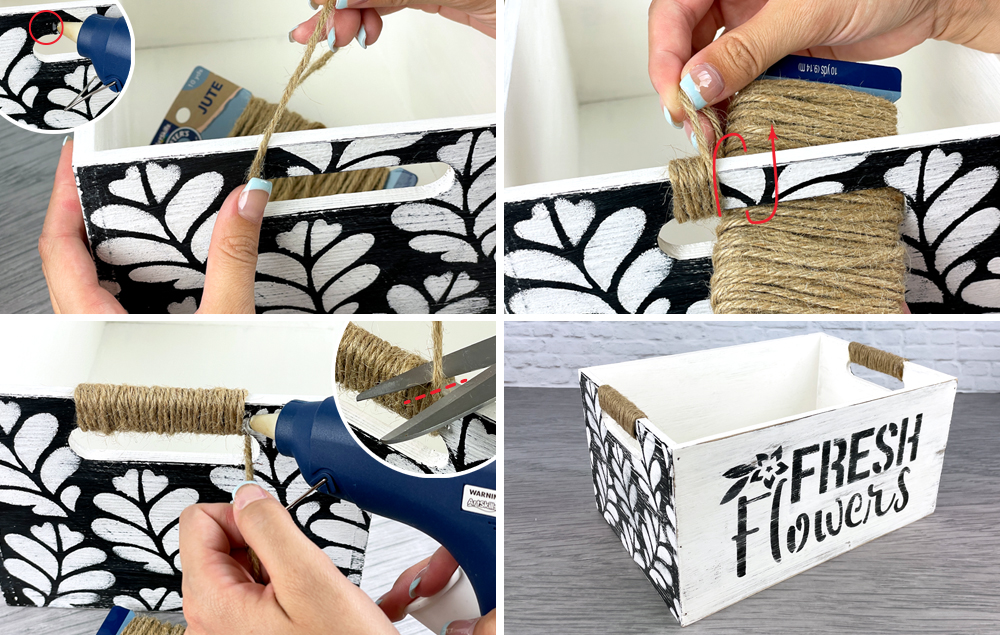
This rustic wood crate is a charming addition to any home decor. With its cut-out handles wrapped in jute, it’s easy to move from room to room. The crate is painted with a distressed finish and stenciled with the words “fresh flowers” and a lovely pattern on each side, making it perfect for any room in your home. Fill it with a DIY flower arrangement and enjoy!
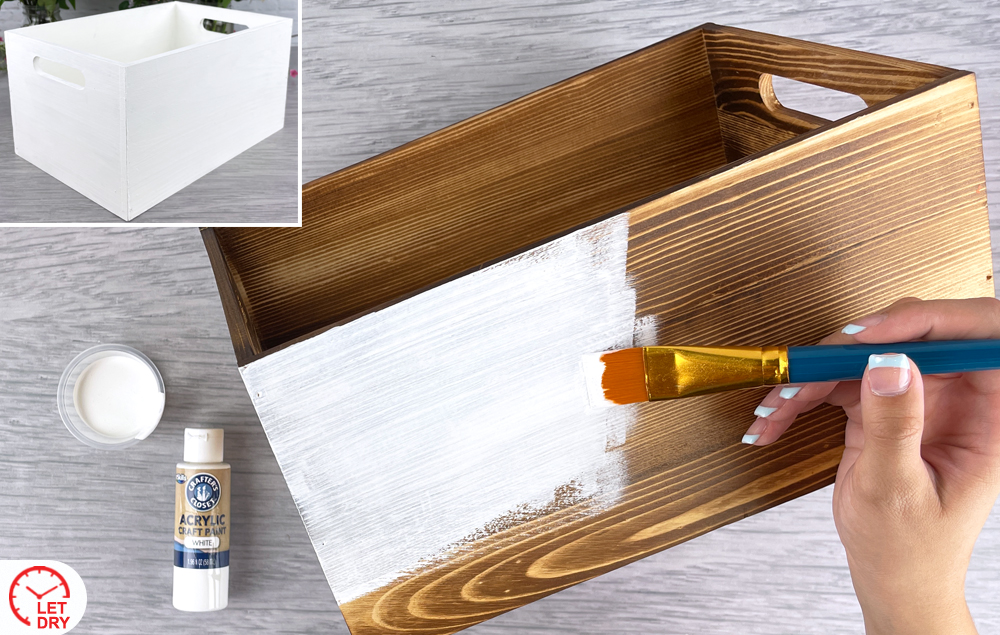
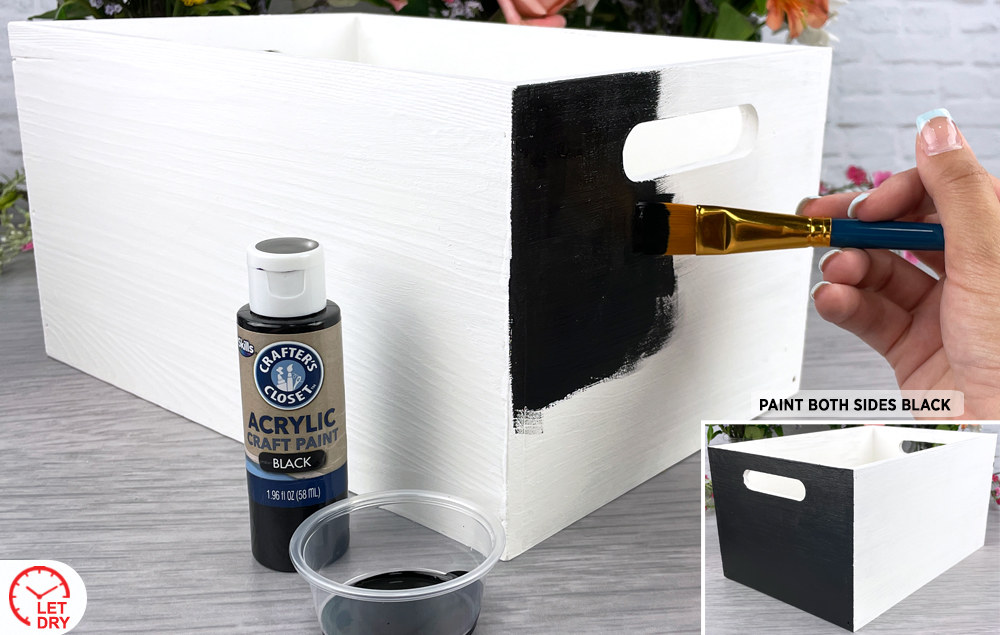
A) Paint both sides of the wood box black. Let dry.
STEP 3:
A) Draw very light pencil lines on the wood box to act as guides for placement of the stencils.
STEP 4:
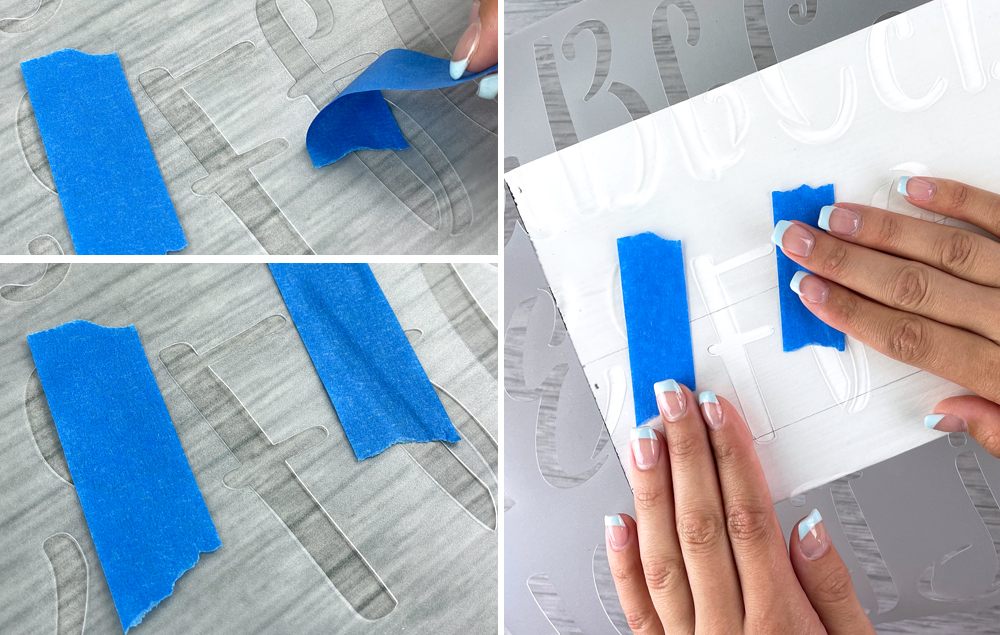
A) Use painter’s tape to cover neighboring letters on the stencil.
B) The tape will prevent paint from bleeding onto the neighboring letters.
C) Lay the stencil on the front of the box, using the pencil lines as guides for placement.
STEP 5:
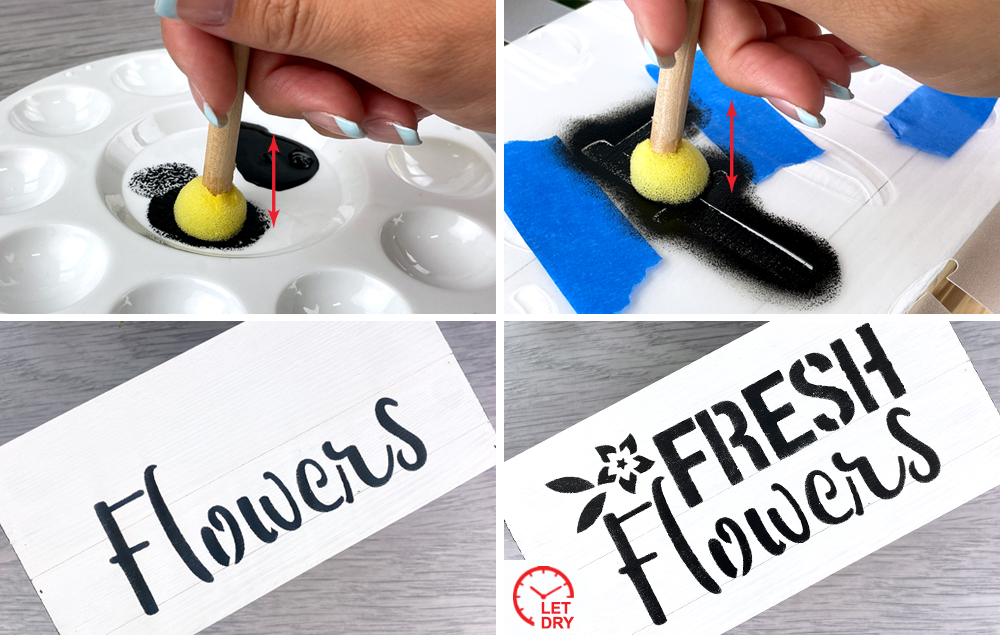
A) Tap the foam dauber into the black paint and then stamp off a bit of the excess paint on the palette.
B) Use an up and down stamping motion to apply the black paint to the stencil. Tip: Allow the paint to dry in between each stencil application so that you don’t accidentally transfer the paint.
C) Continue adding letters to your design.
D) Once your design on the front is complete, let the paint dry thoroughly.
STEP 6:
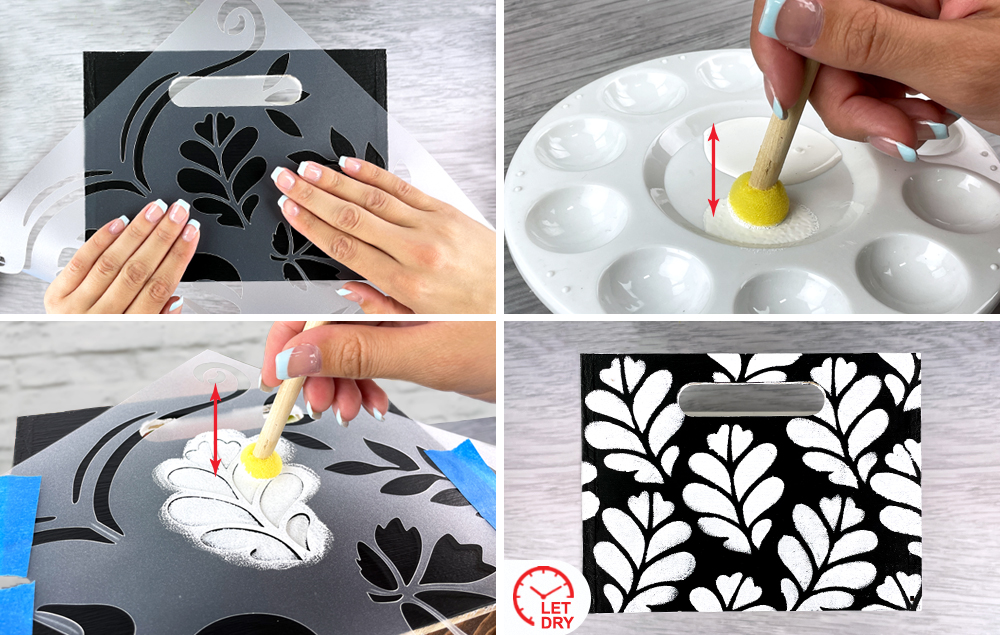
A) Place the stencil on the side of the box.
B) Tap the foam dauber into the white paint and then stamp off a bit of the excess paint on the palette.
C) Use an up and down stamping motion to apply the white paint to the stencil. Tip: Allow the paint to dry in between each stencil application so that you don’t accidentally transfer the paint.
D) Create your pattern on both sides of the box and let the paint dry completely.
STEP 7:
A) Use sandpaper to distress the design on the front and sides of the box. Tip: Use a damp cloth to wipe off any residual dust after sanding.
STEP 8:
A) Place a dab of hot glue by the handle. Attach jute to the hot glue.
B) Wrap the jute around the handle.
C) Hot glue the jute in place at the other side of the handle and trim off the excess.
D) Repeat on the other side so that both handles are wrapped with jute.
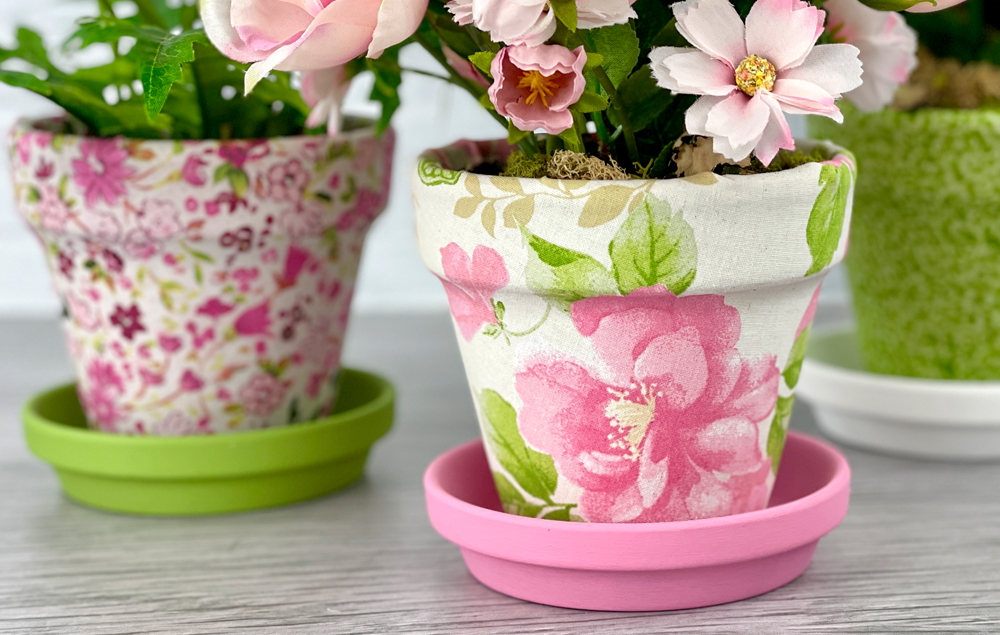
A fun and inexpensive way to add a pop of spring color to your decor is to wrap terra cotta pots with fabric! This DIY craft also makes a great gift idea. Just pop in a pretty potted plant and enjoy...
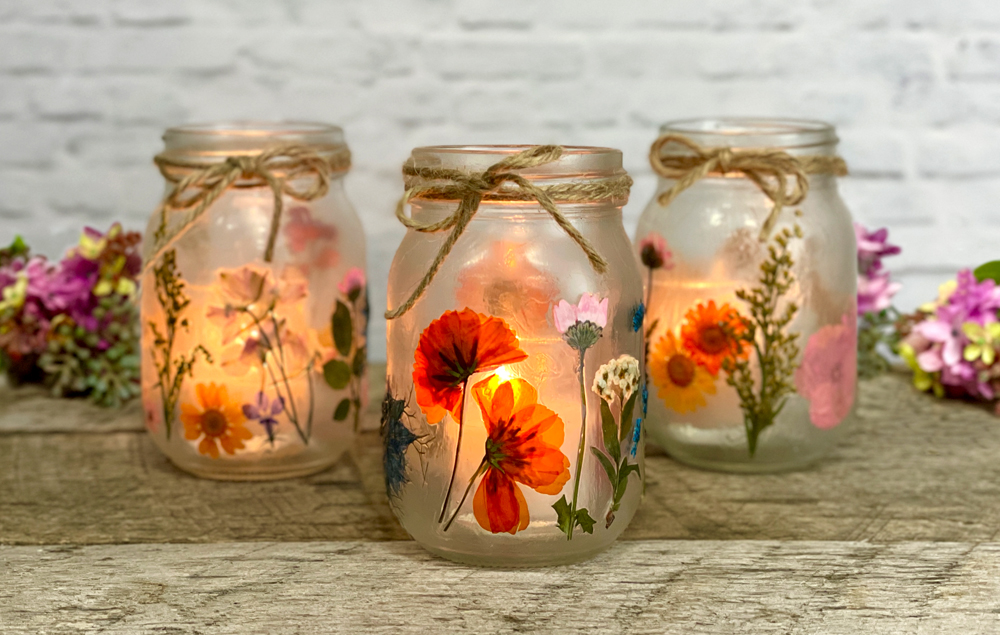
Making this pressed flower lantern is so simple, and the results are so beautiful! The flowers add a pop of color while the tea light provides a soft glow. This craft is great for a spring wedding or other special occasion...