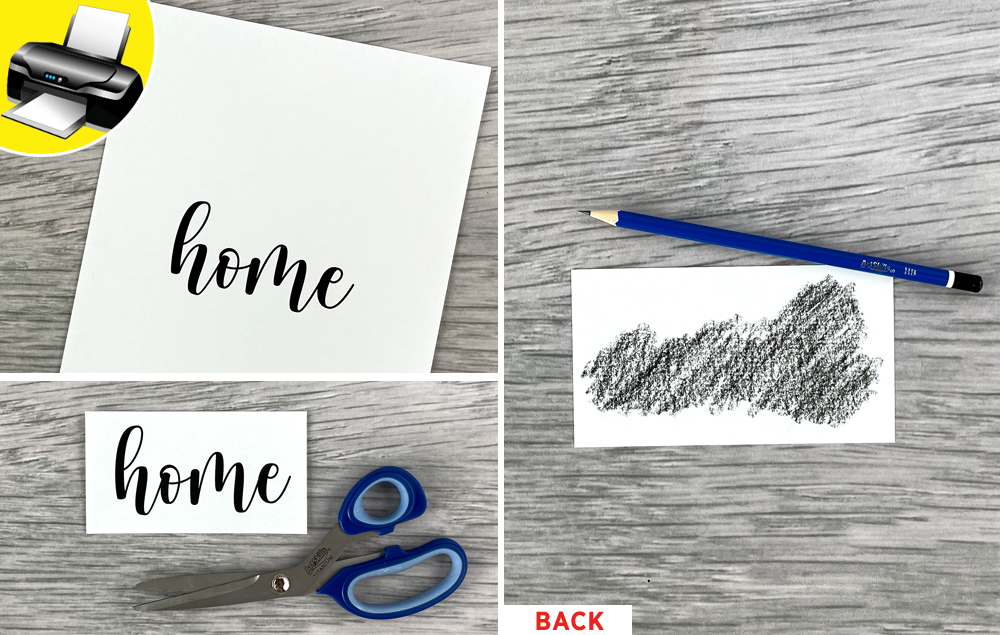
B) Cut closer to the word “home” to remove the excess paper.
C) On the back of the paper, rub graphite from a pencil where the word “home” is. This will help create a transfer.
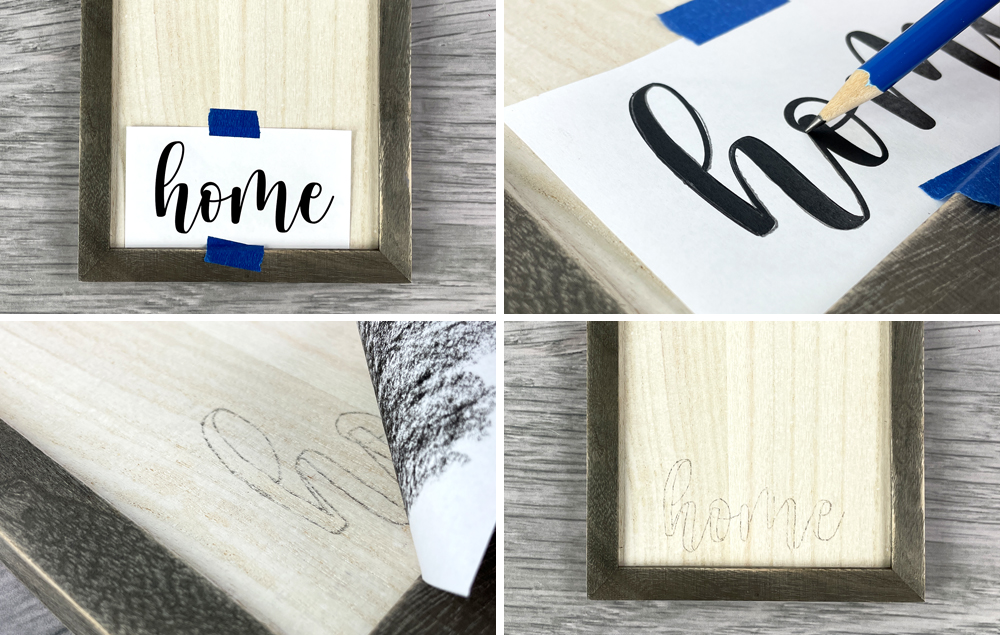
STEP 2:
A) Center the template on the bottom of the wood framed sign and tape it in place.
B) Use a pencil to trace around the edges of the word “home,” which will transfer the graphite to the wood underneath.
C) Remove the template.
D) The transfer is complete.
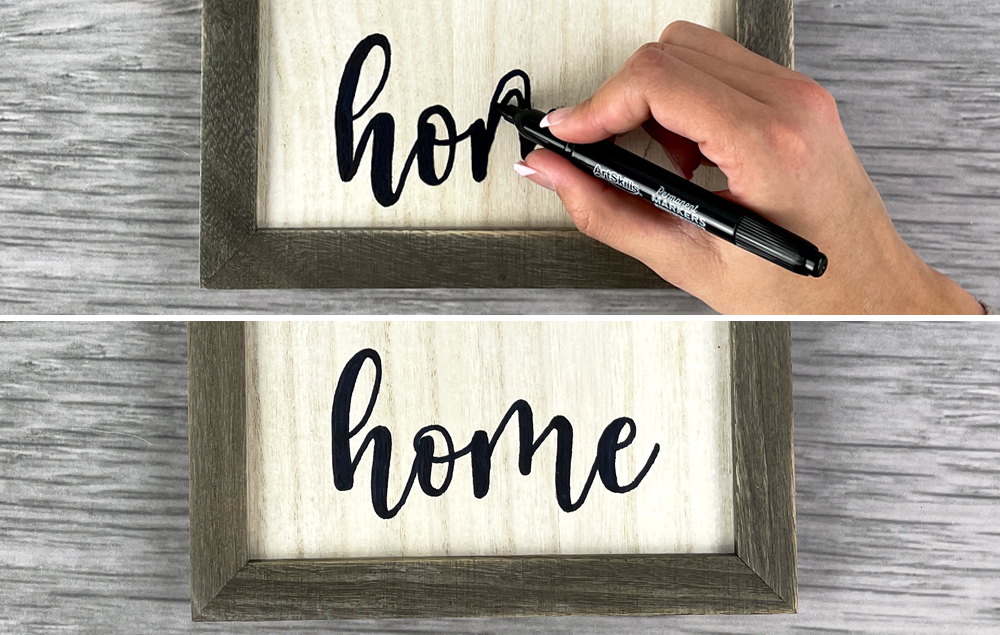
STEP 3:
A) Use a marker to trace the word “home.”
STEP 4:
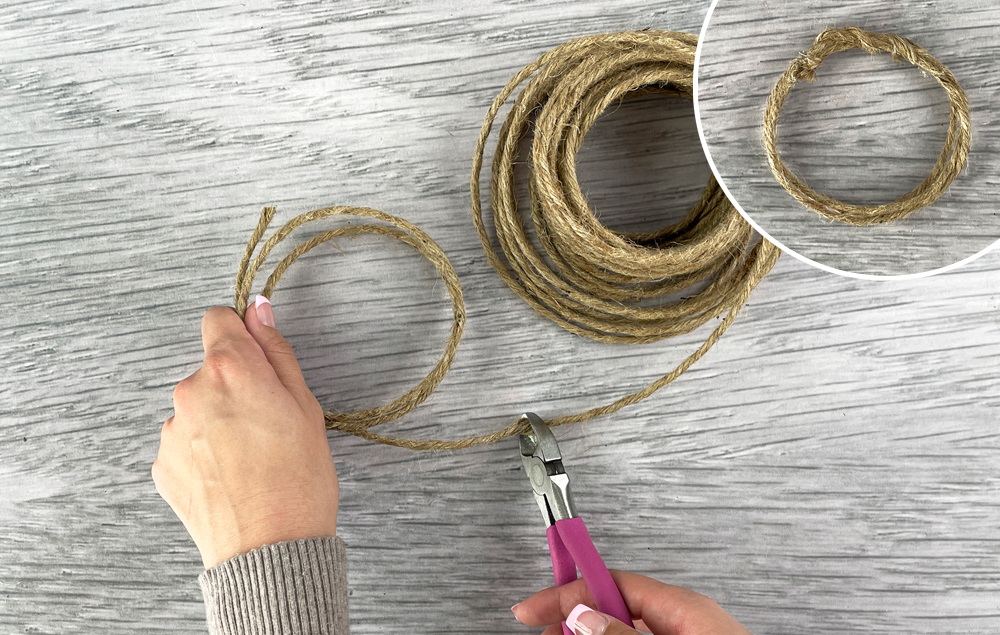
A) Unwind the coiled wire to create a small circle, which will serve as the wreath frame. Loop it around two to three times and twist the ends together to secure it.
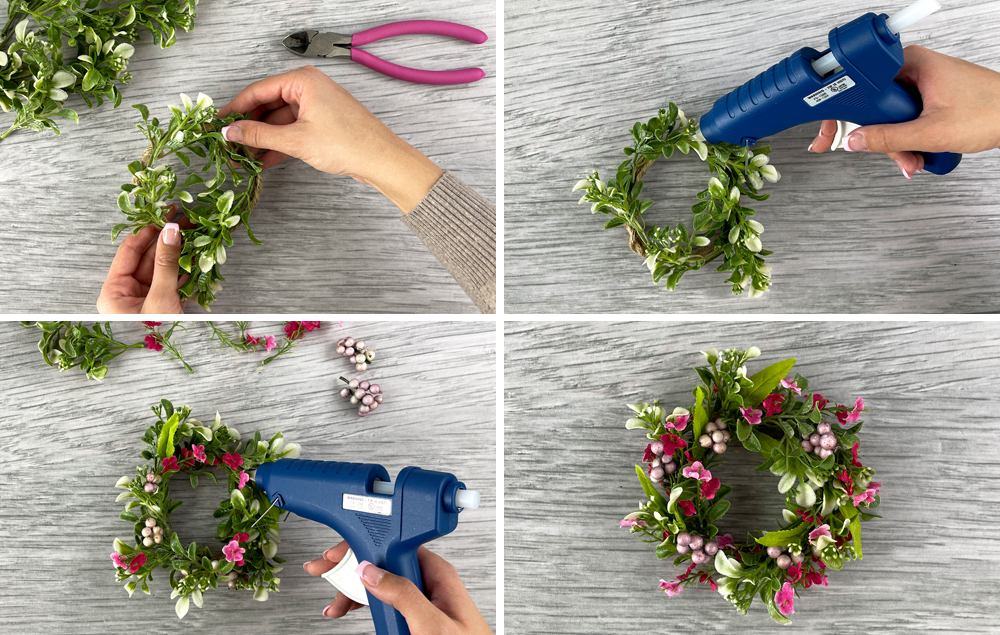
STEP 5:
A) Bend a branch of artificial greenery to the shape of the wreath.
B) Hot glue the greenery to the wreath frame to secure it in place.
C) Add in assorted artificial flowers and hot glue them in place.
D) Continue gluing flowers to the wreath until you are happy with the arrangement.
STEP 6:
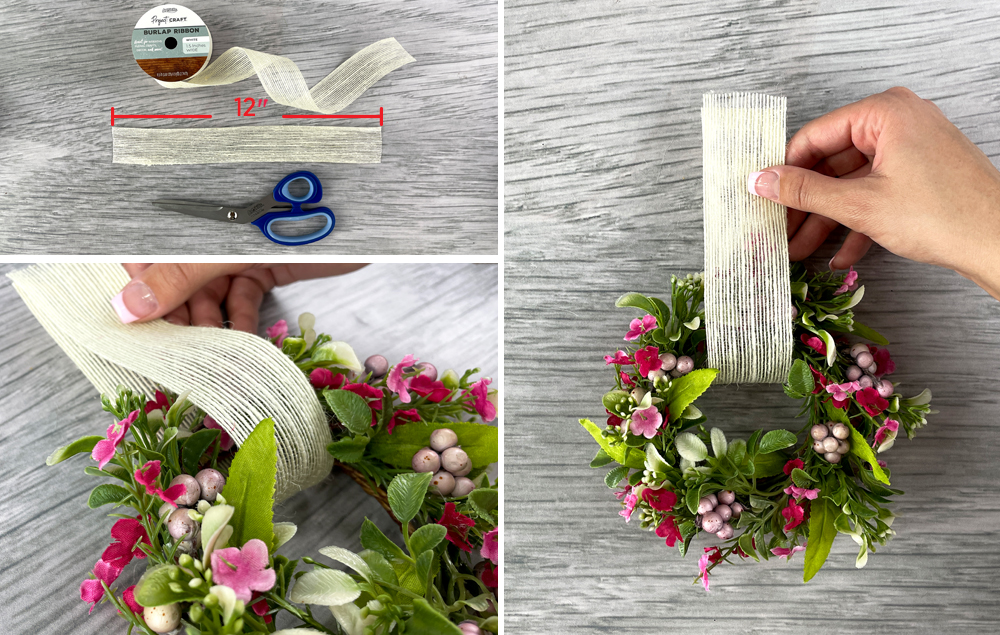
A) Cut a 12” length of burlap ribbon.
B) Loop it through the wreath.
C) Make sure the ends are even above the wreath.
STEP 7:
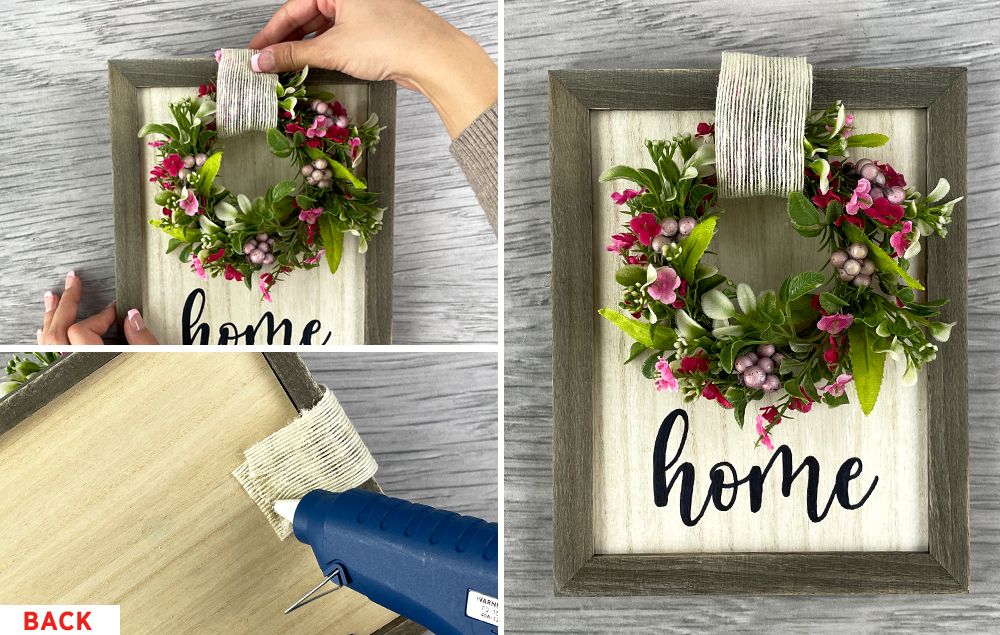
A) Place the wreath against the top of the wood framed sign and fold the burlap ribbon over the back of the frame.
B) Hot glue the burlap ribbon to the back of the frame to secure it in place.
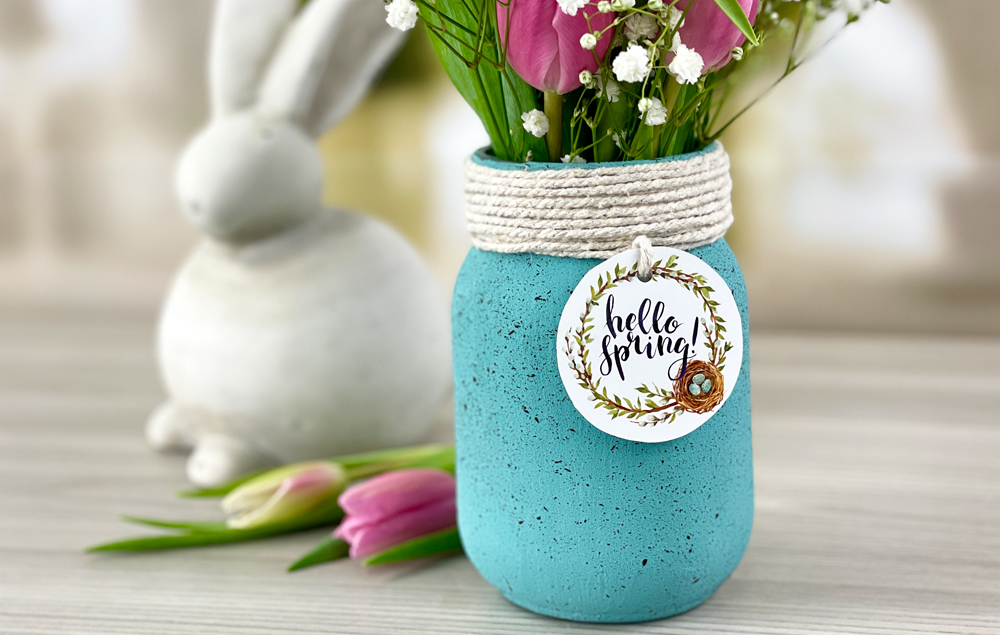
Create a pretty robin egg blue mason jar to display your favorite flowers and bring farmhouse charm to your spring decor! Add fun speckles using a toothbrush and paint...
Create your own framed floral wall art with this easy reverse canvas technique! The 3D paper flowers make this a perfect piece for spring decor in any room of your home...