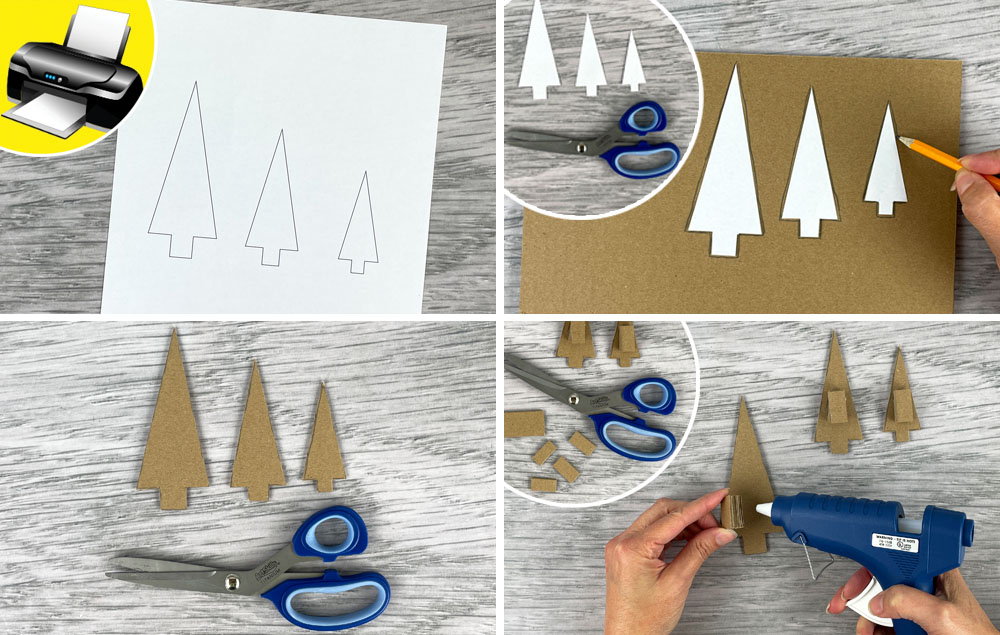
B) Cut out the tree shapes and trace onto cardboard.
C) Cut out the cardboard tree shapes.
D) Cut several small pieces of cardboard and glue them together to create a handle for each cardboard tree stamp.
STEP 2:
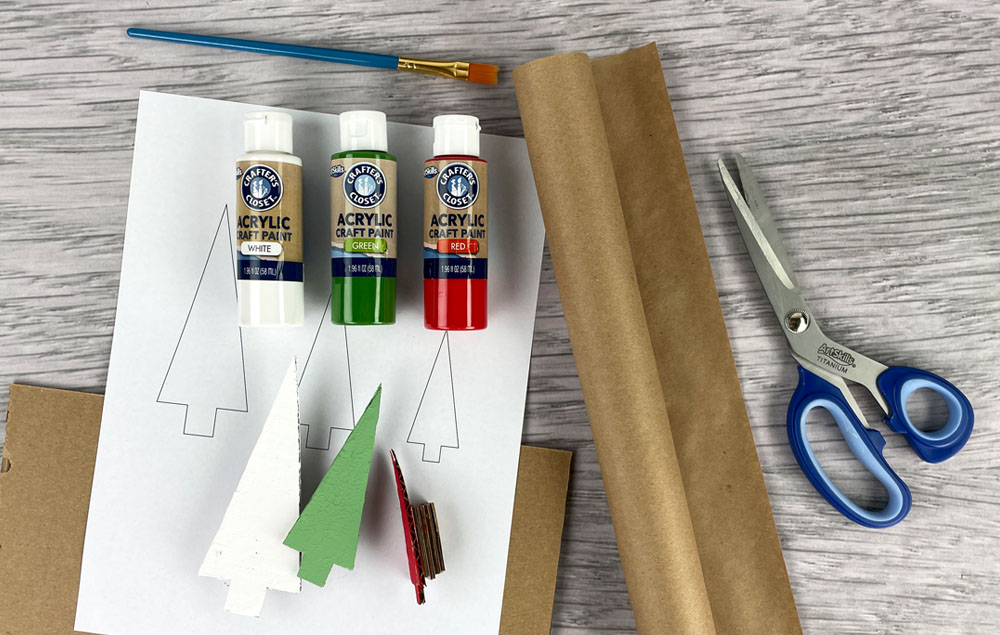
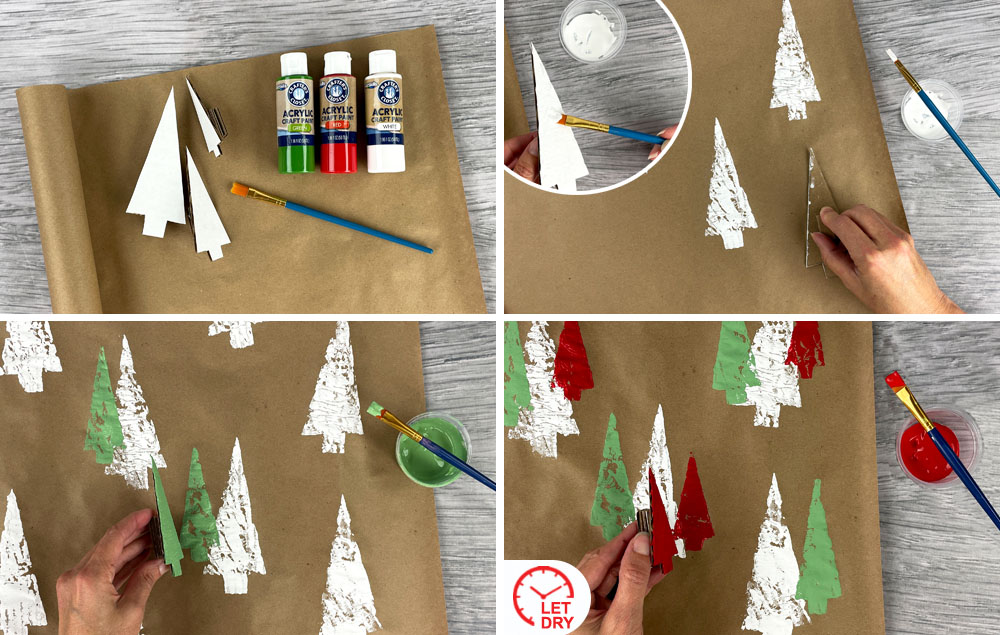
A) Get all of your supplies ready to begin stamping. You will need the roll of kraft paper, your paint colors, a paint brush and the cardboard stamps.
B) Brush your first paint color onto the large stamp and press it onto the roll of kraft paper. Stamp as many trees as you’d like to begin your pattern.
C) Brush your second paint color onto the medium stamp and press it onto the roll of kraft paper. Stamp as many trees as you’d like to continue your pattern.
D) Brush your third paint color onto the small stamp and press it onto the roll of kraft paper. Stamp as many trees as you’d like to finish your pattern. Let dry.
STEP 3:
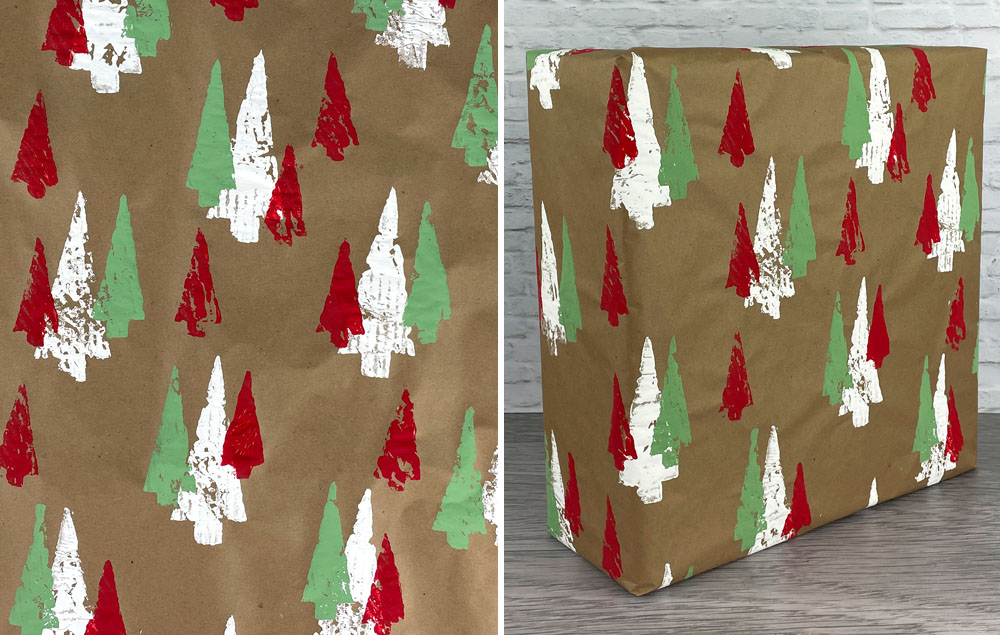
A) You now have hand-stamped wrapping paper!
B) Use it to create beautiful packages for gift giving.
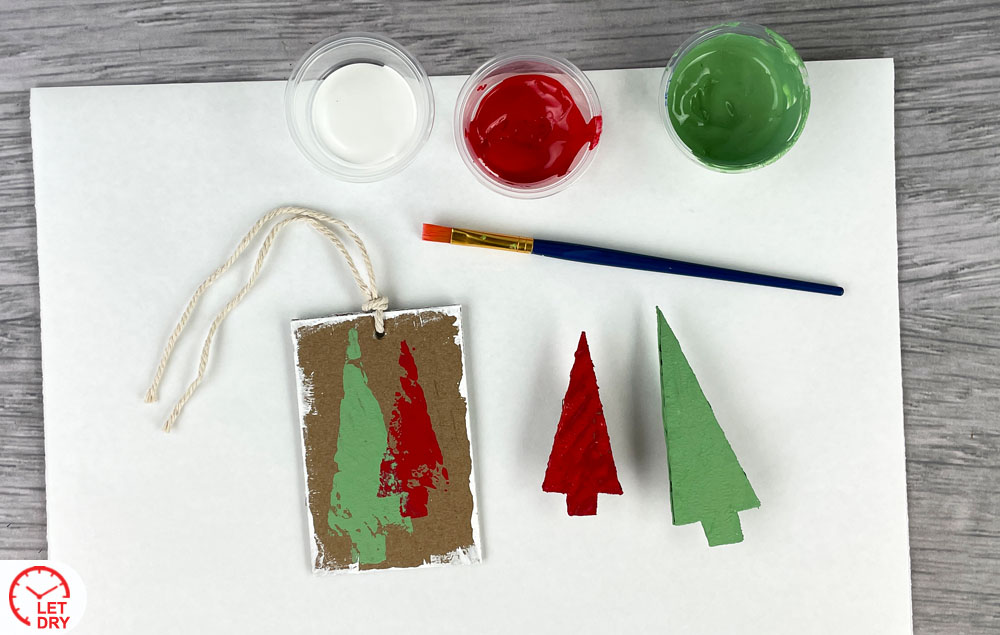
STEP 4:
A) Use a scrap of cardboard to make a tag shape. Stamp a few trees on the tag. Brush paint around the edge. Let the paint dry. Punch a hole and add a scrap of twine.