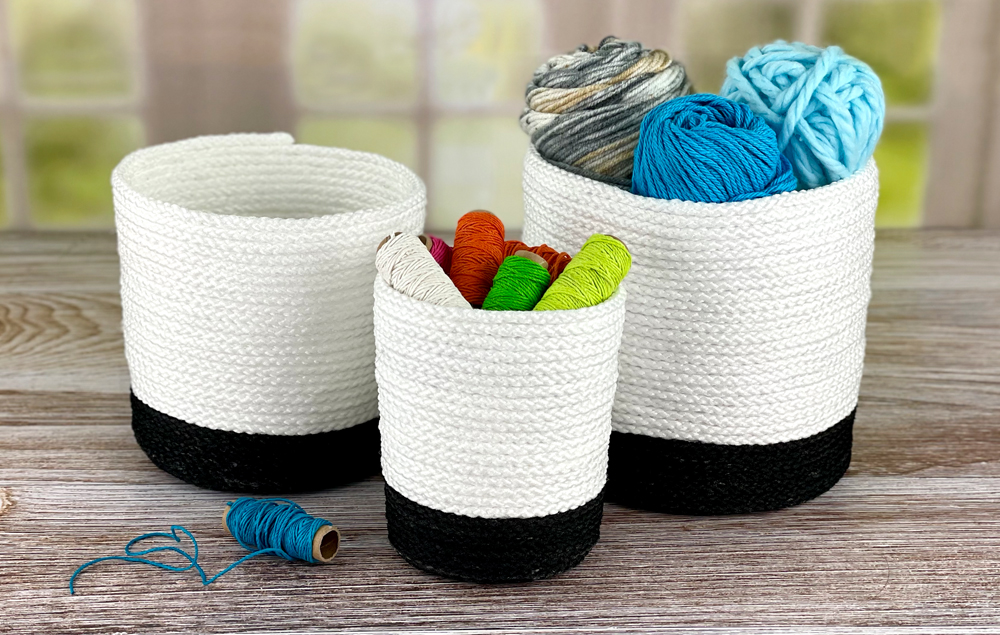
Stay organized and stylish with a few simple supplies! Natural jute and cord materials are accented with a pop of color on the fun tassel. This cute basket would look great in the kitchen, bathroom, or office!
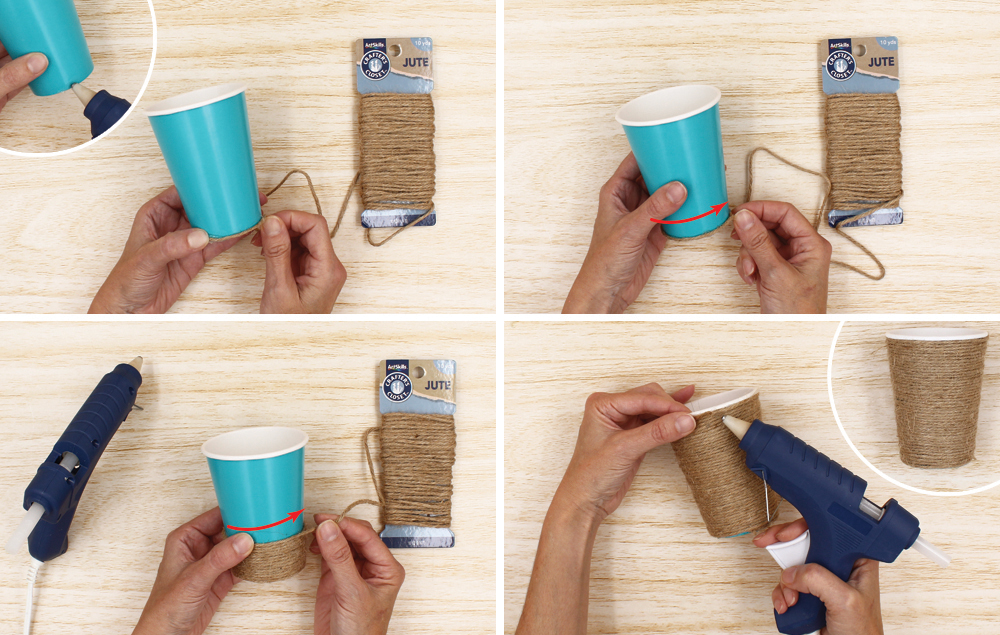
A) Add a bead of hot glue to the bottom of the cup to secure the jute.
B) Begin wrapping the jute around the cup in tight rows.
C) Continue adding hot glue to the cup every so often to adhere the jute.
D) Secure the end of the jute with hot glue.
STEP 2:
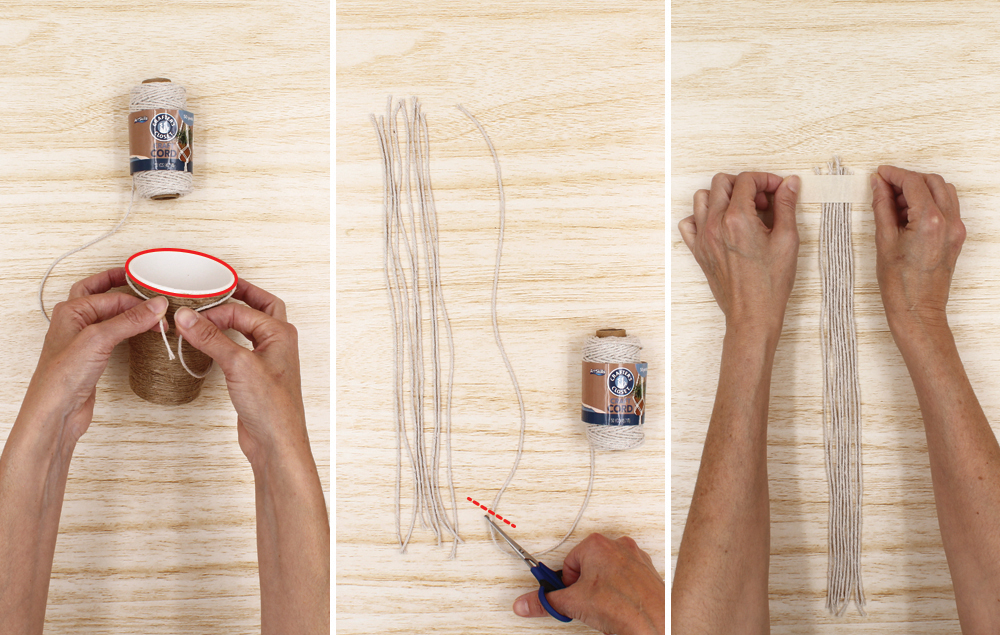
A) Measure around the top of the cup with the craft cord, adding some additional length on both ends.
B) Cut eight more equal strands of craft cord in the length needed, for a total of nine strands.
C) Tape all the strands together on a flat surface.
STEP 3:
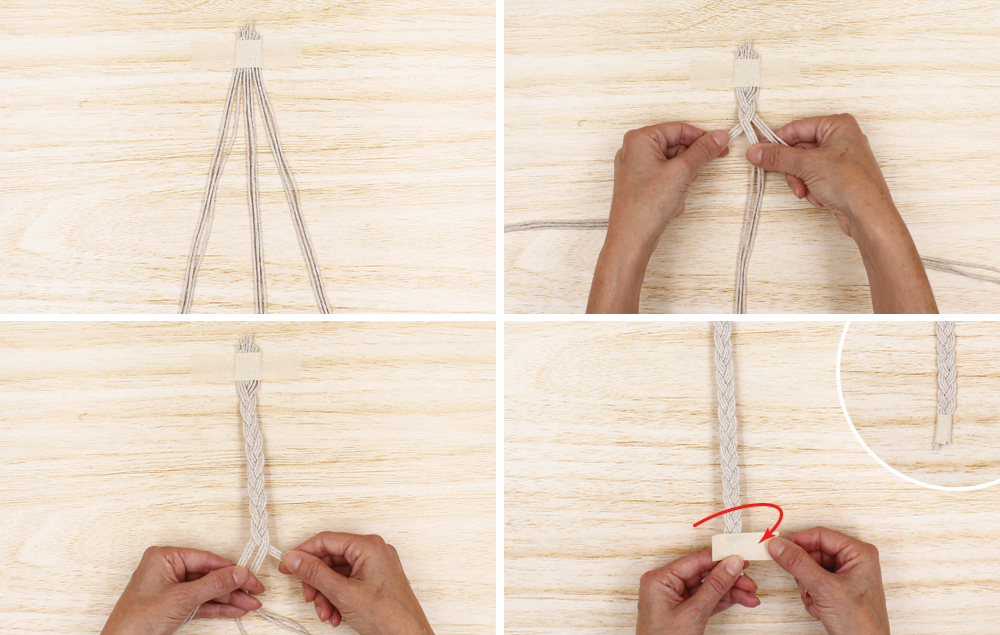
A) Separate the strands into three groups of three.
B) Begin braiding the strands.
C) Braid the strands down to the ends.
D) Wrap a piece of tape around the ends to hold them together.
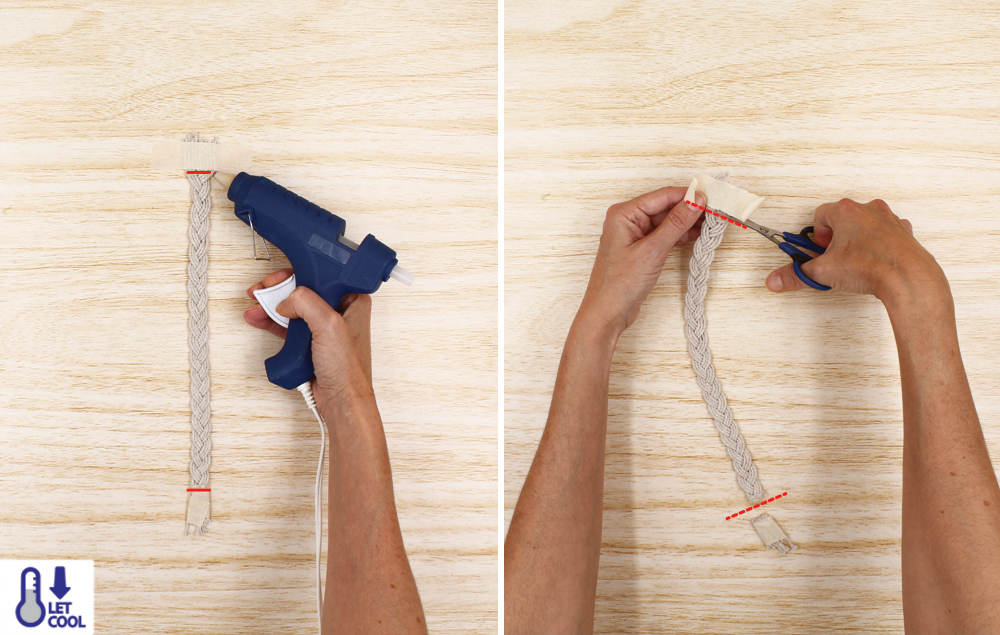
STEP 4:
A) Run a bead of hot glue along both ends of the braid, inside the tape edges. Let cool. NOTE: The hot glue keeps the braid from unraveling.
B) Trim close to the hot glue, removing the tape and raw edges of the braid.
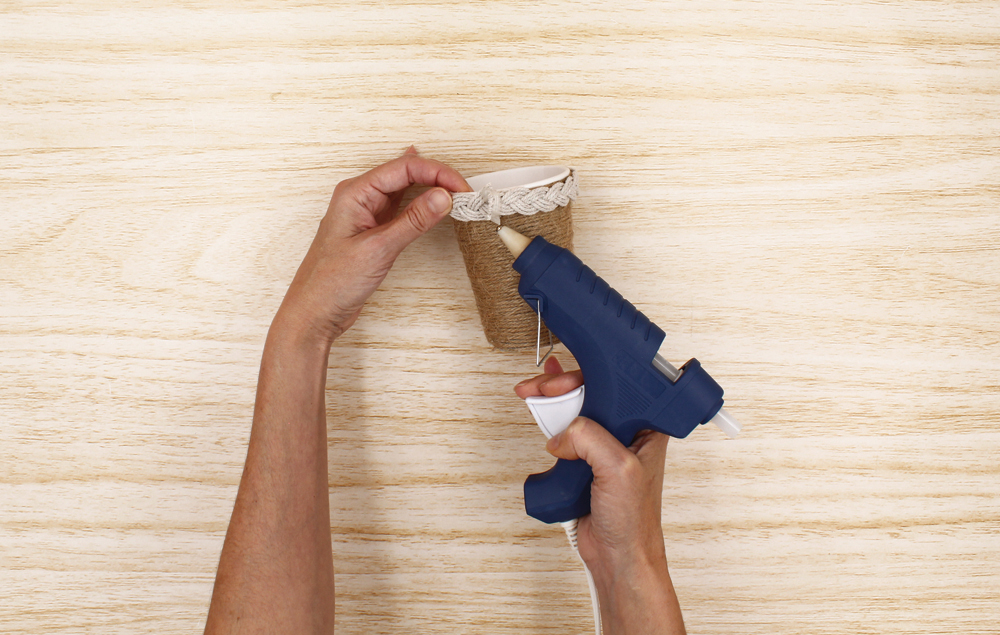
STEP 5:
A) Hot glue the braid to the top of the cup.
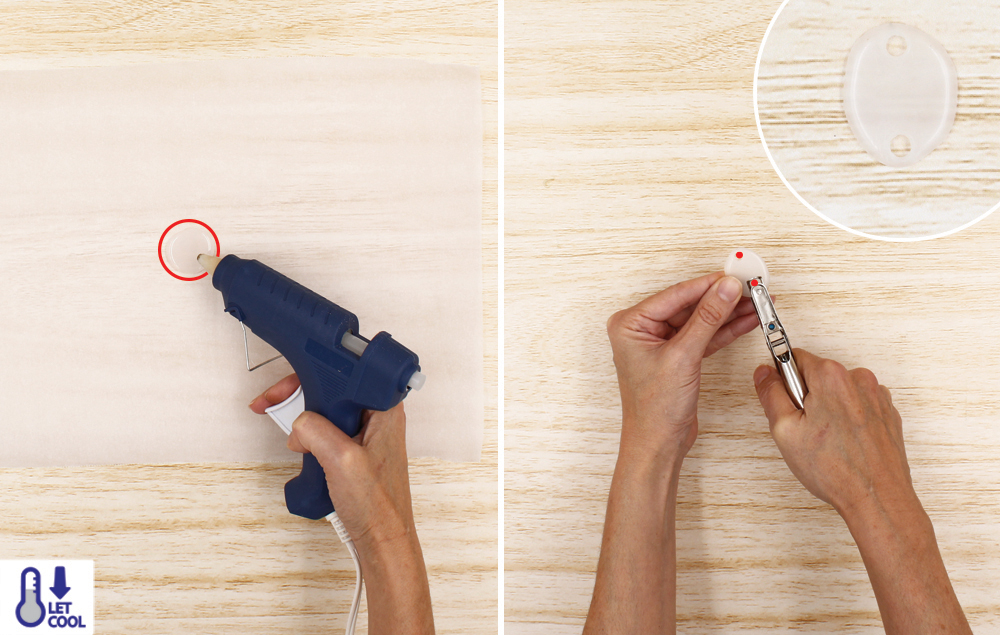
STEP 6:
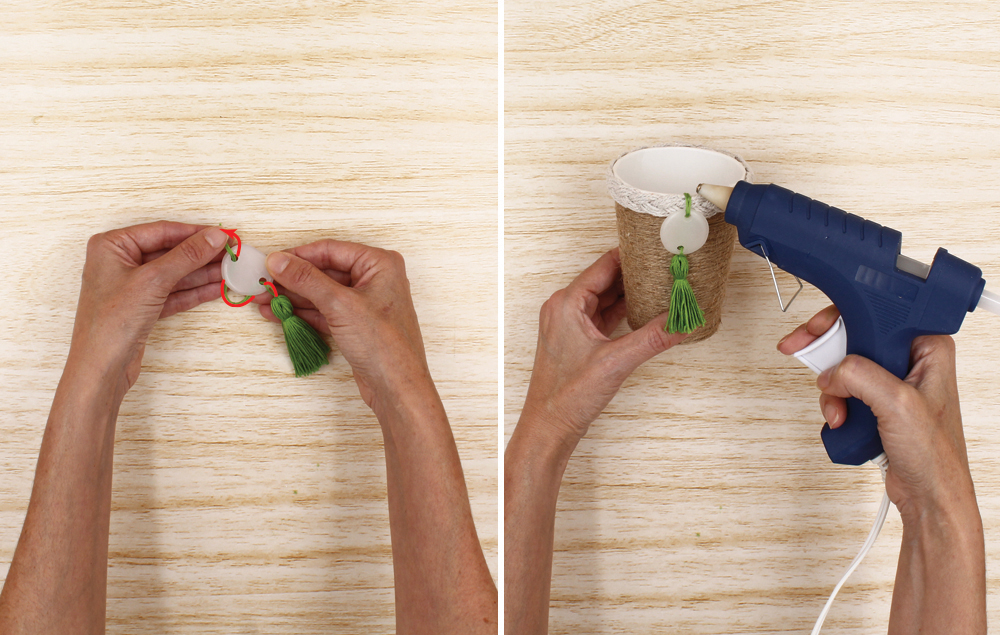
A) On a piece of parchment paper, squeeze hot glue into an oval/circle shape. Let cool. This will be the medallion accent on the cup.
B) Punch two holes in the hot glue medallion, one on each end.
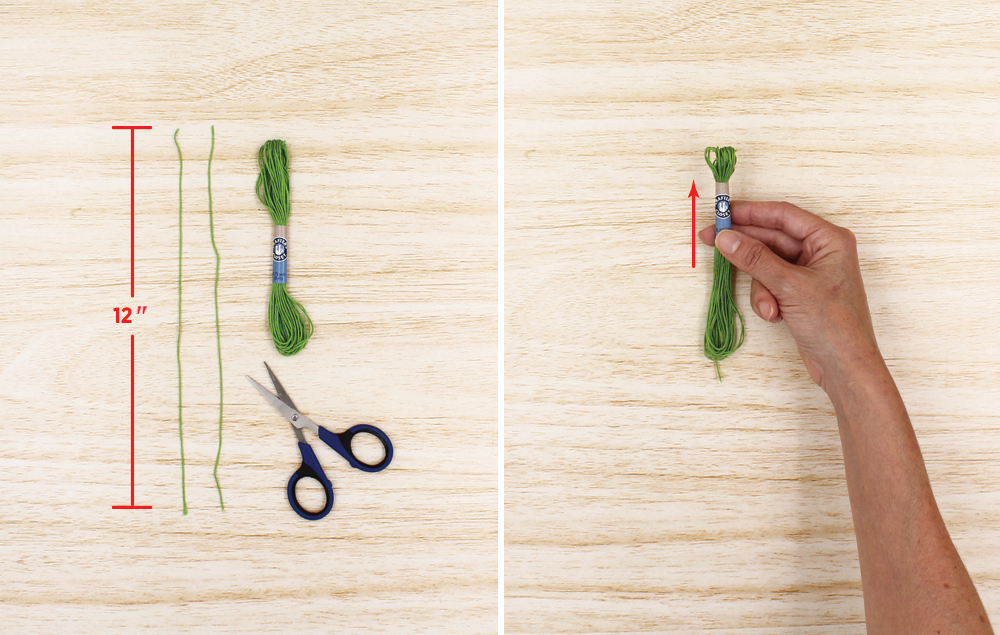
STEP 7:
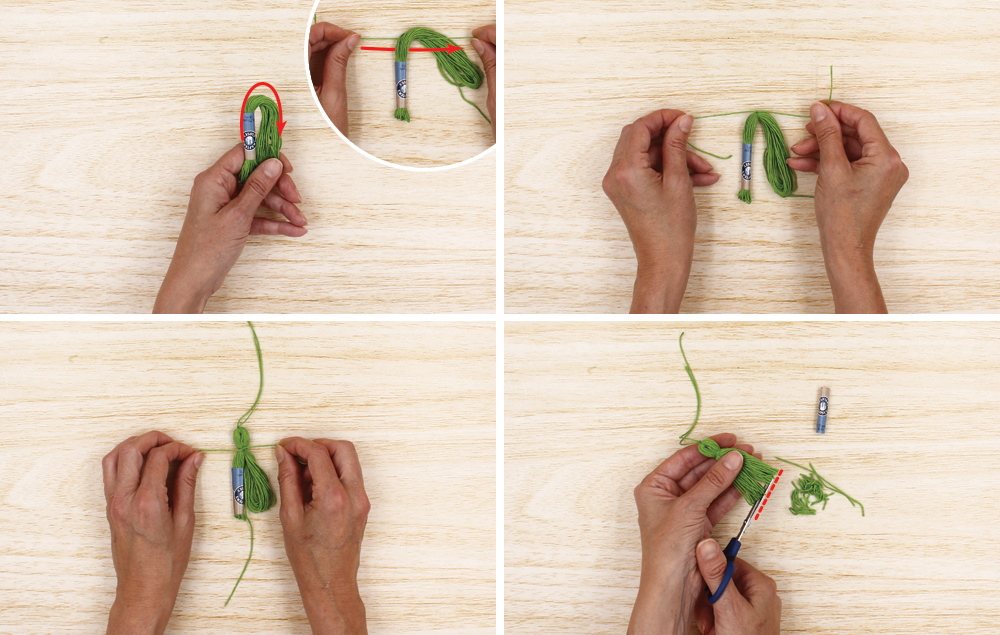
A) Choose a color of embroidery floss. NOTE: Keep the embroidery floss in its wrapper. Pull the loose end from the pack and cut two 12-inch lengths of embroidery floss.
B) Slide the wrapper down toward one end of the embroidery floss, but do not remove it.
STEP 8:
A) Fold the embroidery floss in half. Loop one of the 12-inch lengths of embroidery floss under the fold.
B) Tie a tight knot to secure the 12-inch length to the center of the fold.
C) Use the second 12-inch length to wrap and tie a tight knot just above the wrapper to create the tassel. NOTE: Once tied, remove the wrapper.
D) Trim the ends of the tassel so it’s straight and neat.
STEP 9:
A) Insert the tassel string through one hole in the front of the hot glue medallion and back out through the other hole.
B) Hot glue the tassel medallion string inside the top of the cup.
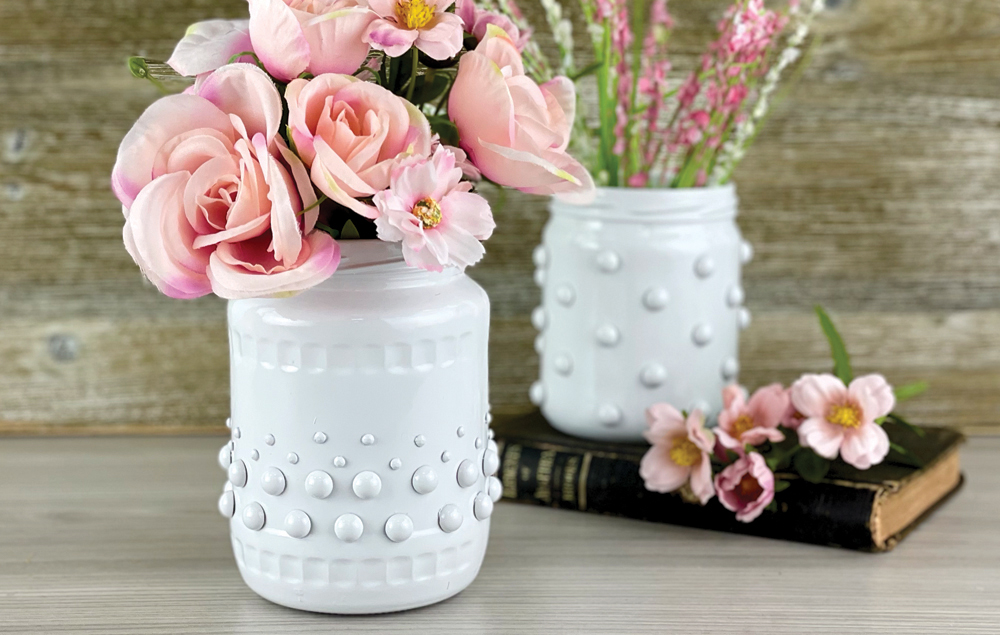
Vintage hobnail milk glass can be expensive and hard to find. This inexpensive DIY project uses a regular recycled glass jar, spray paint, and pearl stickers to create the look of beautiful milk glass! Display your new white hobnail jar by itself or by filling it with flowers or small plants. It makes the perfect small glass container for easy DIY ...
Create a unique planter with simple, inexpensive household materials! Get started making an easy modern planter and customizing it as you wish. This DIY project uses clothespins and an empty tuna can. This small flower pot is perfect for cacti, succulents, spring blooms, and other small indoor plants. You can even use this clothespin craft idea to ...
Use this simple, no-sew technique to make different-sized baskets, perfect for organizing! They are great for holding craft supplies, kitchen utensils, or even using as decorative planters...