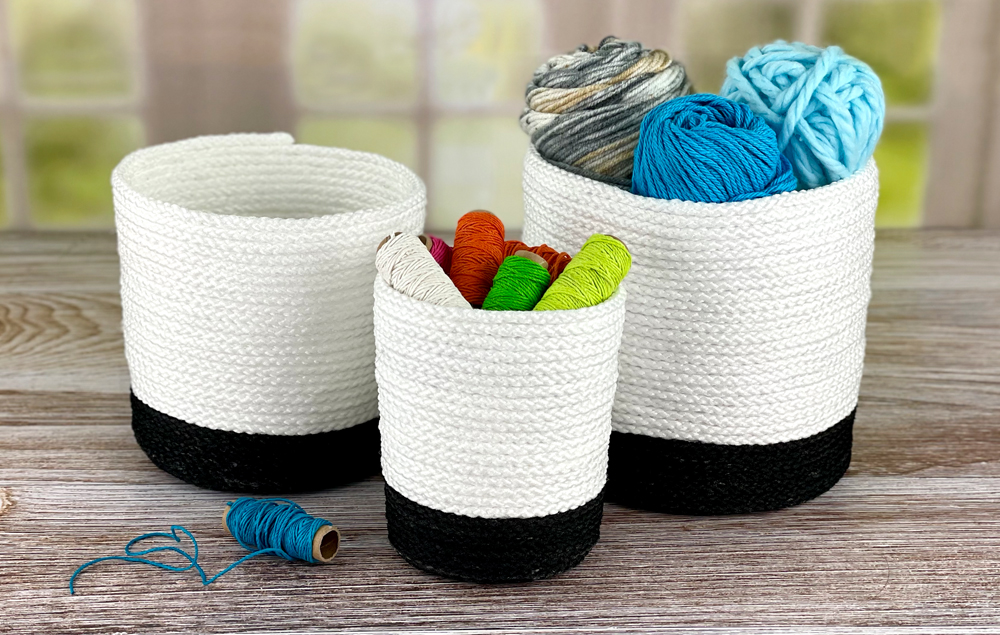
Use this simple, no-sew technique to make different-sized baskets, perfect for organizing! They are great for holding craft supplies, kitchen utensils, or even using as decorative planters.
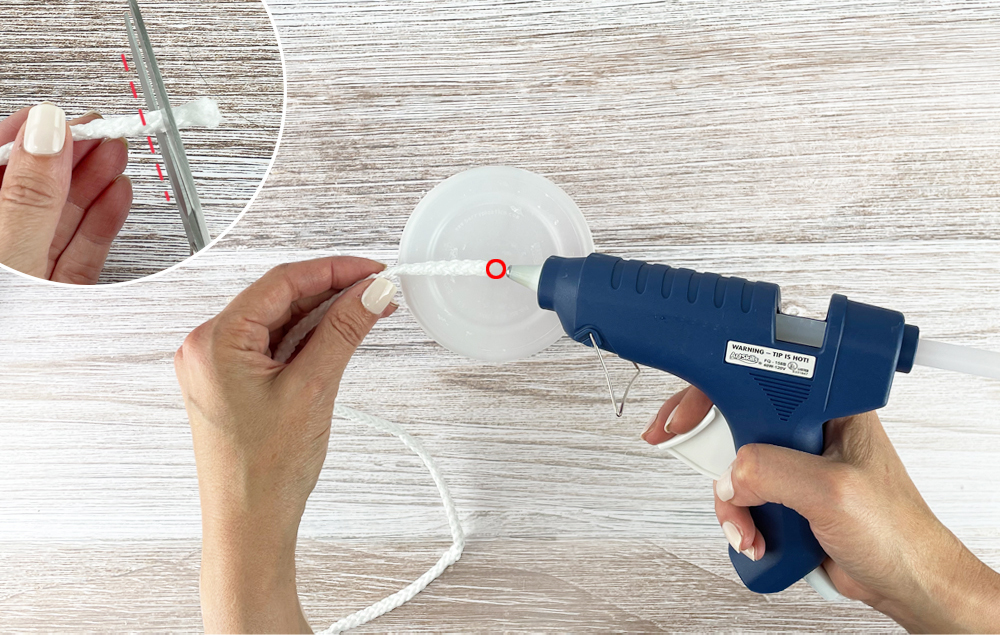
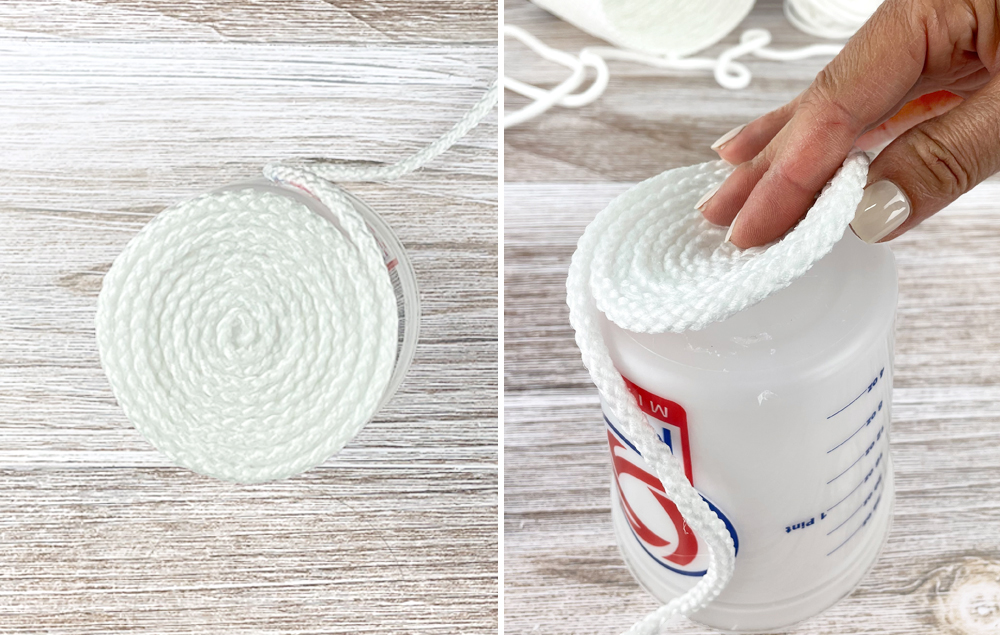
A) Cut the end of the rope to make a clean edge. Hot glue the end of the rope to the bottom center of a plastic container. Note: Plastic containers work best, as the glue will pop off easily.
STEP 2:
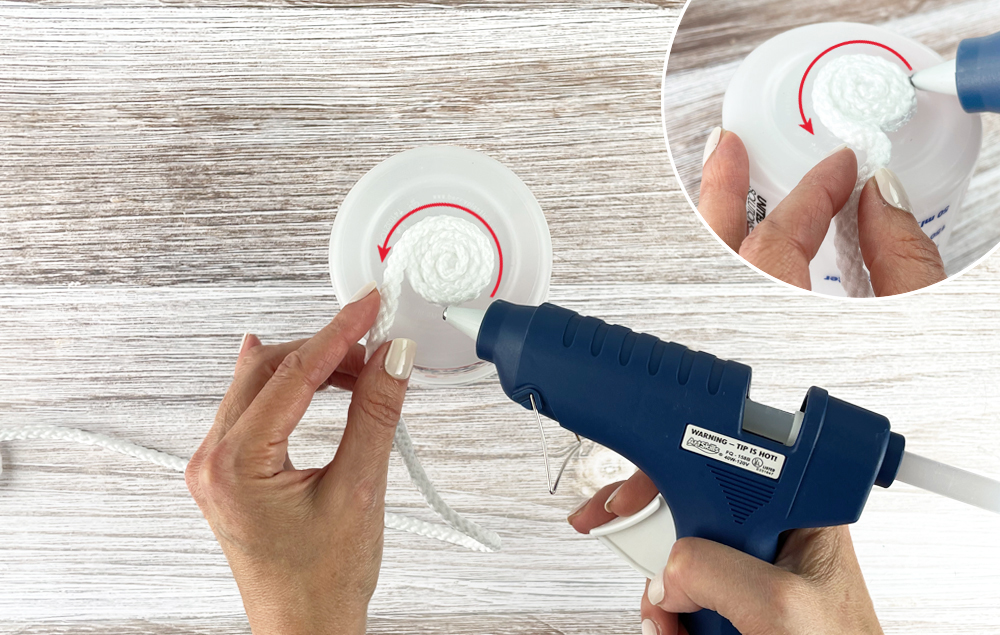
A)Begin coiling the rope around the central starting point, hot gluing as you go.
STEP 3:
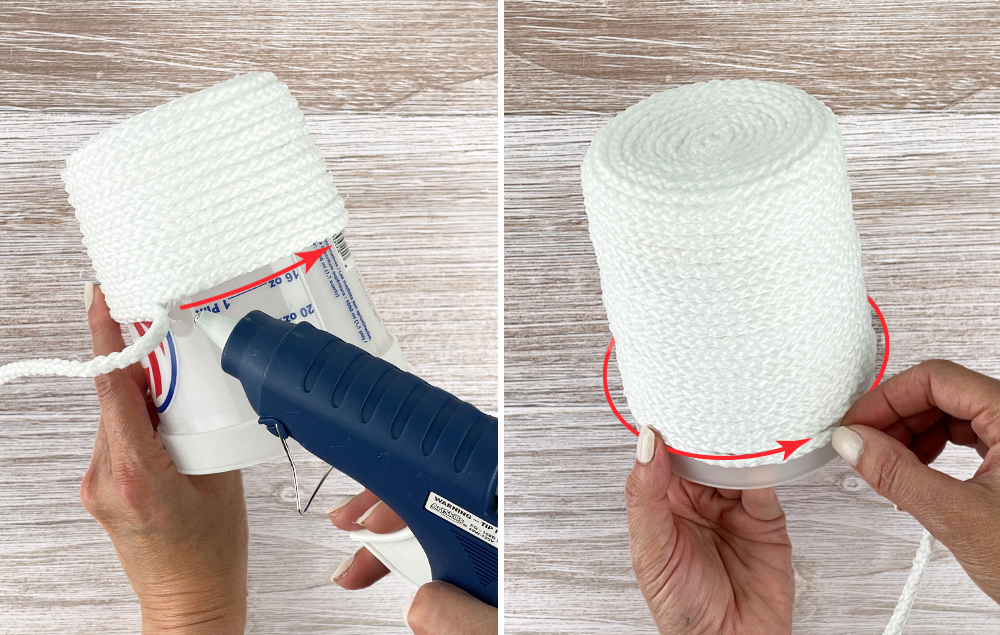
A) Completely cover the bottom of the container. Tip: Once it’s covered, pop off the rope so it doesn’t stick to the container.
STEP 4:
A) Continue wrapping the rope around the side of the container, gluing as you wrap.
B) Continue wrapping until you reach the top.
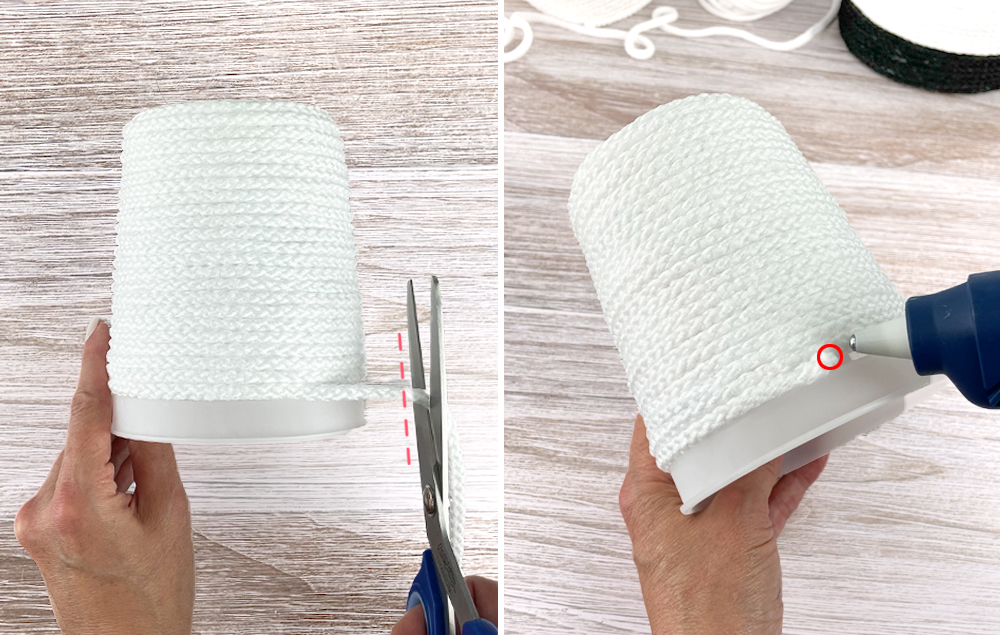
STEP 5:
A) When you reach the top, cut the rope.
B) Glue the loose end in place.
STEP 6:
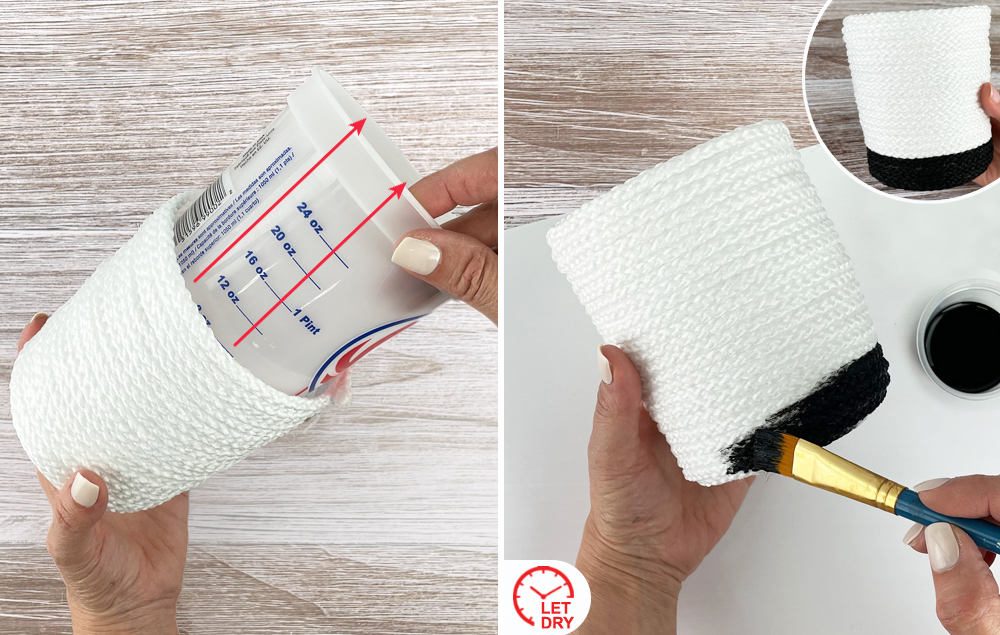
A) Remove the rope basket from the bucket.
B) Paint a section of the basket. Let dry. Repeat this process to create different-sized baskets!
This rustic, farmhouse-inspired sign is the perfect trendy addition for your home decor! Inexpensive and easy to make, it’s sure to add a touch of charm...
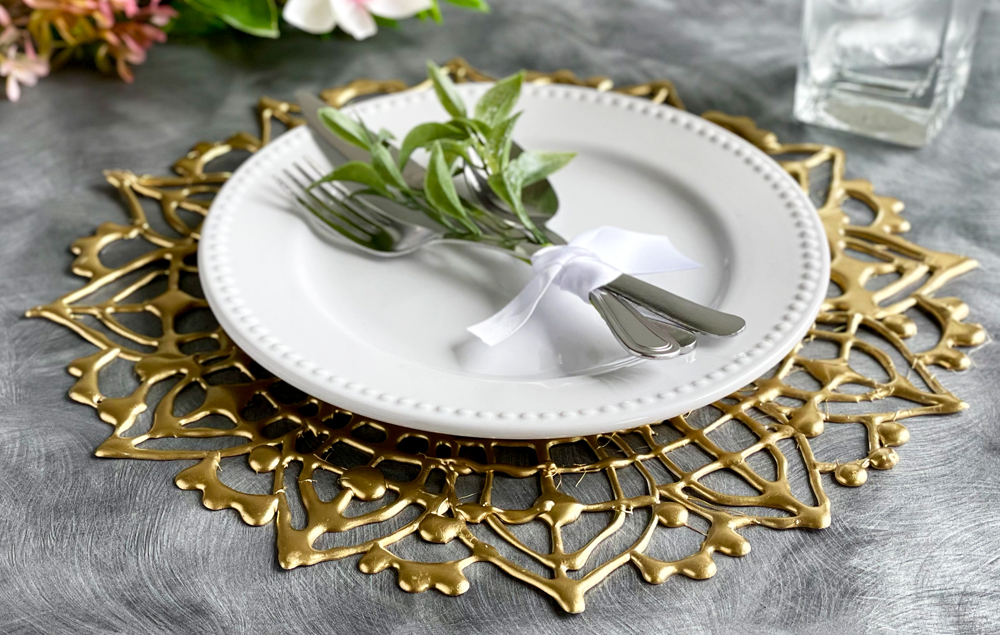
Create beautiful, inexpensive charger plates for the place setting at your next dinner! This DIY decor is made from only hot glue and spray paint. The intricate gold design will suit your table decor during any season...