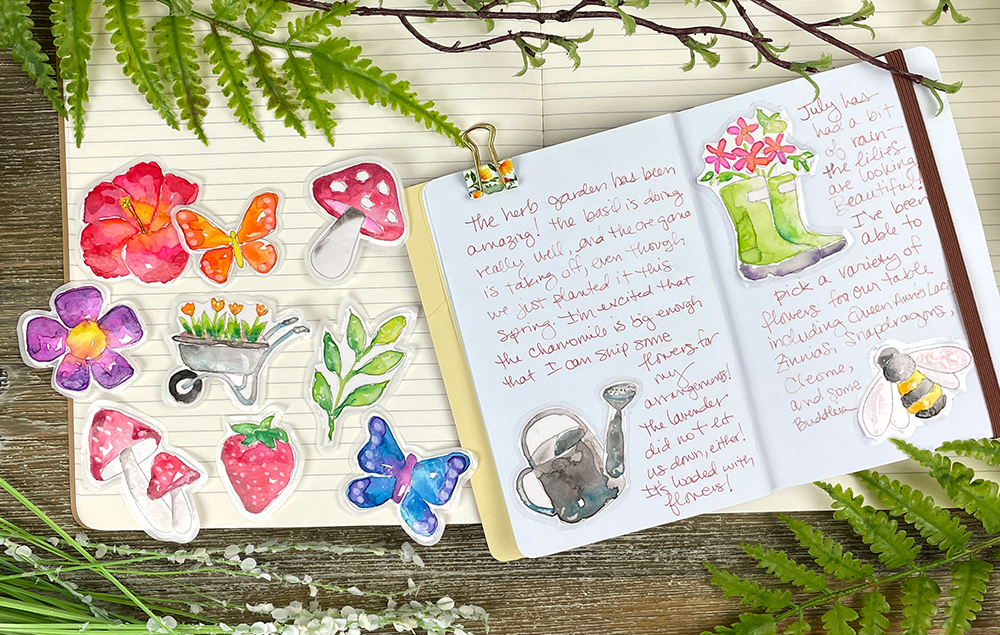
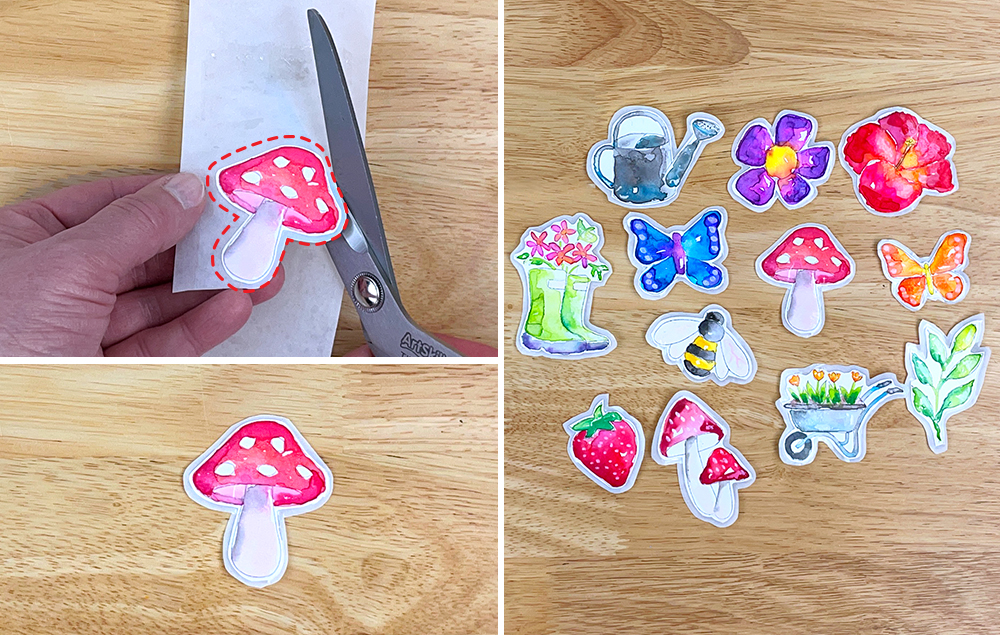
Create your own charming garden-themed stickers using a simple DIY technique with watercolor paper and packing tape. They're as fun to make as they are to share!
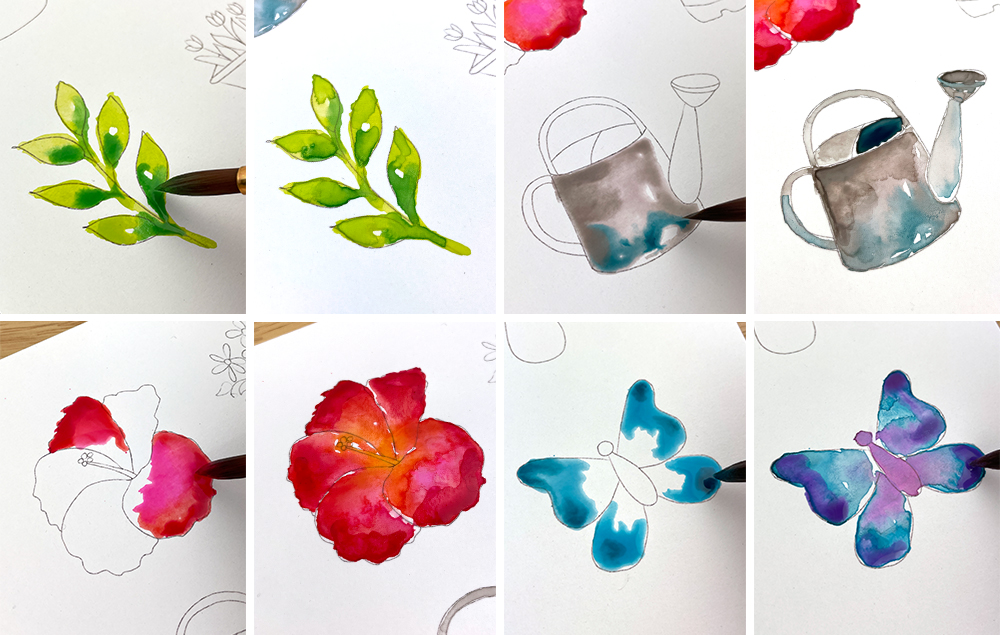
B) Use watercolors to paint the designs. Let dry. Note: For watercolor tips, see STEP 2. You could also use colored pencils or markers to color in the designs!
STEP 2:
A) Use two different hues of a color to add depth (for example, light green and dark green). Let the colors flow together naturally.
B) To create the look of galvanized metal, mix gray and turquoise blue.
C) Mix colors from the same family to add dimension. For example, from the warm color family, red, hot pink, orange, and yellow were all used on the hibiscus petals.
D) Let areas dry, and then go back in and add more color for a fun look.
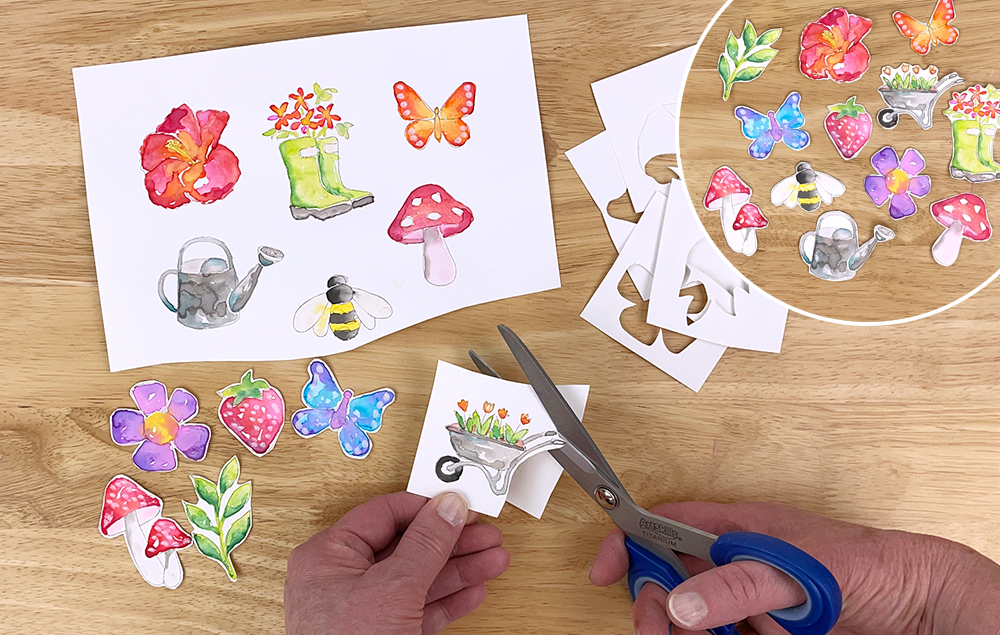
STEP 3:
A) Cut out the watercolor designs.
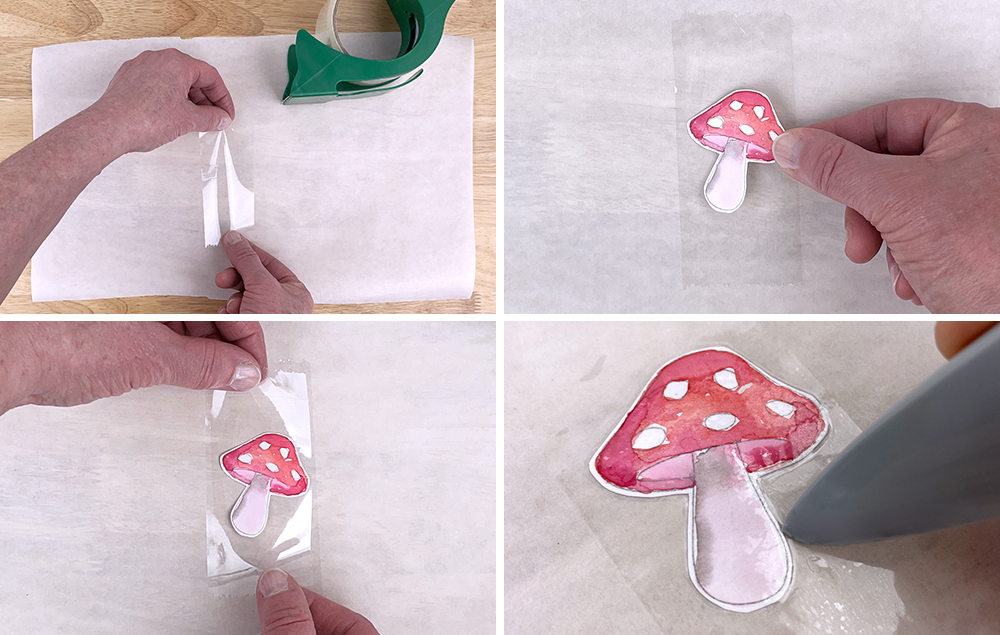
STEP 4:
A) Place a strip of packing tape onto a piece of parchment paper with the adhesive side facing down.
B) Place a watercolor design onto the packing tape.
C) Position a second piece of packing tape over the watercolor design, sandwiching the paper in between the two pieces of tape.
D) Rub around the edges of the watercolor design to seal the edges of the tape together around the paper.
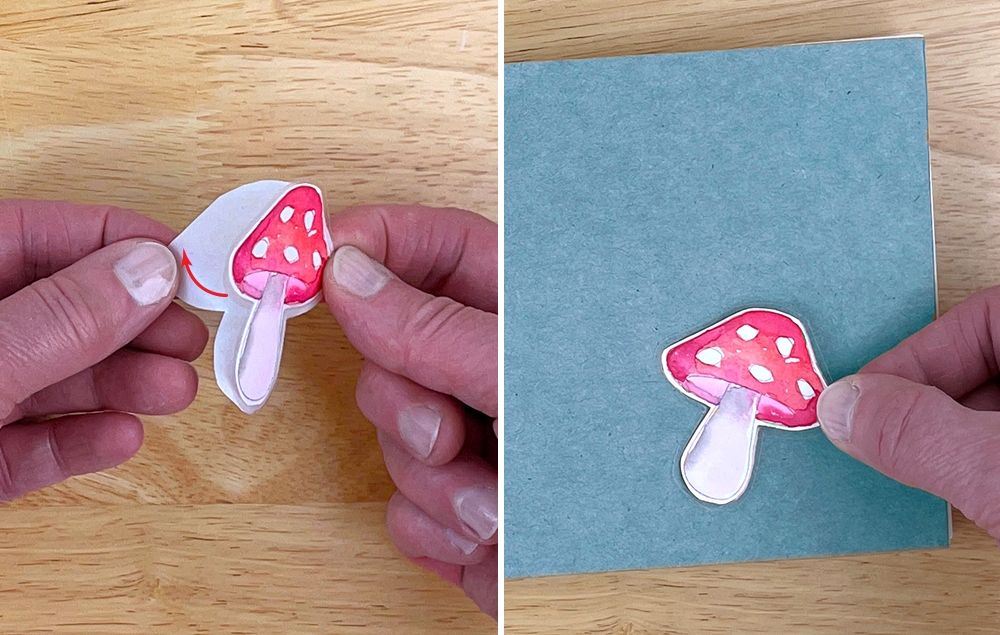
STEP 5:
A) Cut out all layers — the parchment paper, and the tape layers — when you cut around the watercolor design. Be sure to leave a margin of packing tape around the edge of the design.
B) Repeat to make all the stickers!
STEP 6:
A) To use the stickers, peel off the parchment paper backer and adhere the sticker.
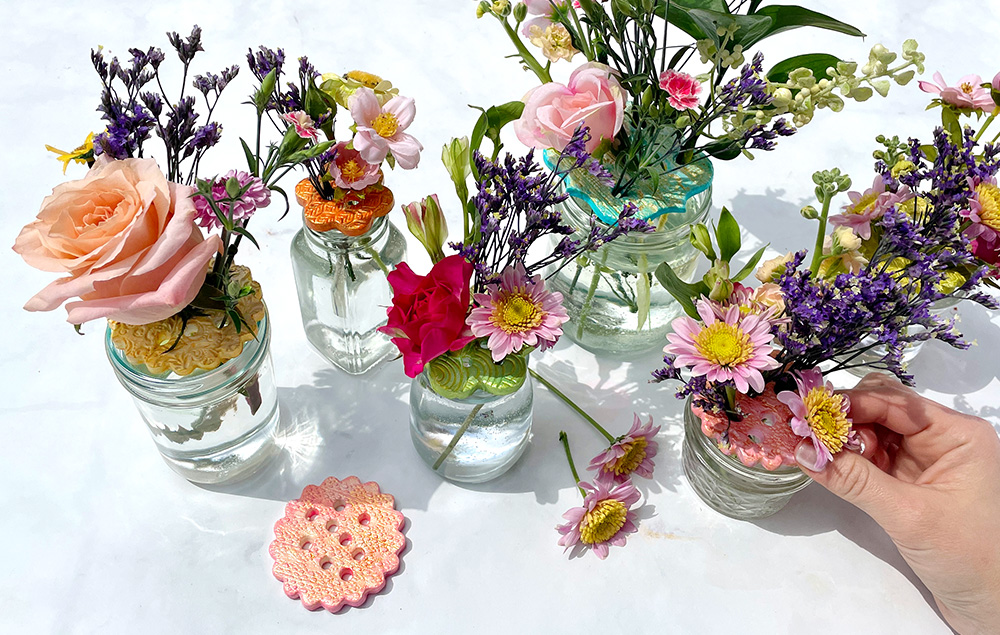
Create a delicate clay flower frog by shaping air-dry clay with a cookie cutter and pressing a decorative design into the surface. Painted with gold metallic accents highlighting the details, this elegant piece adds charm while keeping flower stems perfectly in place...
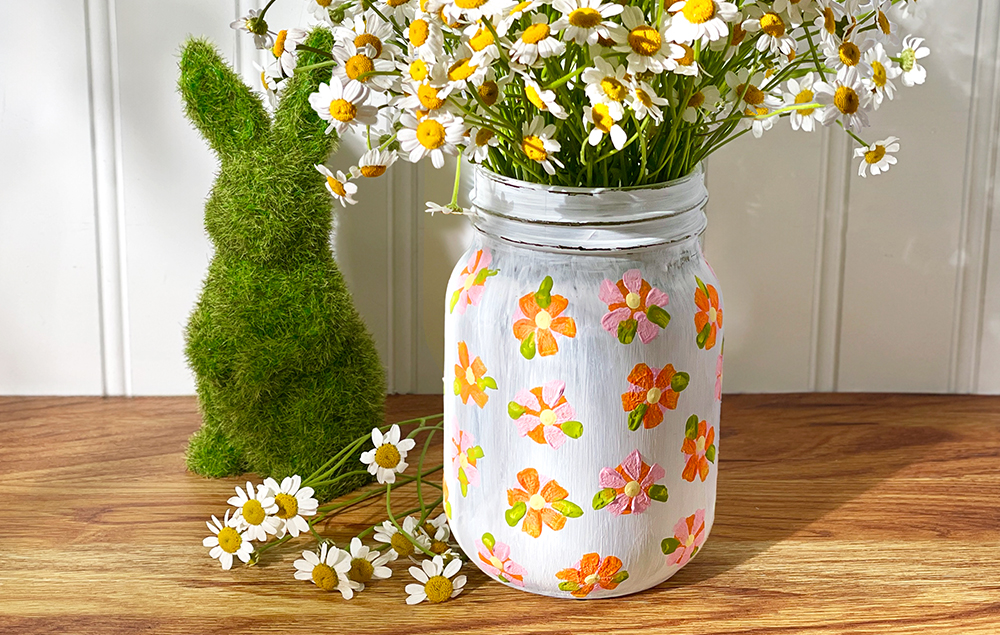
Create a charming painted mason jar featuring delicate pink and orange flowers. This spring craft brings a touch of nature indoors, making it a perfect centerpiece or decorative accent for the season...
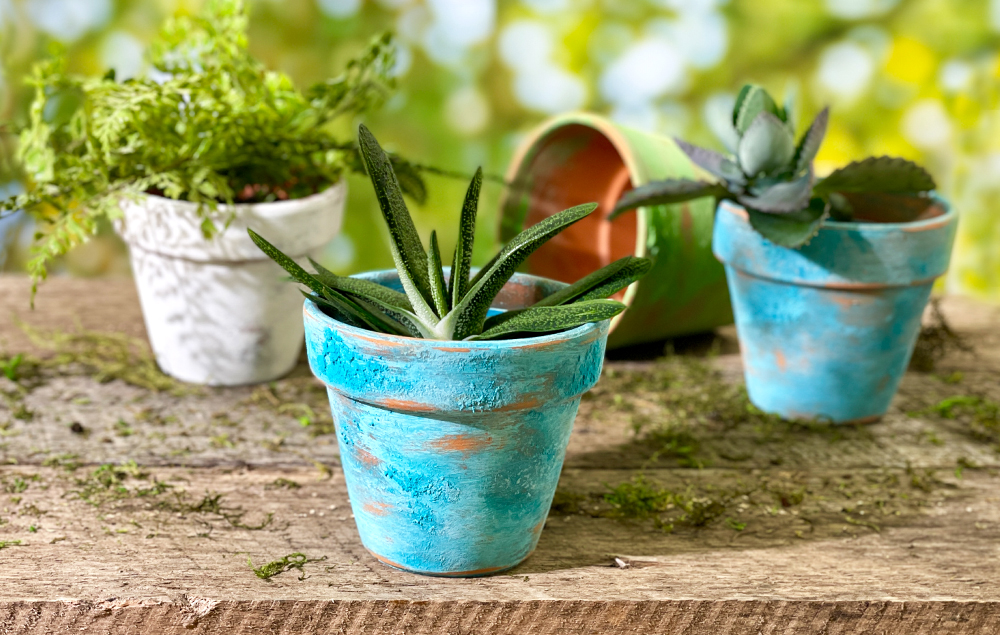
You won’t have to wait months or years to get the beautiful weathered look of a time-worn pot. Give new clay pots a vintage aesthetic in minutes using paint and a few simple steps...