Wood Slice Sign
September 15, 2023
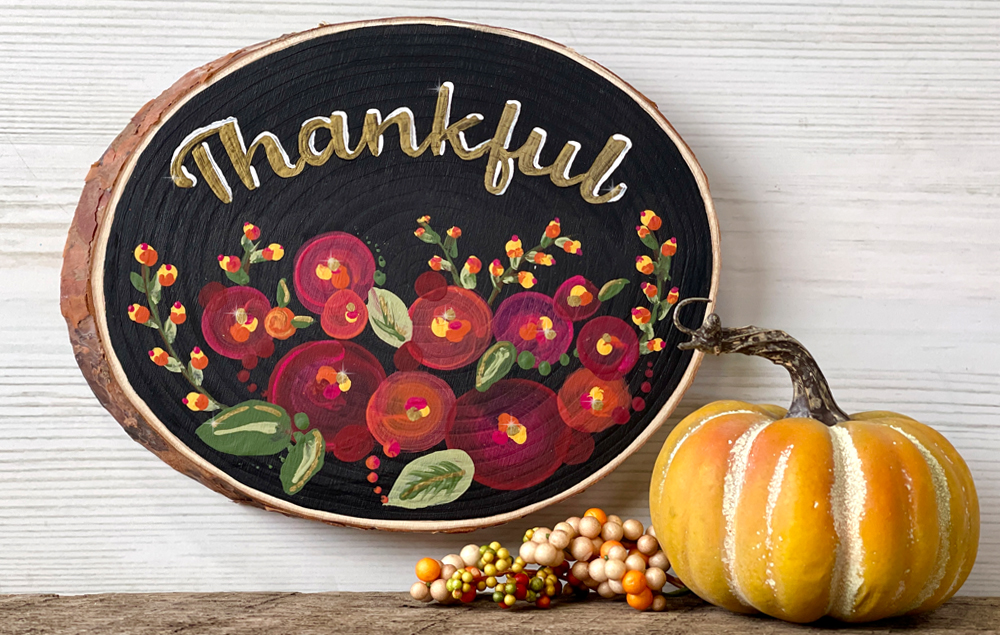
Create a charming wood slice sign for autumn! Simple painting techniques create colorful flowers and leaves, while gold highlights add a warm glow. 

What You'll Need:
- Crafter’s Closet Wood Round
- Crafter’s Closet Chalkboard Black Craft Paint
- Crafter’s Closet White Acrylic Paint
- Crafter’s Closet Red Acrylic Paint
- Crafter’s Closet Orange Acrylic Paint
- Crafter’s Closet Yellow Acrylic Paint
- Crafter’s Closet Pink Acrylic Paint
- Crafter’s Closet Gold Paint Marker
- Crafter’s Closet Fabric Scissors
- Crafter’s Closet Premium Paint Brush Set
-
Chalk
-
Painter’s Tape
-
Pencil
-
Templates
Let's Get Started
STEP 1:
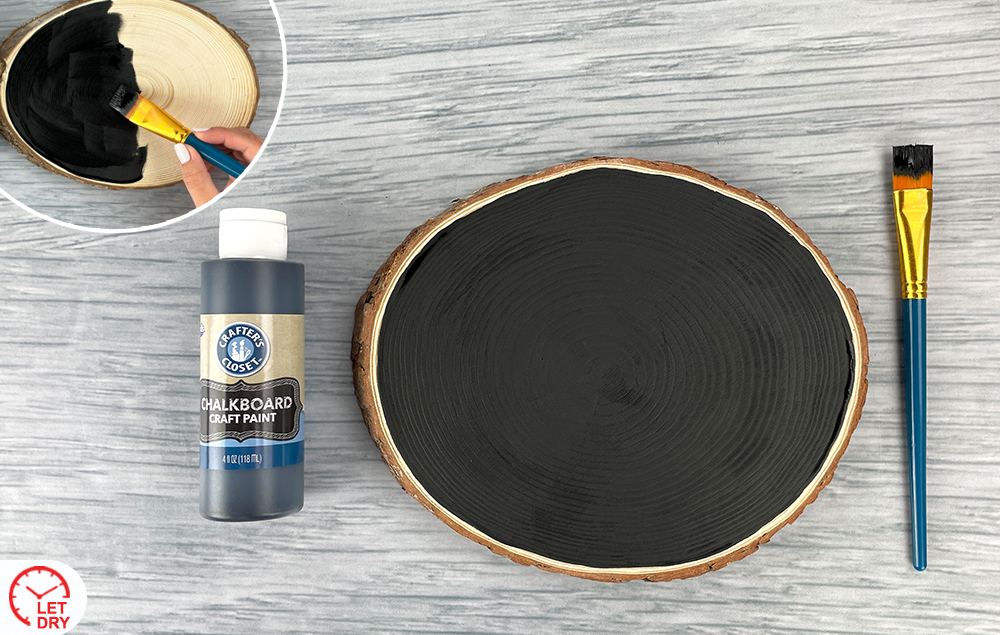
A) Paint the wood round with black chalkboard paint. Let dry.
STEP 2:
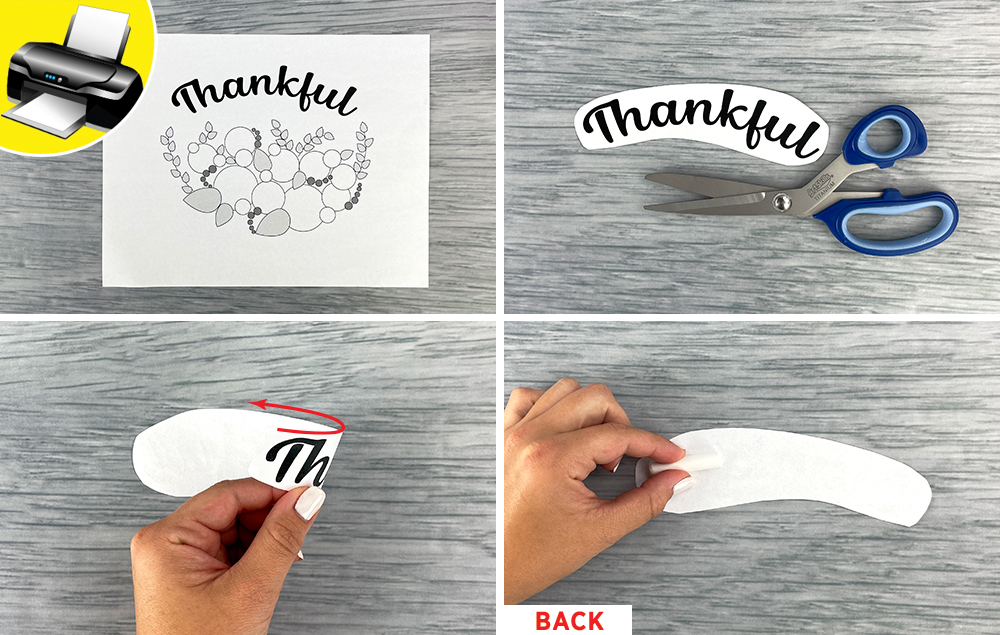
A) Print out the templates.
B) Cut out the word “thankful.”
C) Flip the word “thankful” over to the backside of the paper.
D) Rub chalk on the back of the paper.
STEP 3:
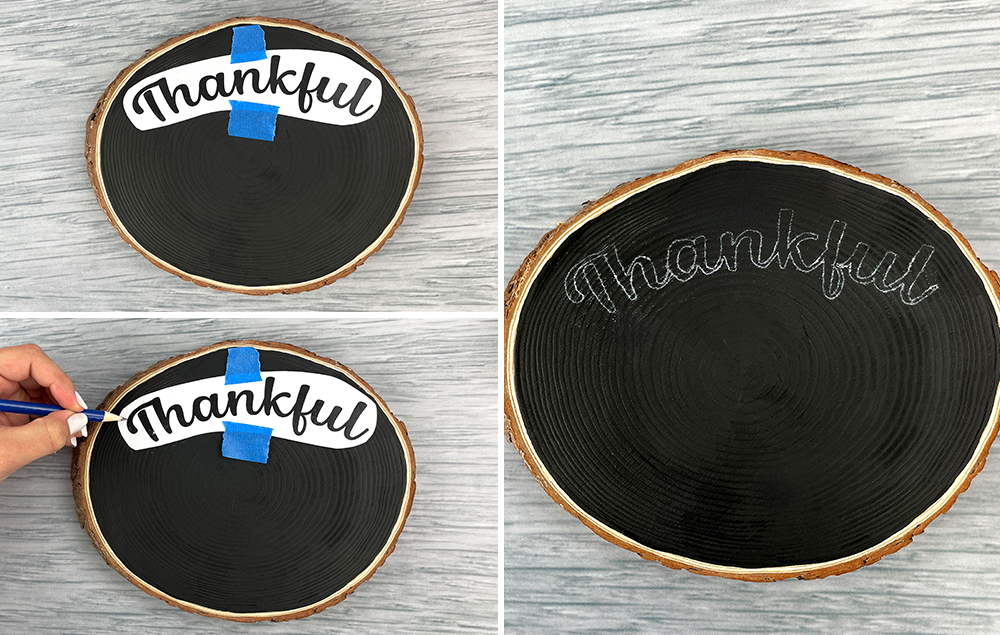
A) Place the word “thankful” on the wood round with the printed side up. Tape the paper in place.
B) Trace the outline of the word “thankful” with a pencil to transfer the chalk to the wood round.
C) Remove the paper and tape.
STEP 4:
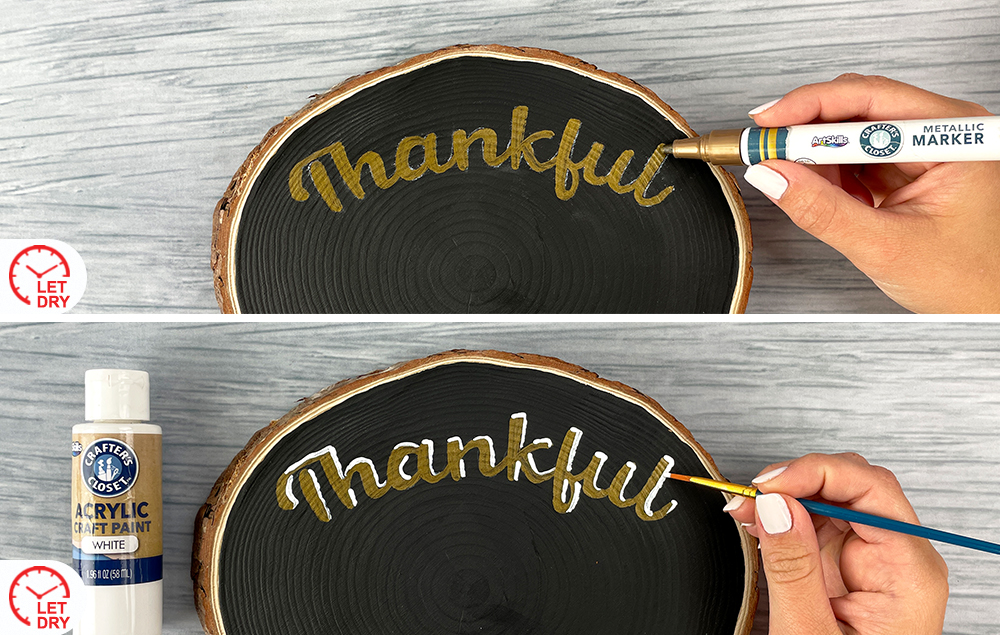
A) Use the gold metallic marker to fill in the word “thankful,” using the chalk markings as a guide. Let dry.
B) Add highlights to the word “thankful” with white paint. Let dry.
STEP 5:
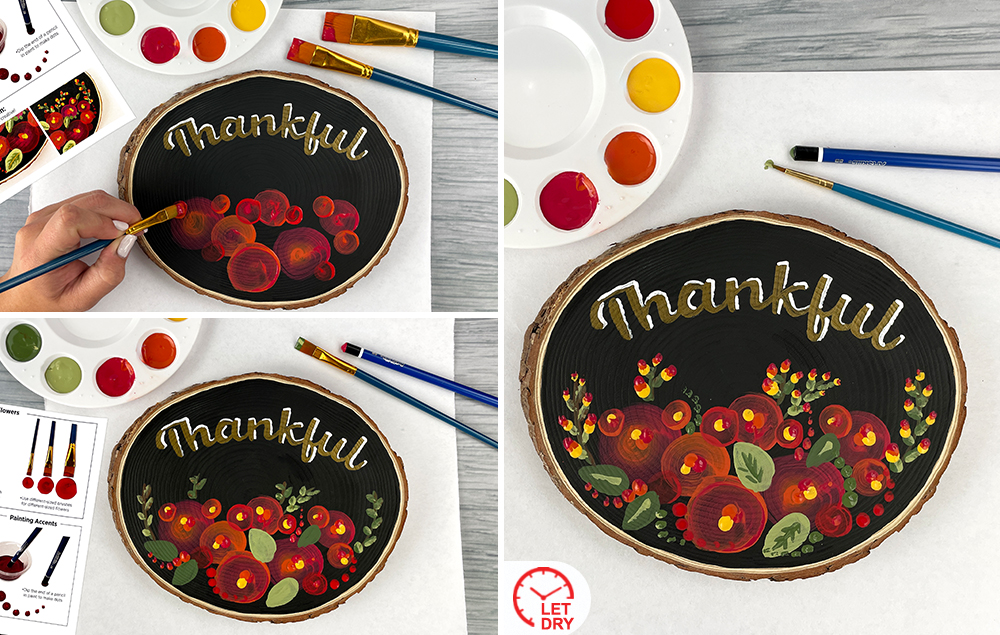
A) Use the template as a reference for placement of the painted flowers. Use the painting guide for tips and tricks. Have fun and be creative!
STEP 6:
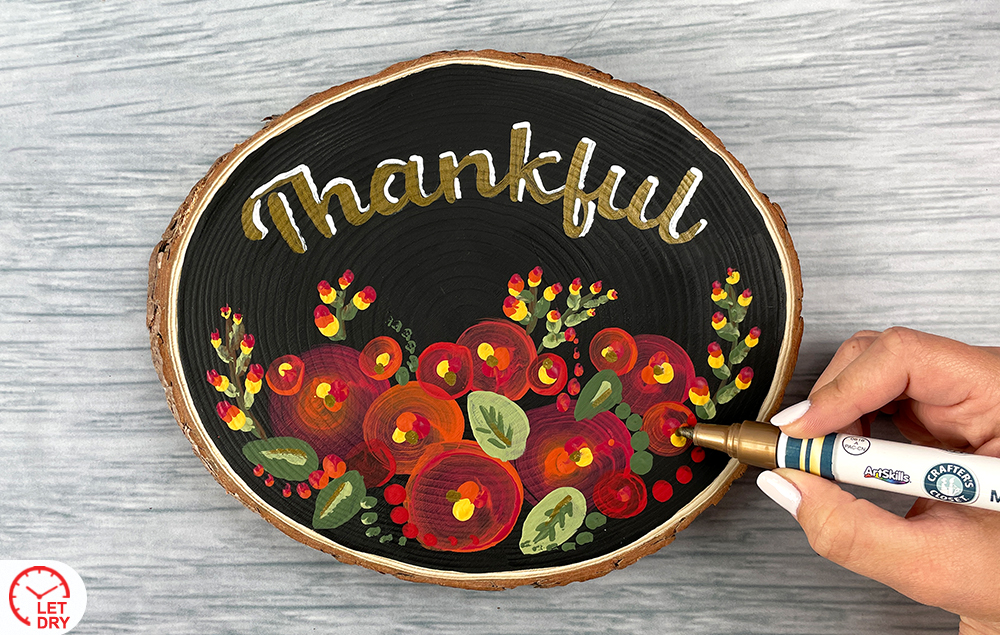
A) Use the gold metallic marker to add highlights to the leaves and flowers. Let dry.
thanksgiving decor
wood slice sign
wood sign
wood slice
wooden slice
wood round
wooden sign
how to make wood signs
how to make a wooden sign
how to make wooden signs
custom wooden signs
thanksgiving sign
thanksgiving signs
thanksgiving decorations
thanksgiving decoration
thanksgiving decoration ideas
door decor for thanksgiving
Related Posts
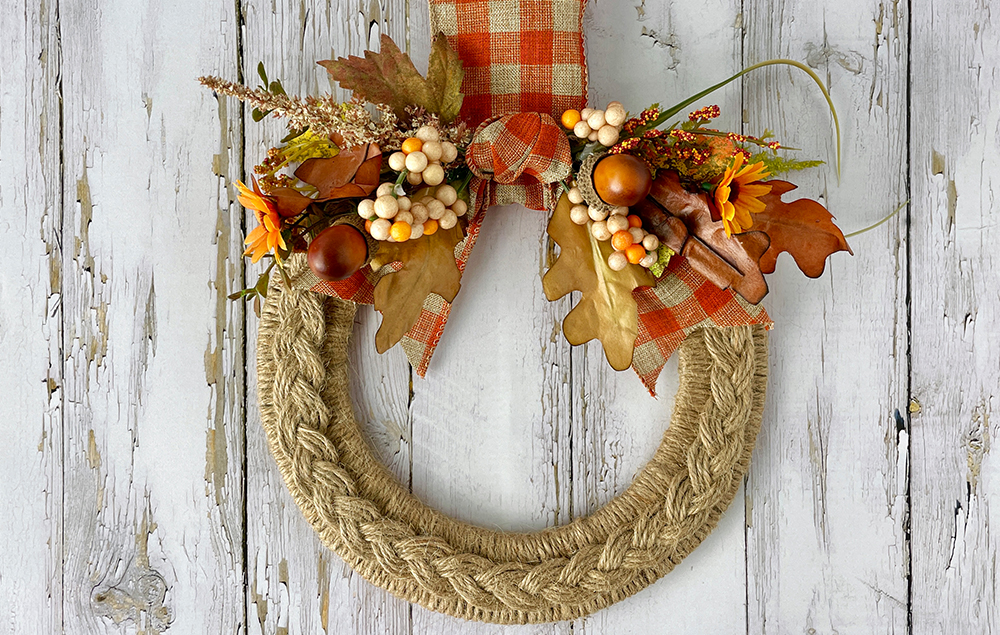
Embrace the cozy spirit of autumn with this DIY Jute Wreath! Crafted with intricate braided jute and adorned with ribbons, flowers, and leaves, this wreath is a heartwarming addition to your seasonal decor...
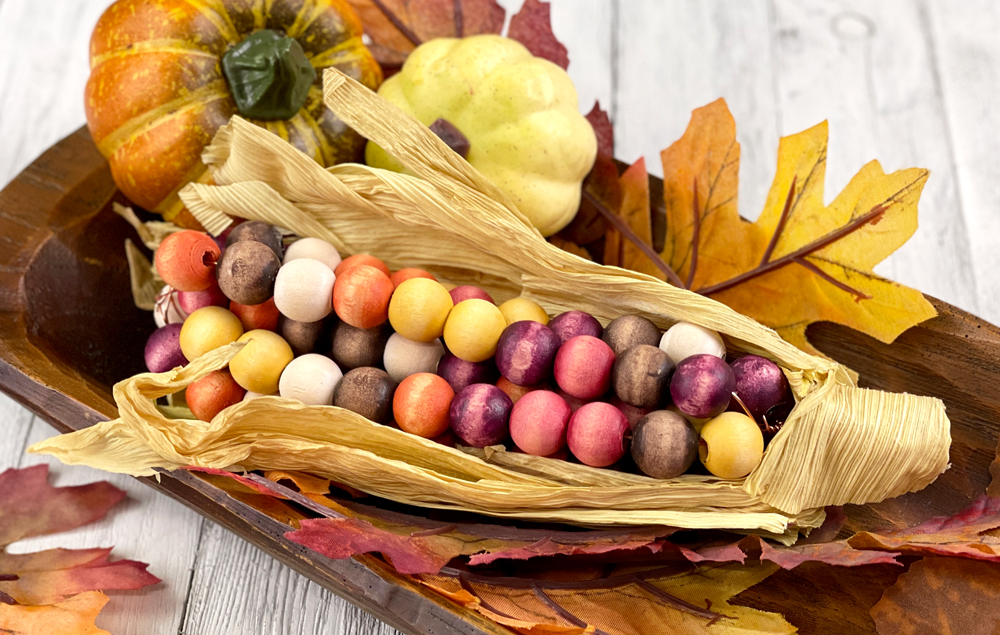
This fun and easy-to-make autumn craft adds an authentic touch of harvest charm to your decor! Wooden beads are painted in warm, seasonal hues and are strung onto wire to resemble ornamental corn...
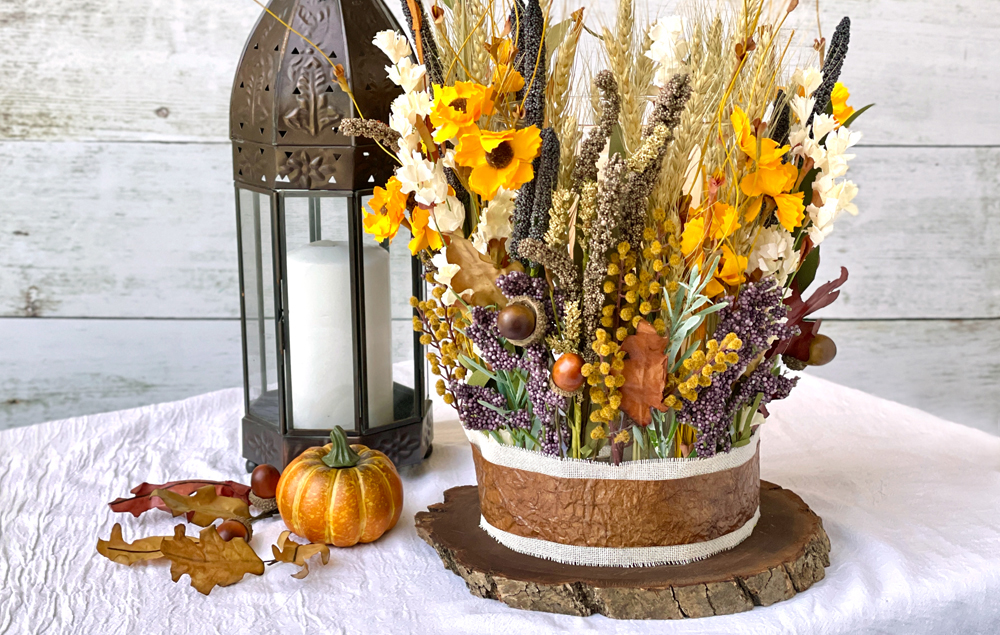
Capture the essence of autumn with this delightful DIY centerpiece! Adorn a glass container with an assortment of artificial fall-colored flowers and complete the rustic charm by crafting a faux leather wrap. Display the floral centerpiece on a rustic wood slice for a cozy and inviting touch to your seasonal decor...
Categories


