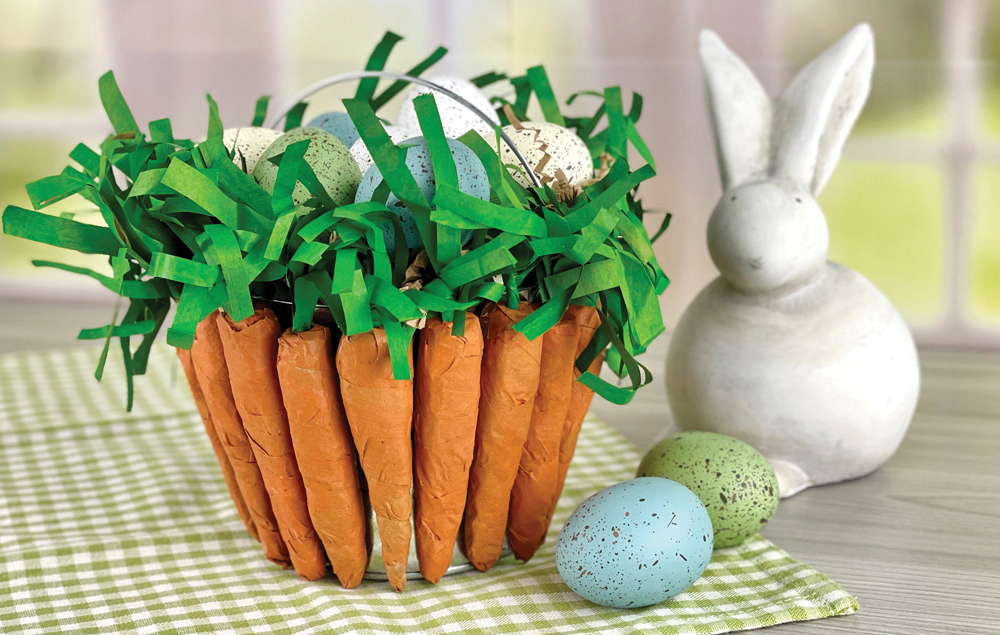
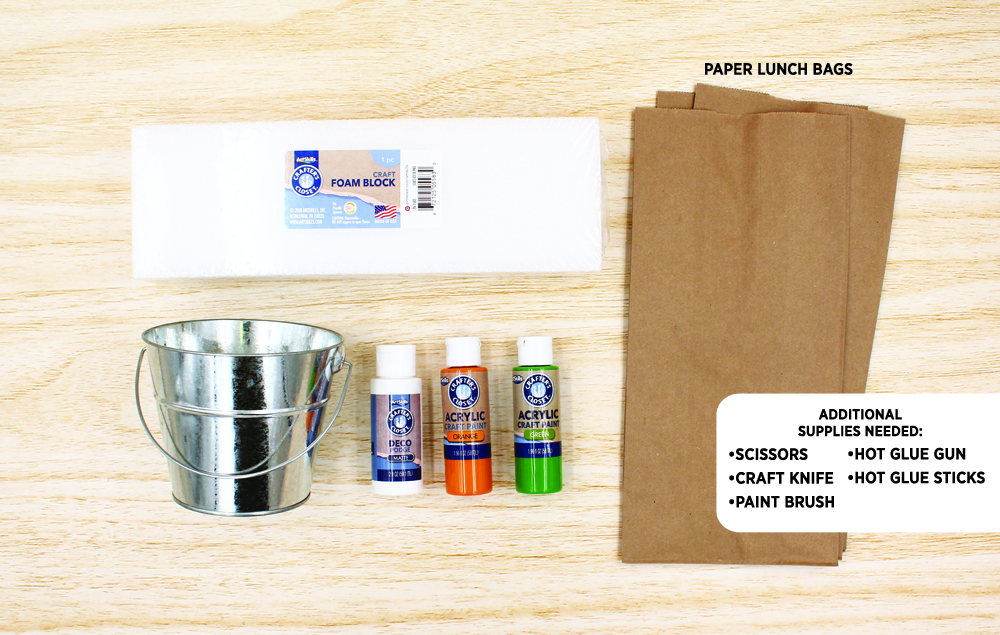
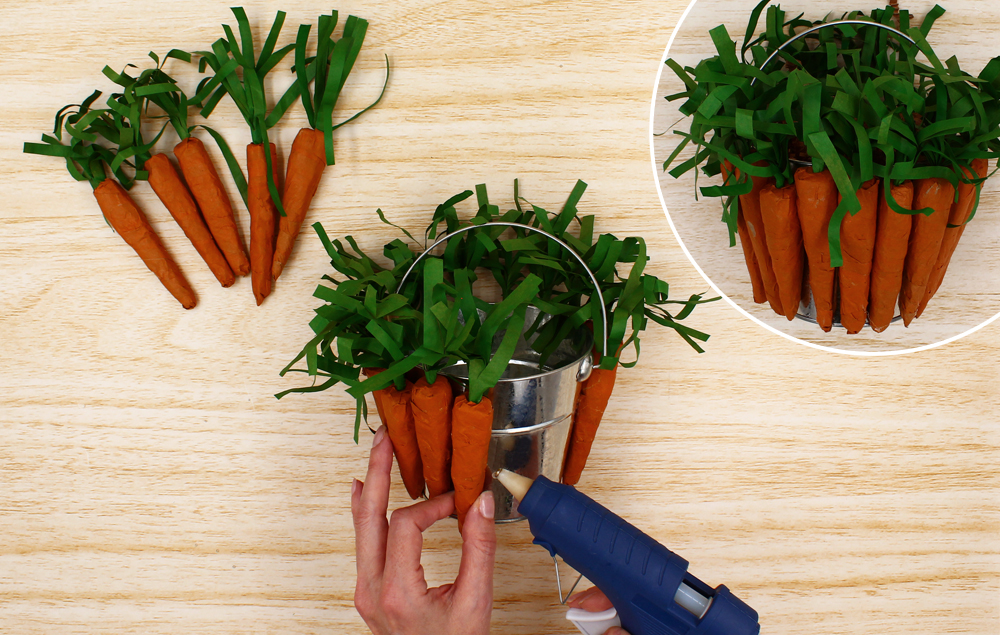
This DIY craft makes a perfect spring centerpiece for seasonal festivities! The cute carrot accents are made from craft foam and painted paper lunch bags. Fill the small metal bucket with flowers or small plants for a beautiful home decor piece.
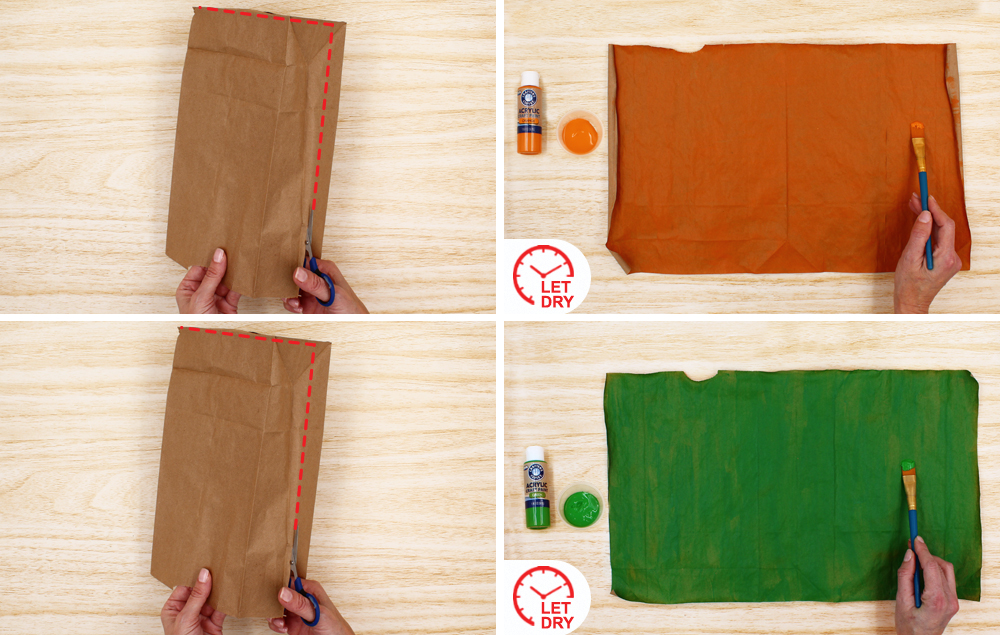
B) Lay the paper bag flat and paint it orange. Let dry.
C) Cut open a second paper bag.
D) Lay the second paper bag flat and paint it green. Let dry.
STEP 2:
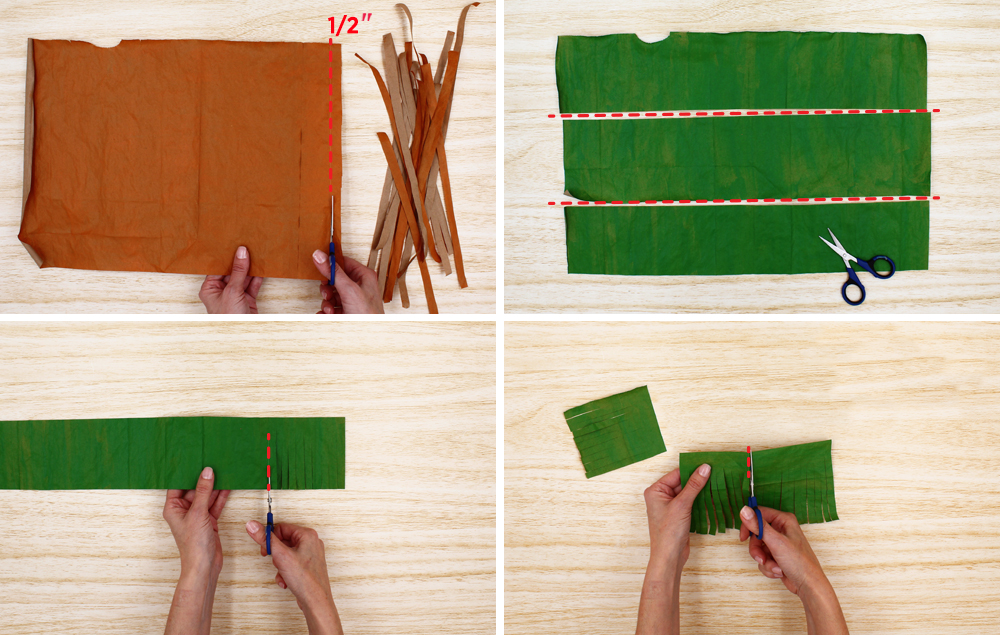
A) Cut the orange paper bag into approximately 1/2" strips.
B) Cut the green paper bag into thirds lengthwise.
C) Cut a fringe on each of the three green paper bag sections. To do this, cut very narrow strips without going all the way across the paper.
D) Cut the fringed sections into smaller 2 1/2" to 3" pieces.
STEP 3:
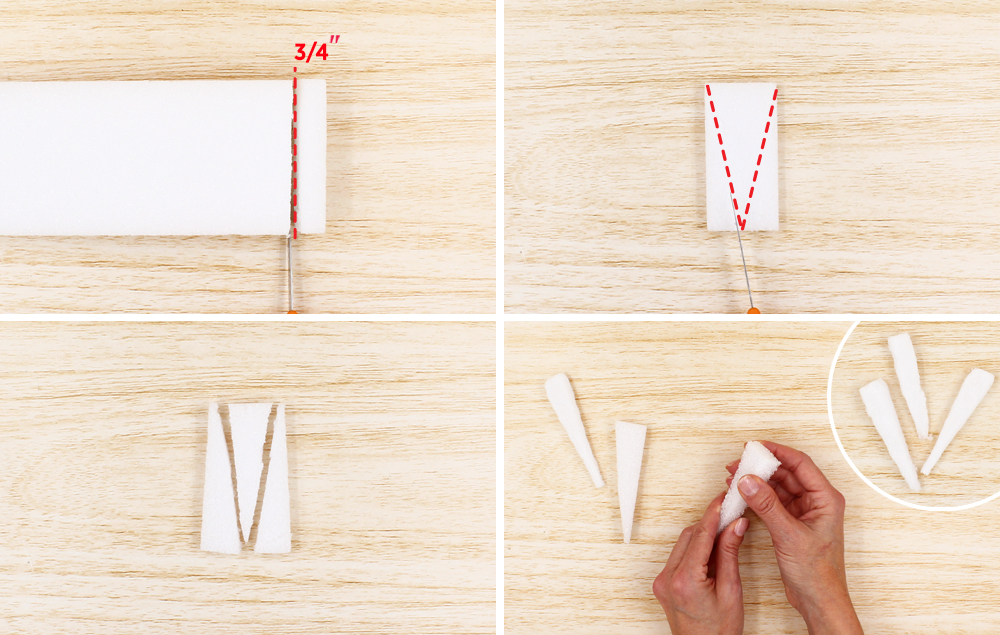
A) Cut a 3/4" section off the end of the foam block.
B) Lay the foam section flat and cut it into a “V” shape with a craft knife.
C) Separate the foam “V” into three “carrots.”
D) Mold the foam into a carrot shape by squeezing it to soften the edges.
STEP 4:
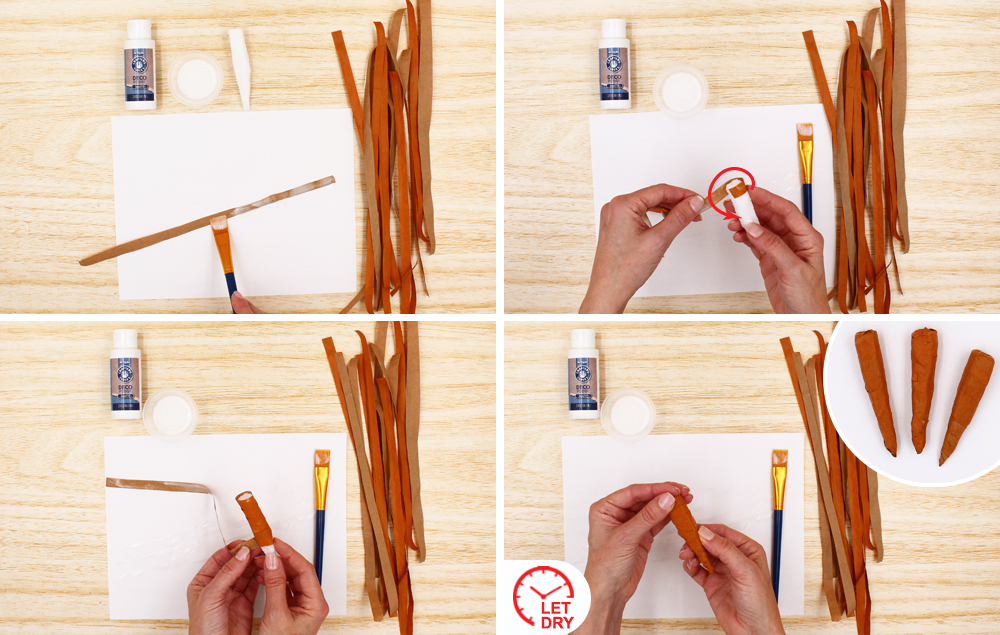
A) Apply deco podge to an orange paper strip.
B) Begin at the top of the carrot and wrap the orange paper strip around the foam.
C) Repeat this process until the carrot is covered with orange strips. Note: It may take two or three strips to completely cover the carrot.
D) Squeeze the carrot to help the deco-podged paper stick to the foam inside.
STEP 5:
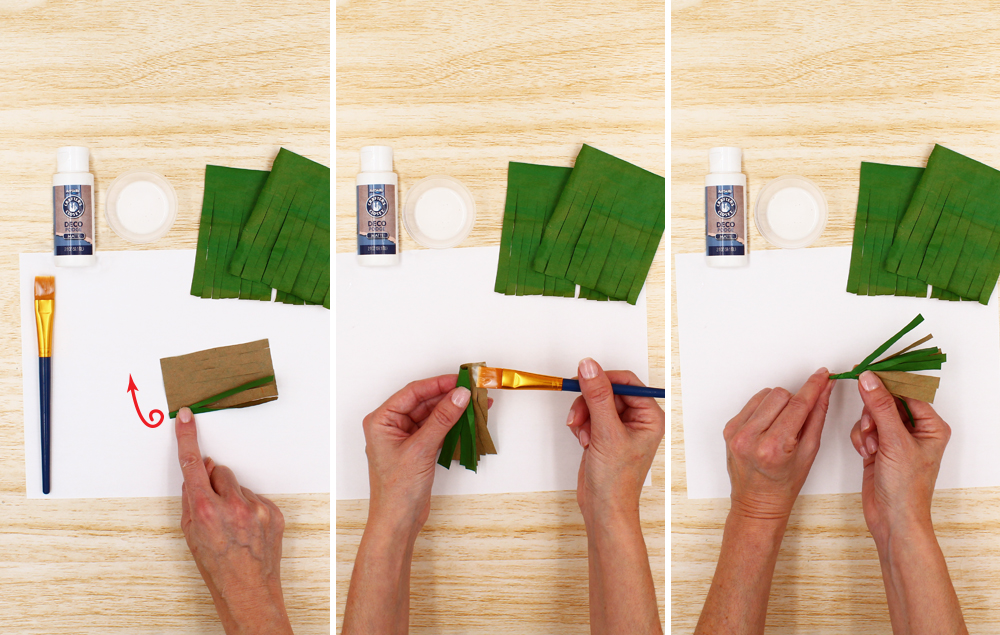
A) Tightly roll a piece of green fringe paper along the uncut edge to create the carrot foliage.
B) Apply a dab of deco podge to the rolled end of the fringe to secure it and keep the roll tight.
C) Twist the glued end of the carrot foliage to create a point.
STEP 6:
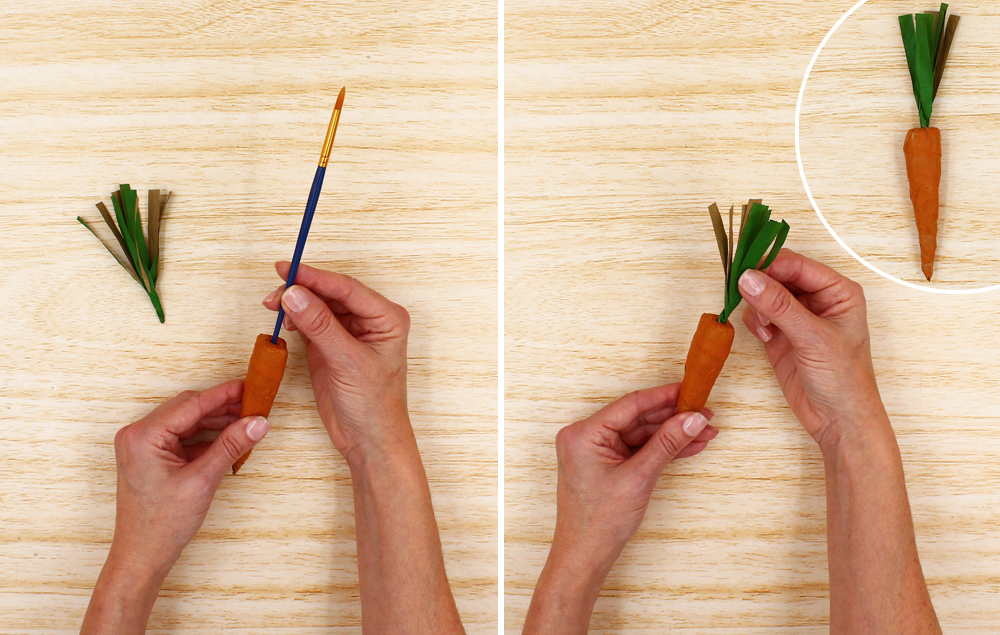
A) Poke a hole into the top of the carrot with the end of a paint brush.
B) Insert the twisted end of the carrot foliage into the hole at the top of the carrot. Note: You will need to make about 19 carrots to encircle the bucket.
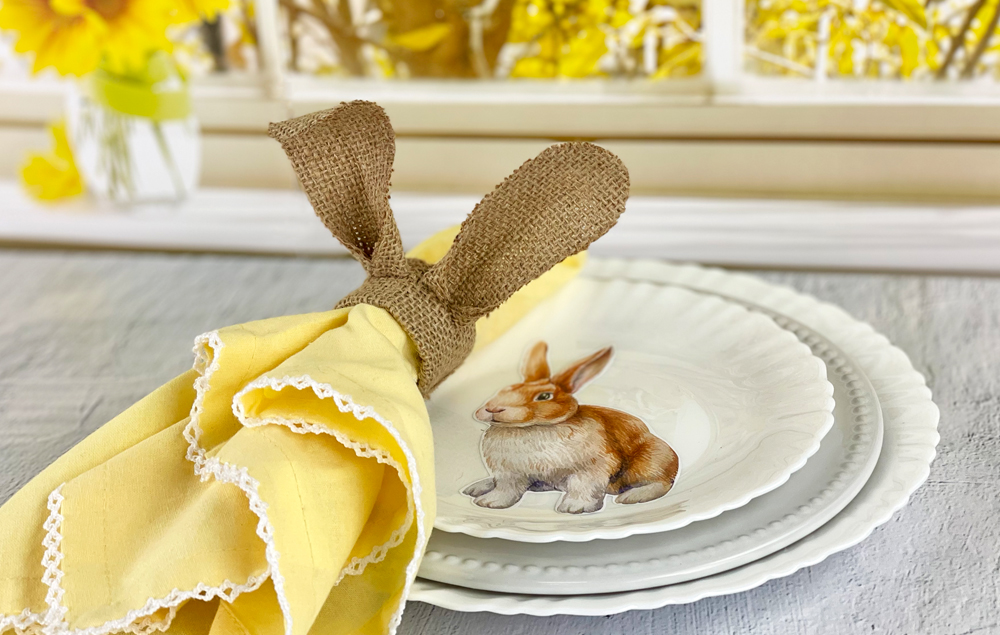
Add a touch of spring to your table with this cute burlap napkin ring! This simple DIY project uses just burlap ribbon, deco podge, and a tube from paper towels or toilet tissue. These simple, adorable accents will be perfect for the tablescape at your next spring feast or gathering...
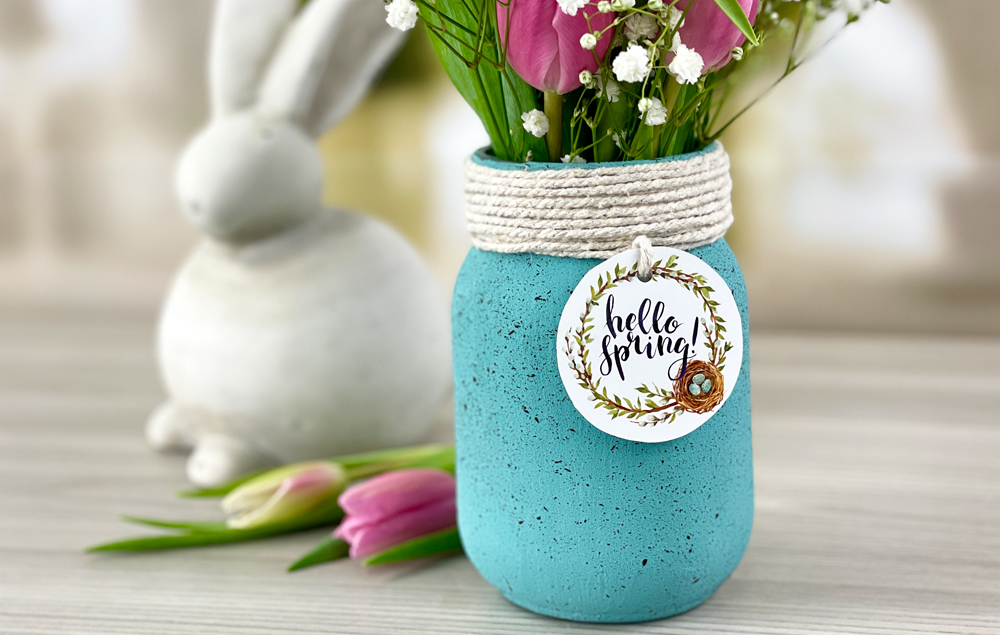
Create a pretty robin egg blue mason jar to display your favorite flowers and bring farmhouse charm to your spring decor! Add fun speckles using a toothbrush and paint...
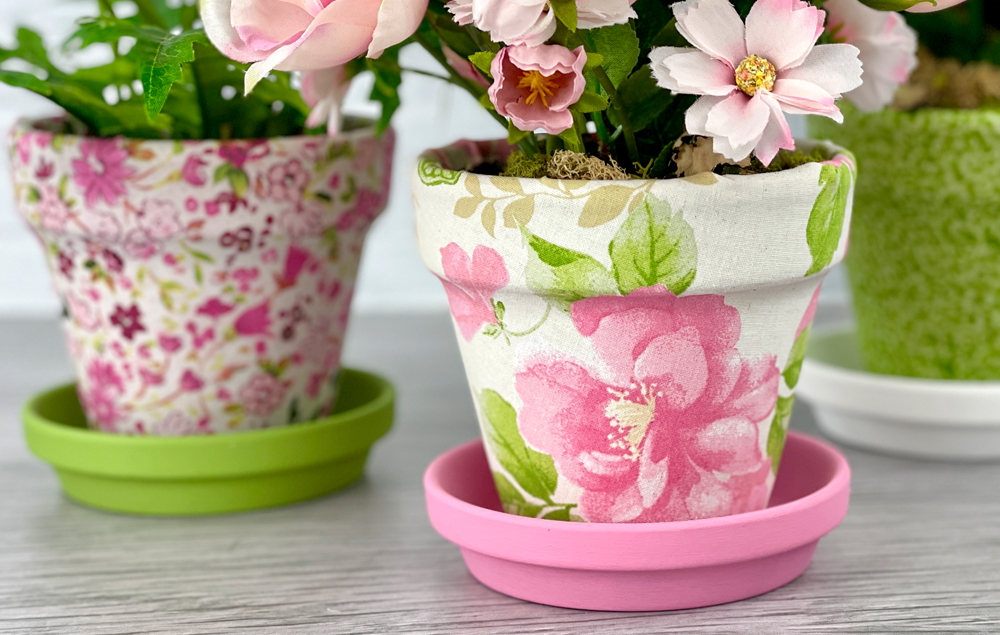
A fun and inexpensive way to add a pop of spring color to your decor is to wrap terra cotta pots with fabric! This DIY craft also makes a great gift idea. Just pop in a pretty potted plant and enjoy...