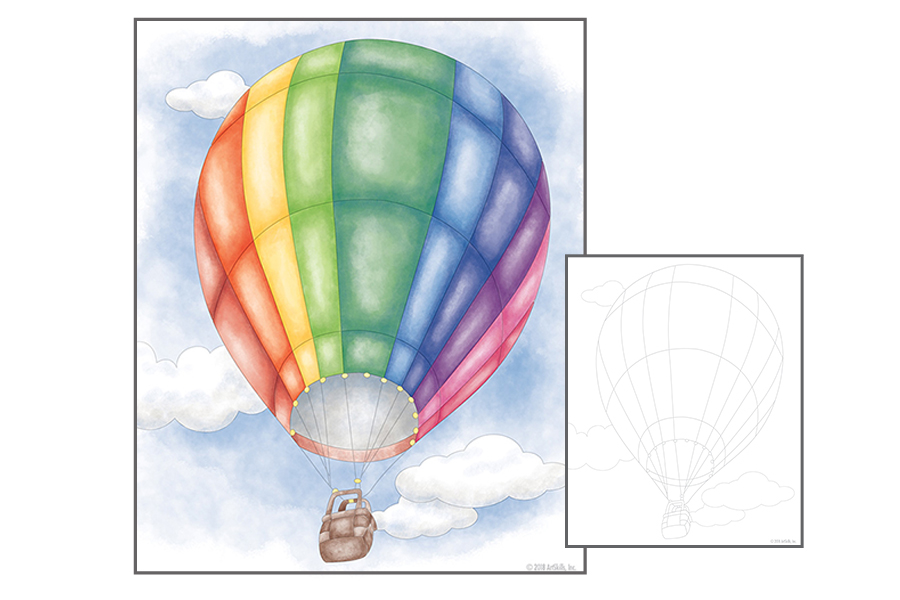
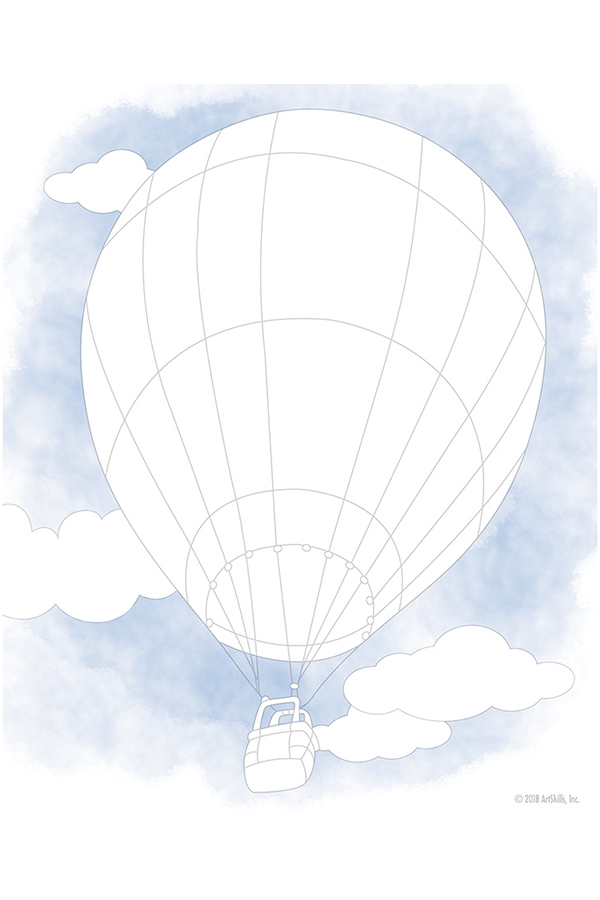
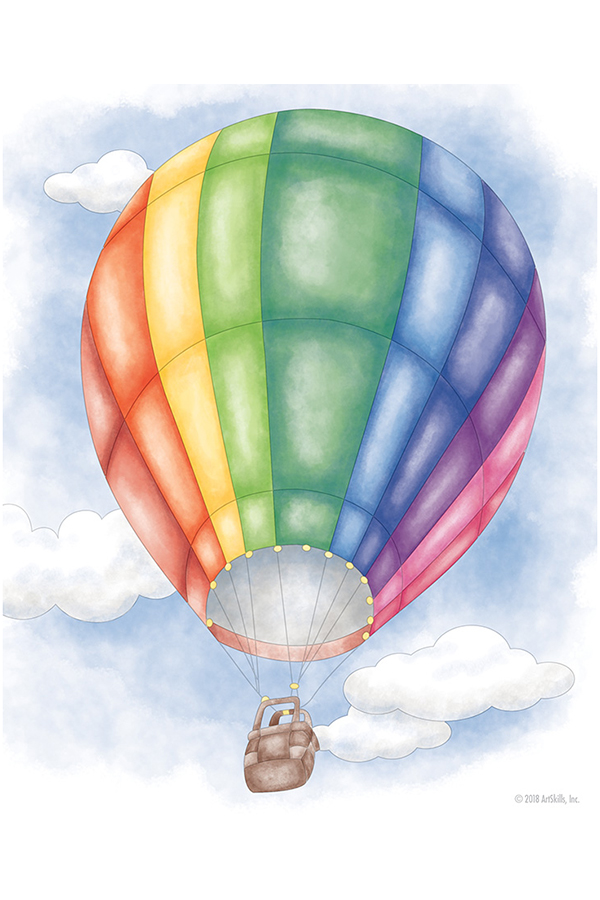
This printable project teaches you the tips and techniques behind the vibrant Watercolor medium, perfect for artists of any age! Follow the steps below to guide you through and you will quickly be on your way to creating this Beautiful Hot Air Balloon.
With watercolor paint, a color will always appear more intense (vibrant and darker) when it is wet. As it begins to dry the color will lose its intensity.
Test a Color First
Watercolor paint dries very fast. Therefore, it's best to test a color on a scrap piece of paper.
Keep Water Clean
To prevent colors from getting muddy, it is important to wash off your brush when switching colors. Periodically replace the water in your cup to help keep your colors clean and bright.
Let's Get Started!
STEP 1:
Use your Light Blue paint to create a light wash in the sky behind the balloon. Keep your brush very wet to achieve a blotted, airy look. Spread the blue out from the balloon and behind the clouds.
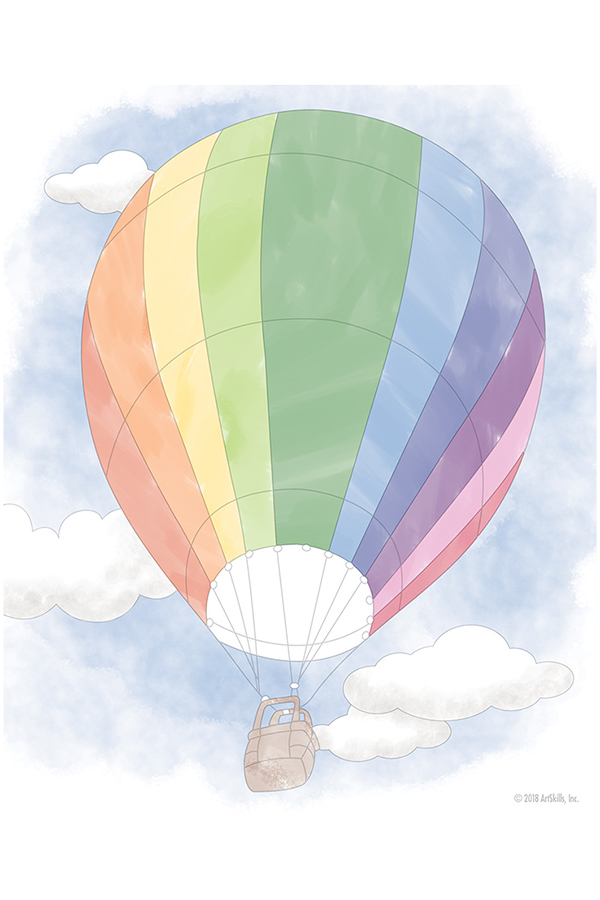
STEP 2:
Paint a light wash of each color of the rainbow into the stripes of the hot air balloon. Remember to use a lot of water on your brush so that the colors stay pale and transparent for this base layer. To allow colors to dry, try painting every other stripe first, and go back to fill in the missing ones when those you already painted are dry. Add a small amount of Gray to the bottoms of the clouds to start shading them.
STEP 3:
To start adding shadows to the sections of the balloon, apply more of the same color onto the edges of each section, creating darker areas that imply curves. Shadows fade towards the center of the shapes. Also add some Light Blue to the shadows in the clouds for more dimension. Paint Gray shadows inside the opening of the balloon, making sure your darkest shades are along the top edge, fading downward.
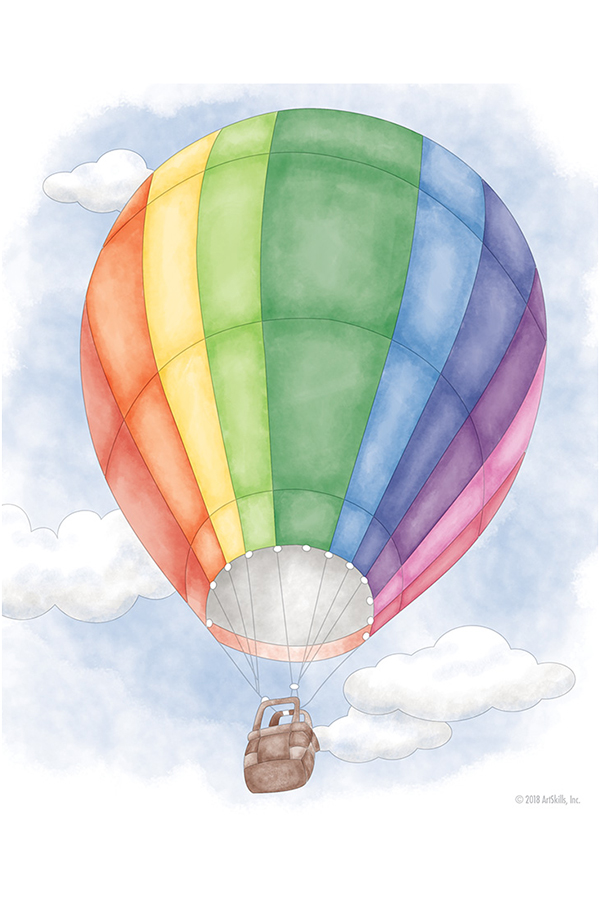
STEP 4:
Use a darker shade of each color to help create the illusion of curved panels in each section of the balloon (and the basket). Again, make sure your paint is darkest along the edges and gently spread your colors out towards the centers of the shapes. Add Blue to the inside portion of the balloon to give it depth.
STEP 5: Finalize Your Artwork
Let your painting dry, then use watered-down White paint to create highlights on the sections of the balloon. Referencing the image, add highlights to each area on the balloon and basket. Add more Blue to the sky behind the balloon to help it stand out from the background.
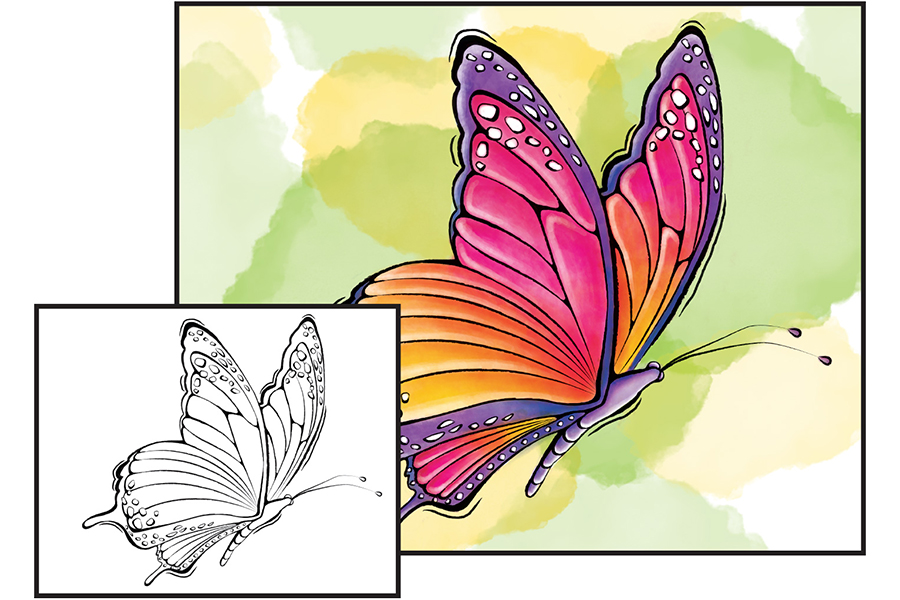
This printable project teaches you the tips and techniques behind the vibrant Watercolor medium, perfect for artists of any age! Follow the steps below to guide you through and you will quickly be on your way to creating this Beautiful Butterfly...
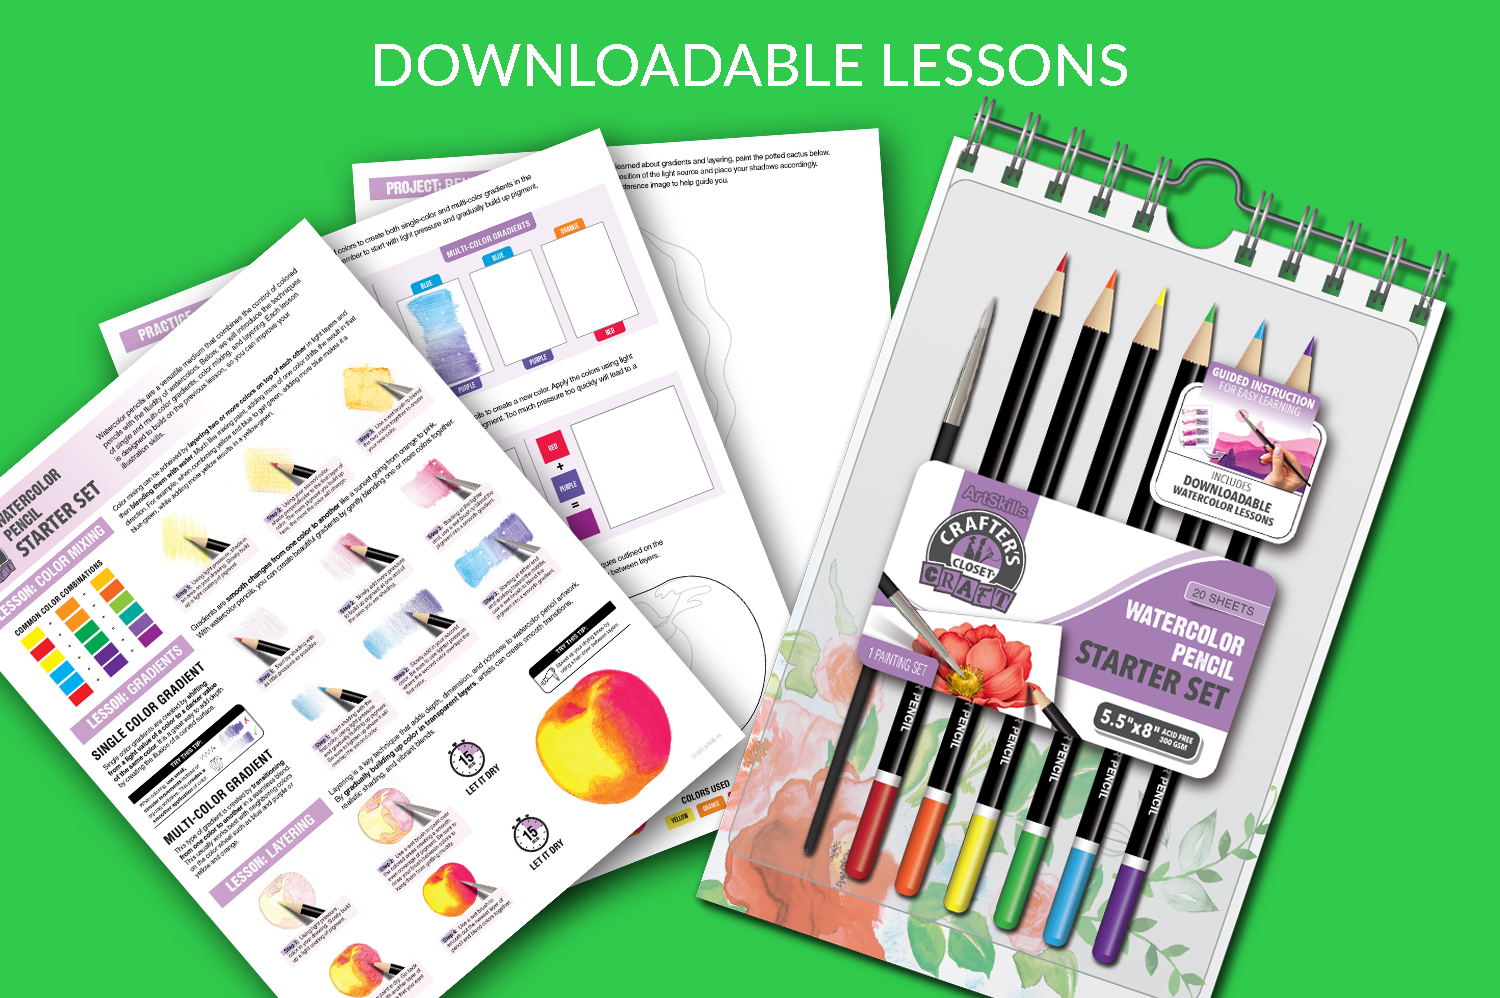
Ready to bring your drawings to life with color? This printable lesson plan teaches essential watercolor pencil techniques—perfect for artists of any level! Explore how to create smooth gradients, mix and layer colors, and master the art of blending with water. Download the guide and discover how to turn your pencil strokes into stunning ...