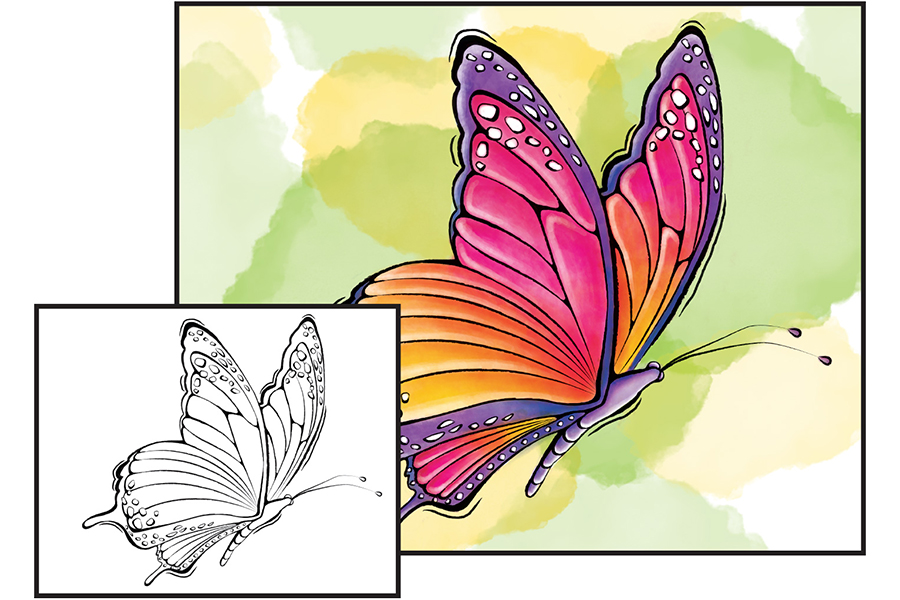
This printable project teaches you the tips and techniques behind the vibrant Watercolor medium, perfect for artists of any age! Follow the steps below to guide you through and you will quickly be on your way to creating this Beautiful Butterfly.
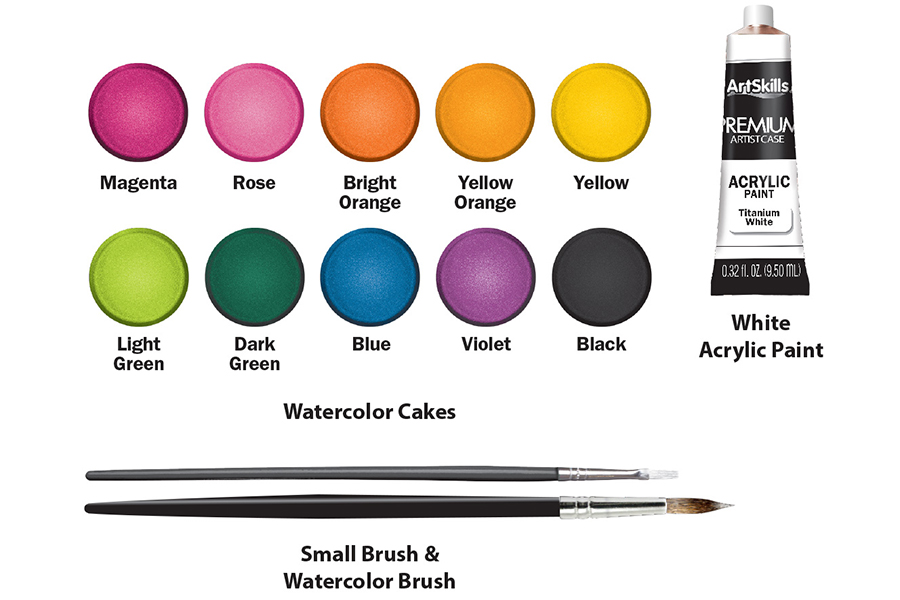
Supplies Needed
This project works best when using the materials shown below. These items can be found in the ArtSkills Premium Artist Case!
With watercolor paint, a color will always appear more intense (vibrant and darker) when it is wet. As it begins to dry the color will lose its intensity.
Test a Color First
Watercolor paint dries very fast. Therefore, it's best to test a color on a scrap piece of paper.
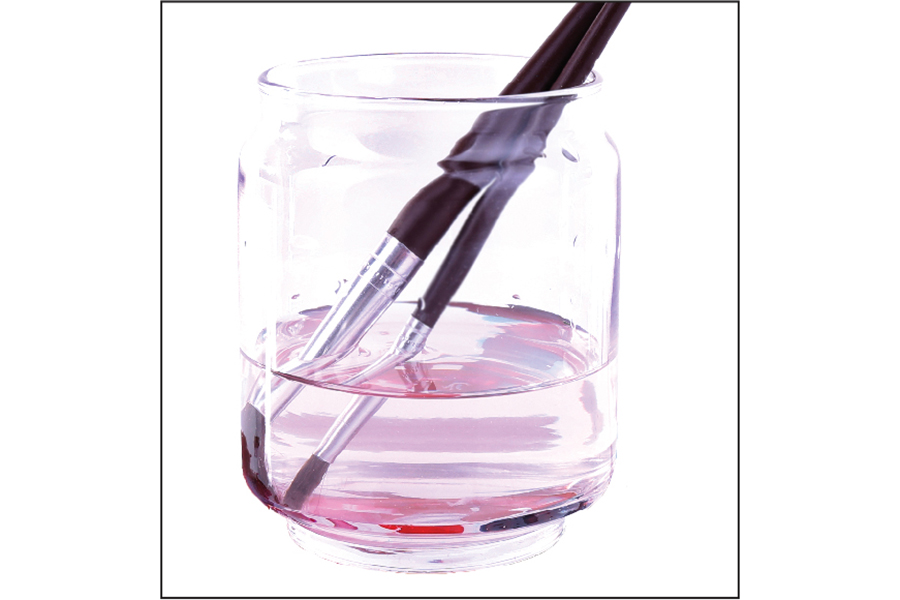
Keep Water Clean
To prevent colors from getting muddy, it is important to wash off your brush when switching colors. Periodically replace the water in your cup to help keep your colors clean and bright.
Let's Get Started!
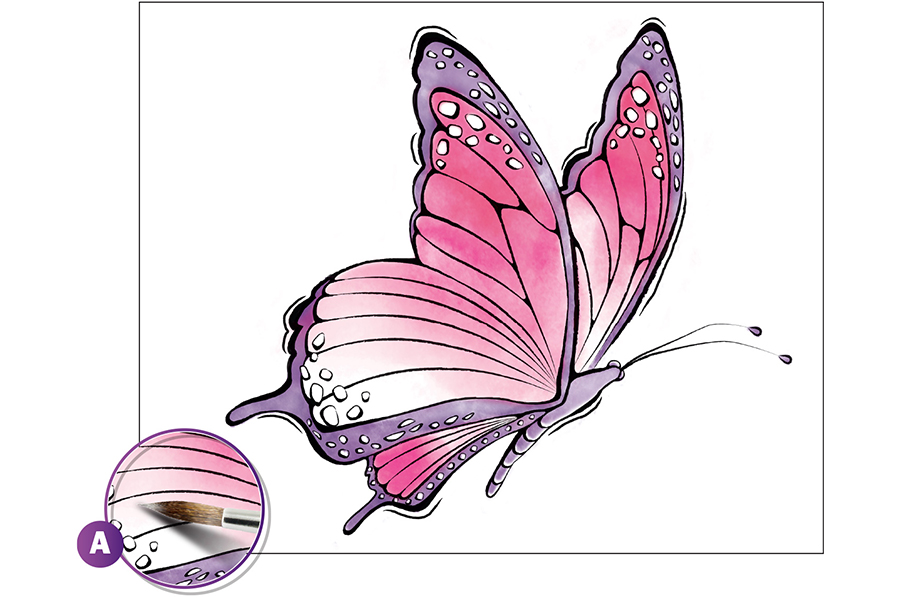
STEP 1: Lay Down Your Base
Use your Violet paint to fill in the body and outer wings of the butterfly. Avoid the white spots on the wings. Layer the paint more than once to achieve a darker color, if needed. After cleaning the Violet from your brush, use Magenta and start painting from the outer tips of the inside section of the wings down towards the center. Carefully fade this color out, and blend it into a light wash of Rose. Let the Rose fade out to white at the ends of the wings (see Ex. A).
STEP 2: Add More Color
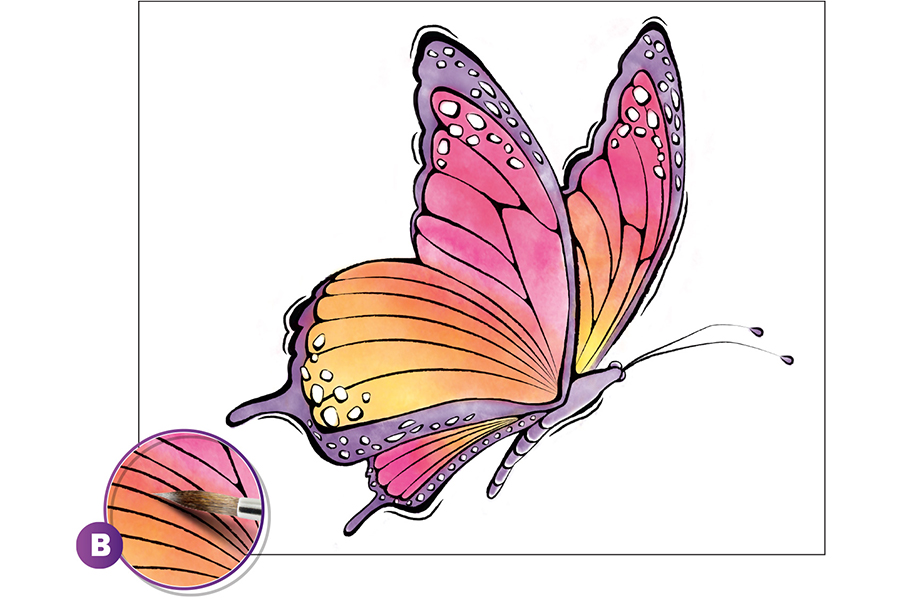
Next, wet the Rose edges you faded out in the previous step with a clean brush. Then use Yellow Orange and paint on top of the edge of the Rose. The wet paper will help the two colors blend together into a rich orange color (see Ex. B). Using the same technique as in Step 1, fade the Yellow Orange out to Yellow at the ends of the wings, still avoiding the white spots.
STEP 3: Deepen Your Shadows
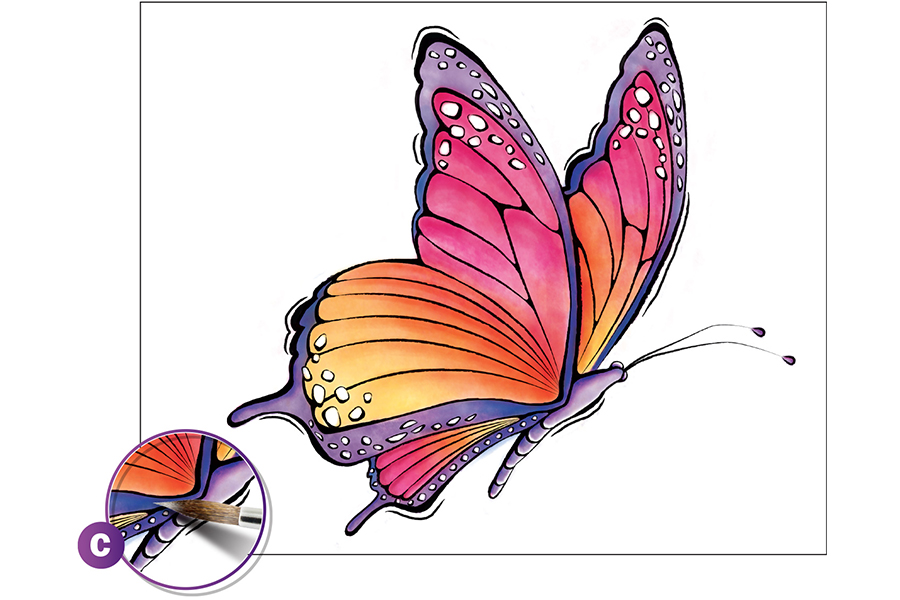
Start to add deeper shadows to your butterfly with new colors. Use a small amount of Blue on a wet brush to paint in subtle shades on the Violet body of the butterfly. Paint your Blue where the wings create shadows on each other and the body (see Ex. C). Paint Magenta along the edges of the Magenta sections of the wings, and Bright Orange along the Yellow Orange sections. Use water to blend these shades into the existing paint on the page.
STEP 4: Paint Your Background
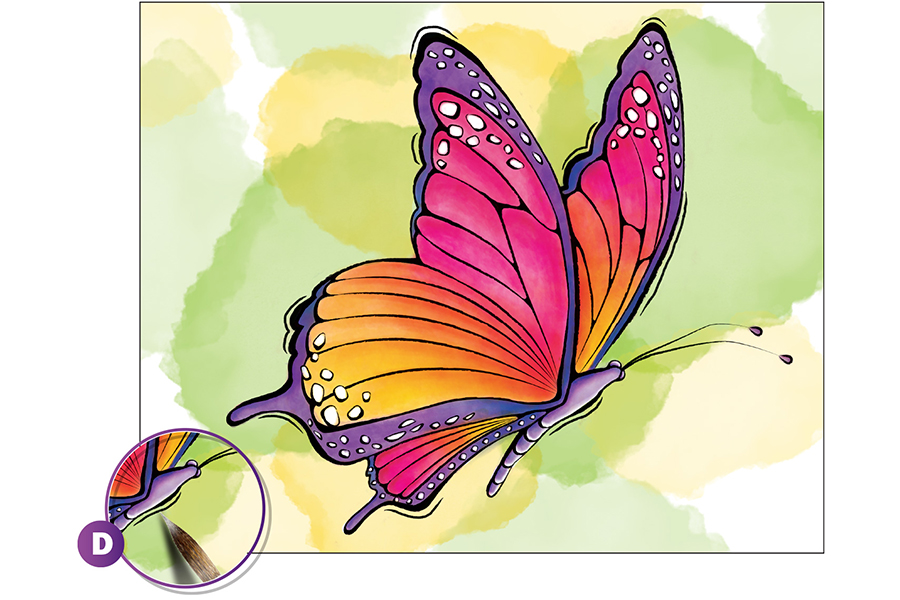
Paint a background behind your butterfly using various shades of greens and yellows. Make abstract, overlapping splashes of color around the butterfly to really pop it off the page (see Ex. D). Allow each layer to dry before overlapping the colors to keep them from bleeding into each other and becoming muddy.
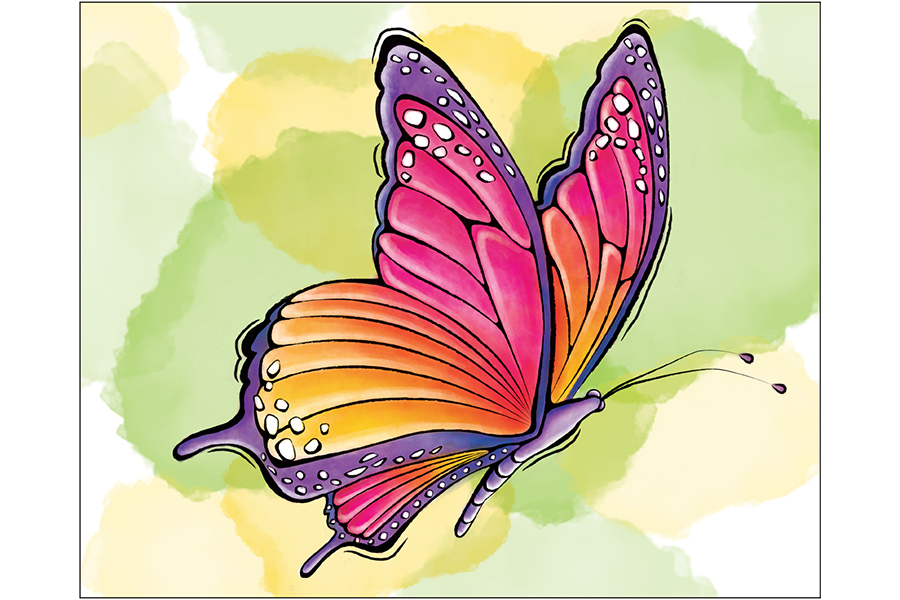
STEP 5: Finalize Your Artwork
Using Titanium White Acrylic Paint, take your smallest brush and carefully give subtle highlights to the small sections of the butterfly's wings. Try watering down your white paint a small amount to make it semi-transparent. This will allow the bright colors of the watercolor paint to show through.
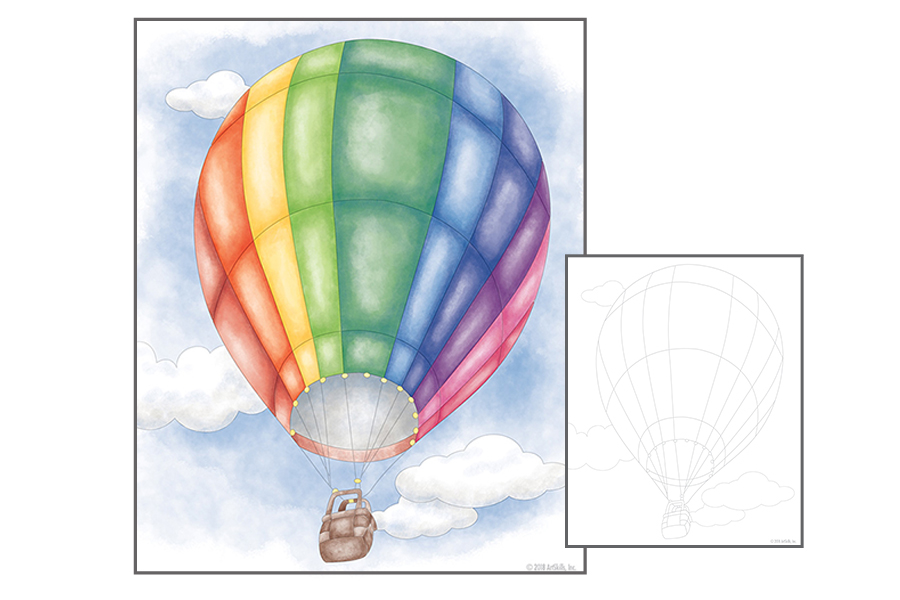
This printable project teaches you the tips and techniques behind the vibrant Watercolor medium, perfect for artists of any age! Follow the steps below to guide you through and you will quickly be on your way to creating this Beautiful Hot Air Balloon...
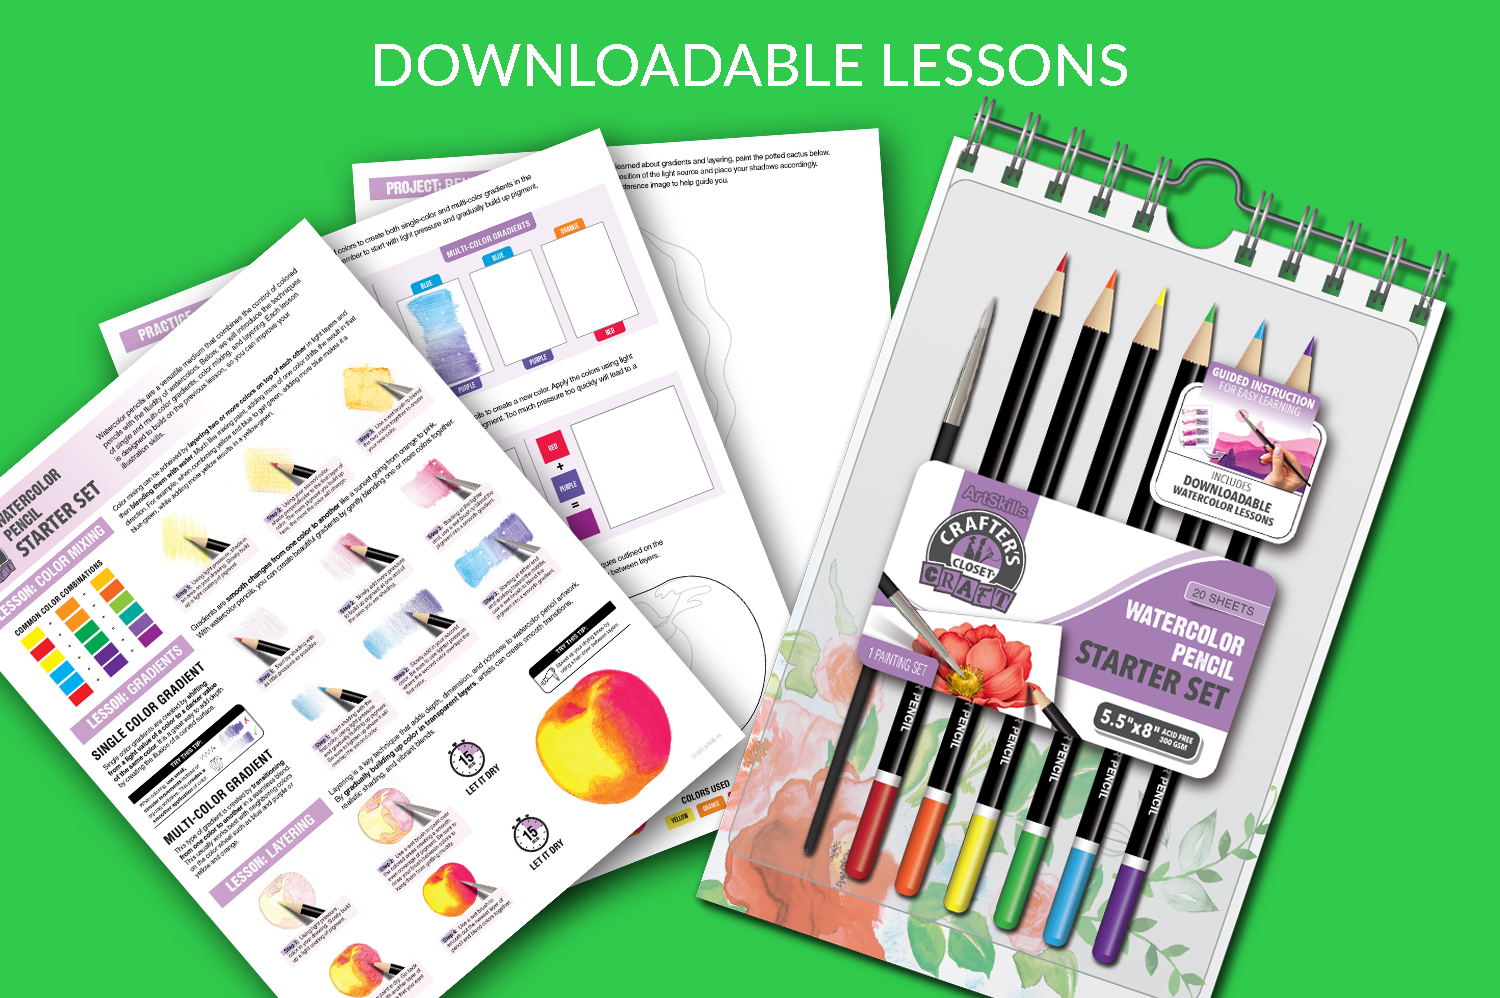
Ready to bring your drawings to life with color? This printable lesson plan teaches essential watercolor pencil techniques—perfect for artists of any level! Explore how to create smooth gradients, mix and layer colors, and master the art of blending with water. Download the guide and discover how to turn your pencil strokes into stunning ...