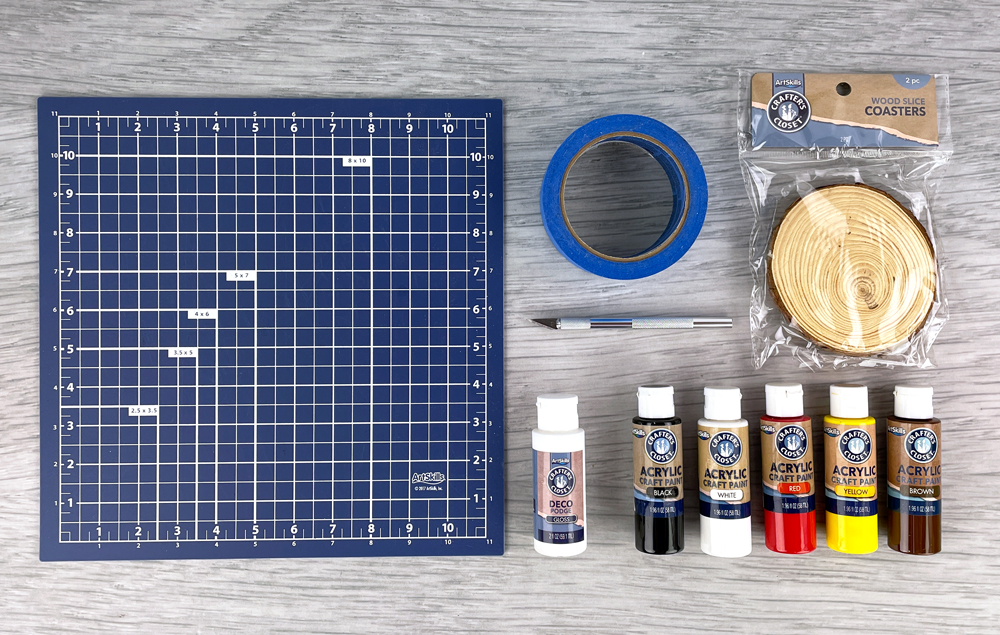
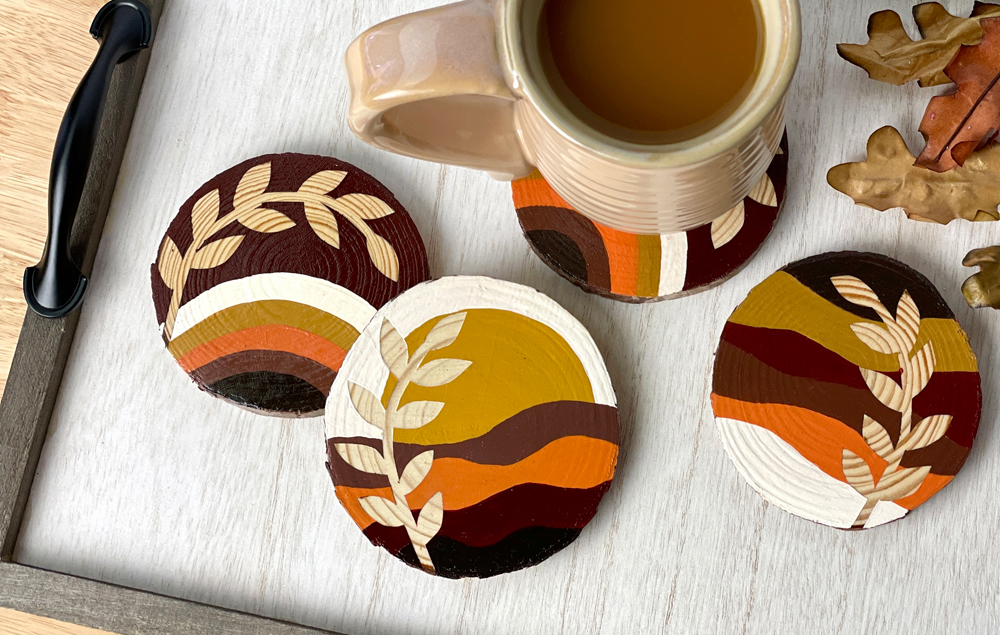
Create beautiful painted wood slice coasters inspired by the vibrant hues of fall! A fun stencil painting technique is used to reveal the wood grain underneath.
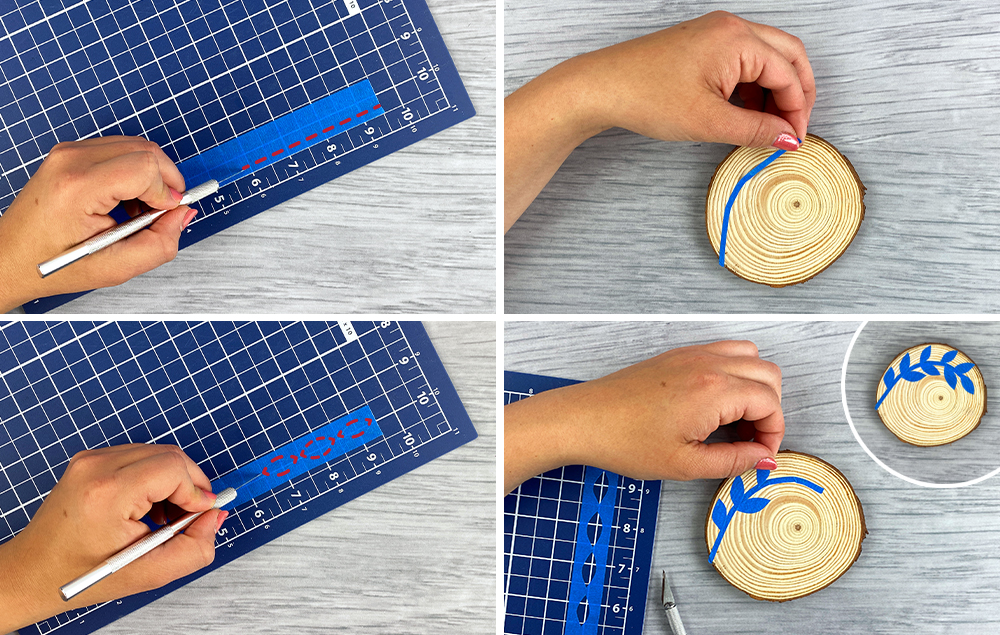
B) Adhere it to the wood slice, creating an arched stem along the top. Tip: Use your fingernail to rub the tape on the wood and make a secure seal along the edges of the tape.
C) Cut out small leaf shapes from the painter’s tape.
D) Adhere the leaves to the wood slice along the stem.
STEP 2:
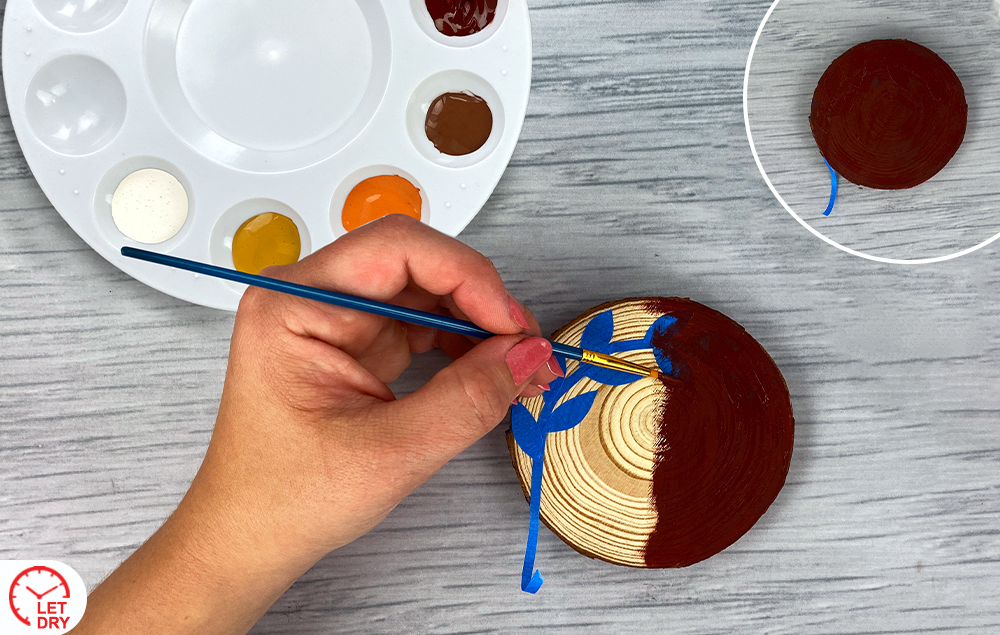
A) Paint the first color over the whole wood slice, covering the taped area. Let dry.
STEP 3:
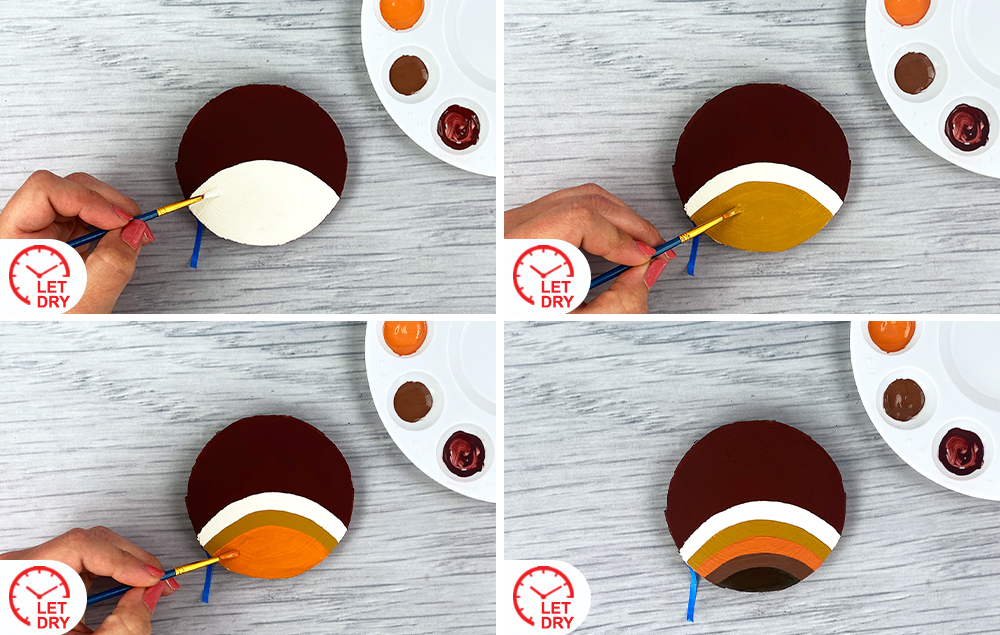
A) Paint the second color on the bottom of the wood slice. Create an arch underneath the stem and leaves. Let dry.
B) Paint the third color on top of the color from Step 3A. Create a stripe like you would see on a rainbow. Let dry.
C) Paint the next color on top of the color from Step 3B, also making a stripe. Let dry.
D) Continue painting stripes until you are happy with the arches. Let dry.
STEP 4:
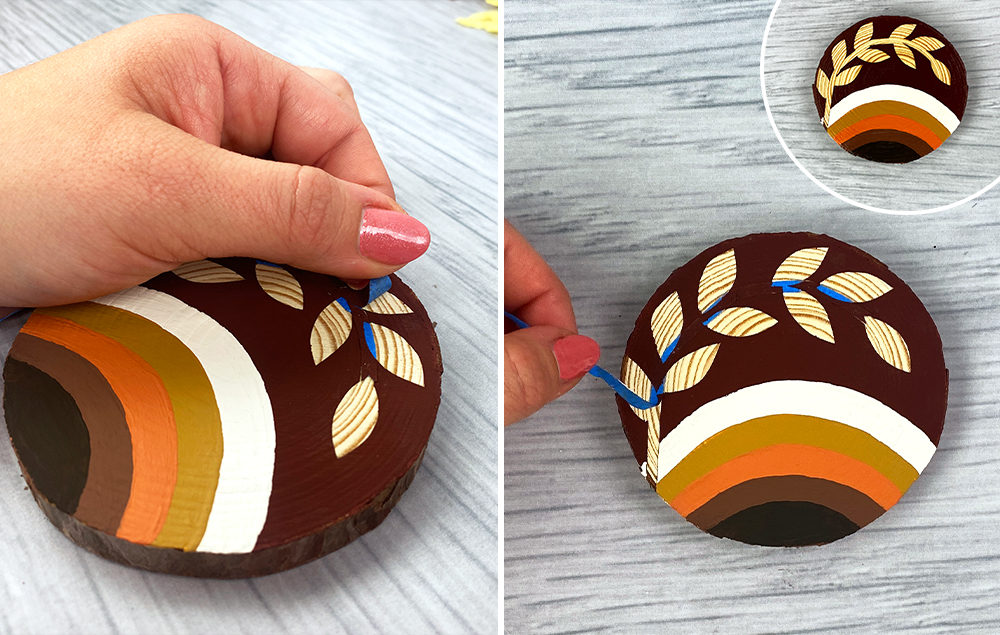
A) Carefully peel off the tape leaves.
B) Carefully peel off the tape stem.
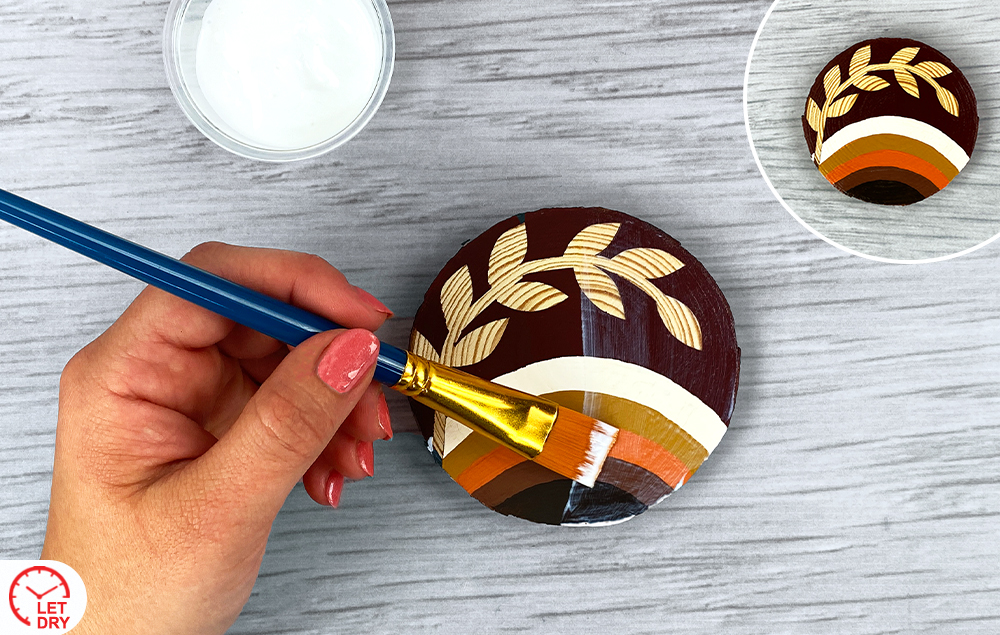
STEP 5:
A) Apply a coat of deco podge to seal the coaster. Let dry.
Transform a simple glass jar into an enchanting centerpiece with this DIY craft. Adorned with intricately arranged jute in a stunning diamond pattern, this rustic-inspired jar adds a touch of warmth and elegance to any space...
Create a charming, homespun citrus garland to decorate a tablescape, mantle, or window this holiday season. Make the garland as short or long as you’d like using this easy DIY technique...