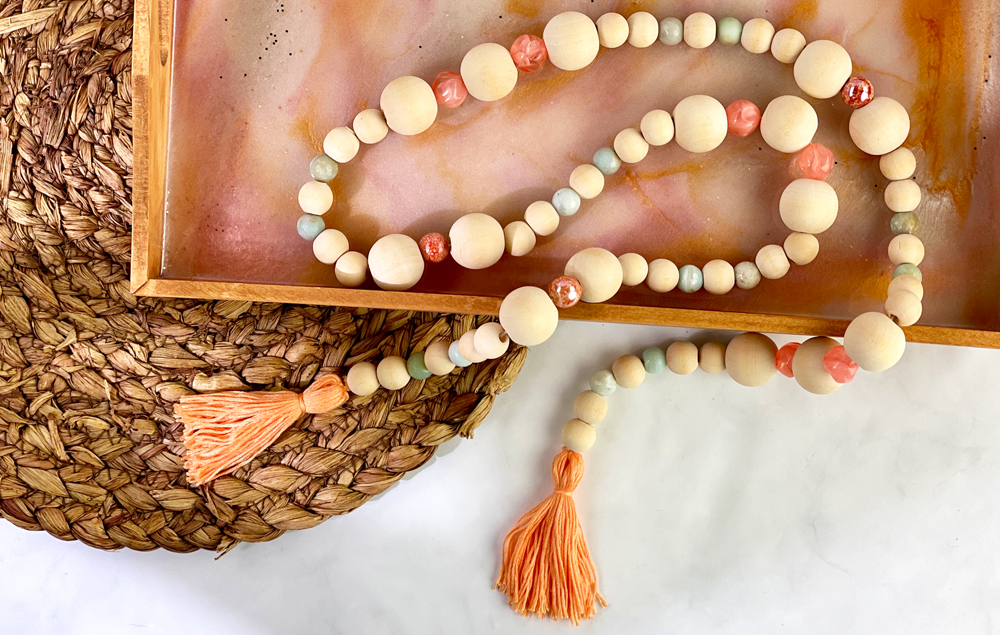
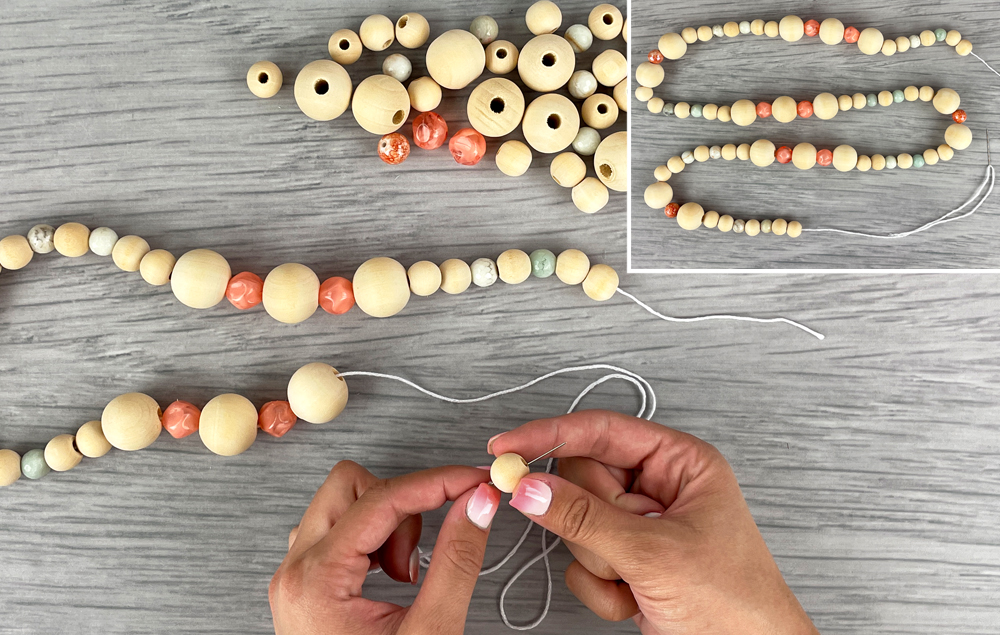
This DIY natural wood bead garland is a perfect finishing decor piece for your home! Add accent beads and tassels in your favorite colors to complement your summer decor.
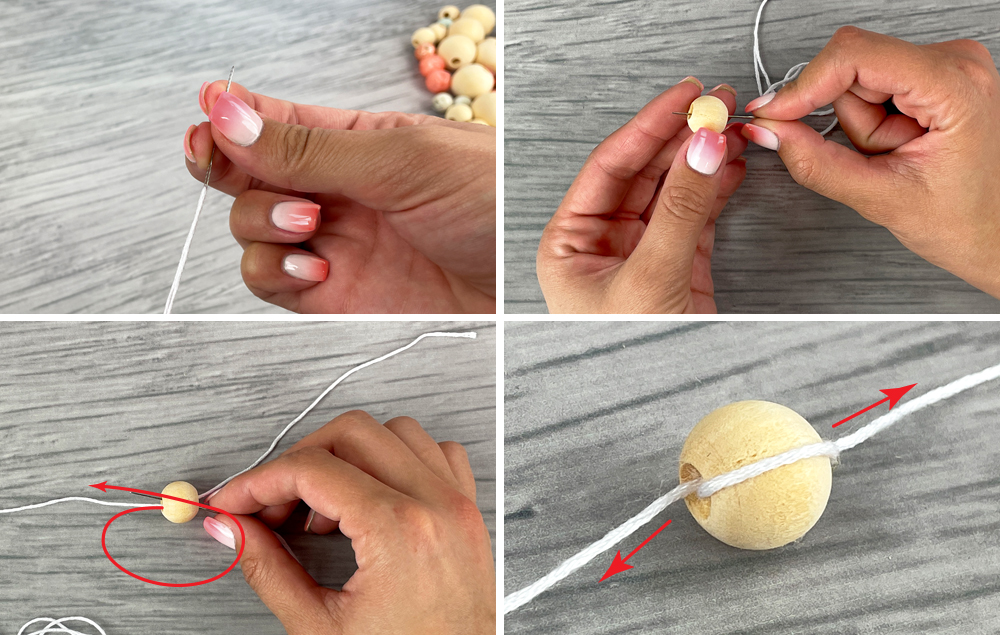
A) Thread a needle with embroidery floss. Make sure the floss is long enough to string through the bead pattern that you would like to make, with a little extra on each end.
B) Insert the needle through the first bead. Slide the bead along the embroidery floss until you almost reach the other end. Leave a few inches at the end.
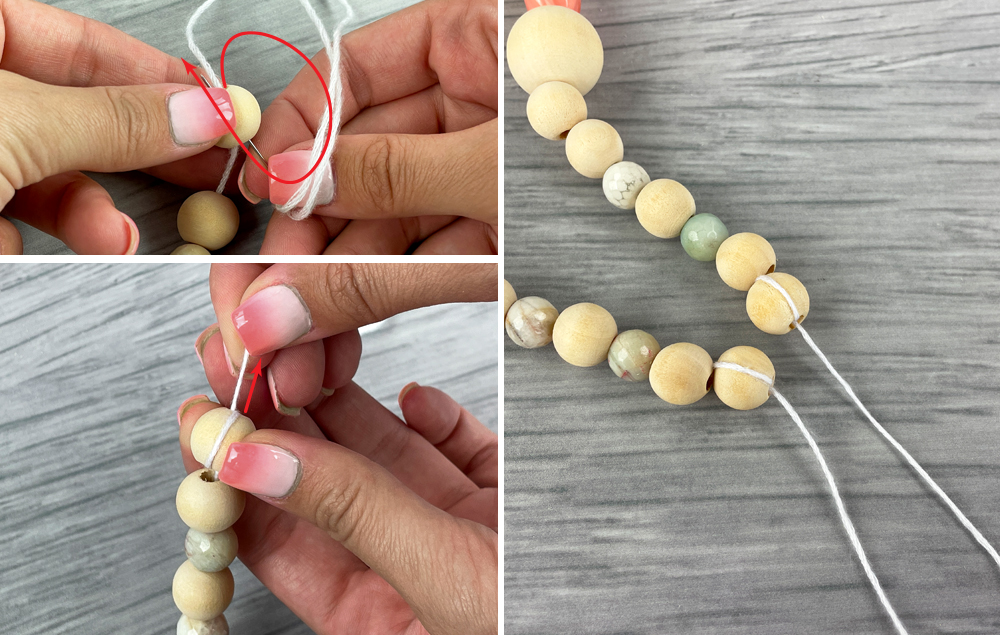
C) Insert the needle through the bead again and pull the embroidery floss all the way through to create a loop around the bead.
D) Gently pull on the floss to lock the bead in place.
STEP 3:
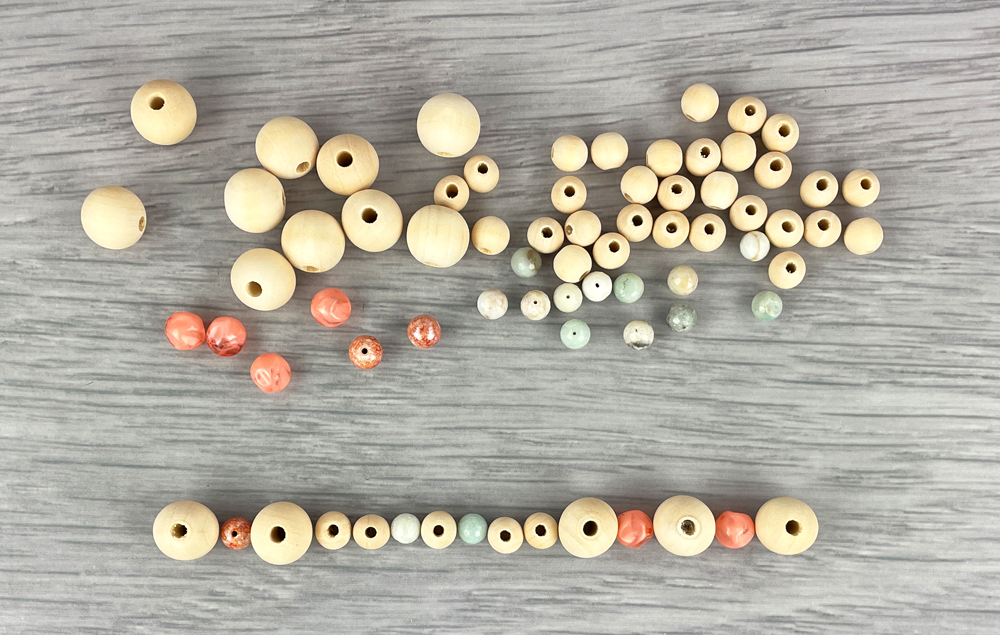
A) String your bead pattern onto the embroidery floss.
STEP 4:
A) When you’ve reached the last bead, insert the needle through it a second time and pull the embroidery floss all the way through to create a loop around the bead.
B) Pull on the embroidery floss to lock the bead in place.
C) You will now have your completed pattern with the end beads locked in place.
STEP 5:
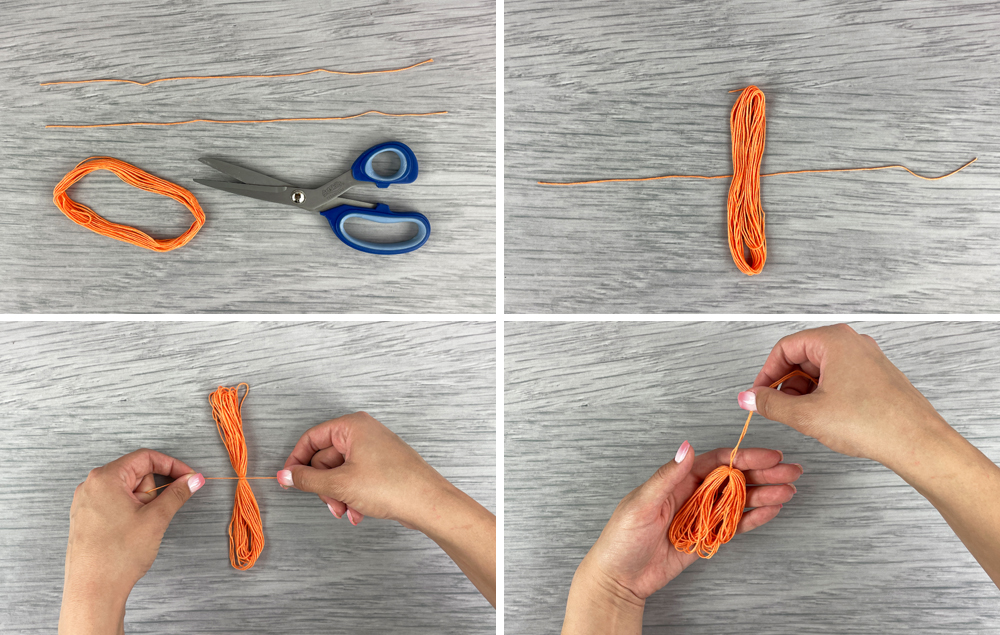
A) Choose an embroidery floss skein color to make a tassel. Carefully cut two 10" strings from the skein.
B) Lay the skein over one of the strings. Make sure the skein and the string are centered.
C) Tie the string around the center of the skein and knot it in place.
D) Fold the skein in half to create a tassel shape.
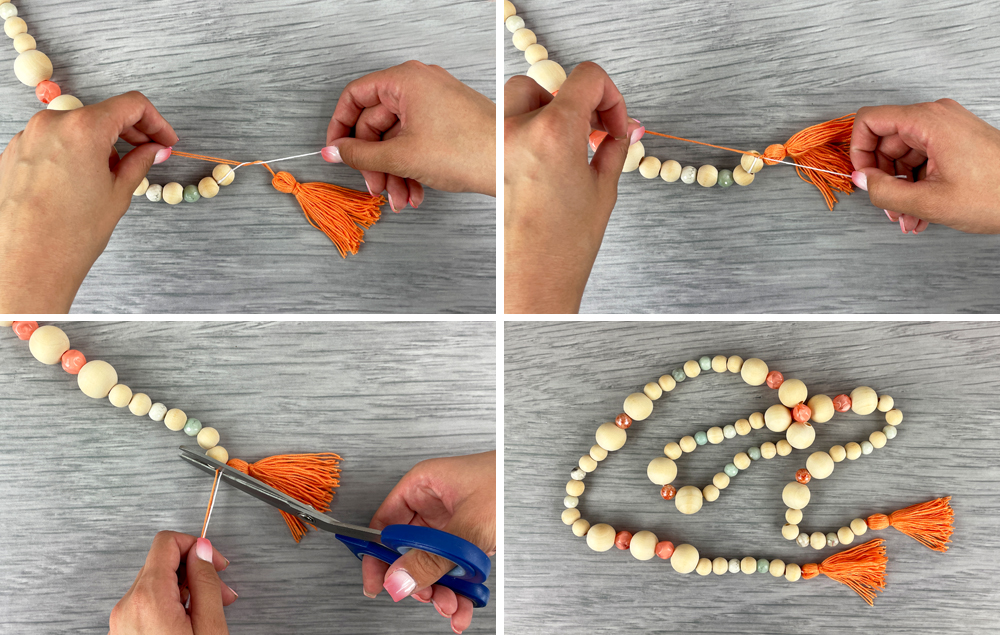
STEP 6:
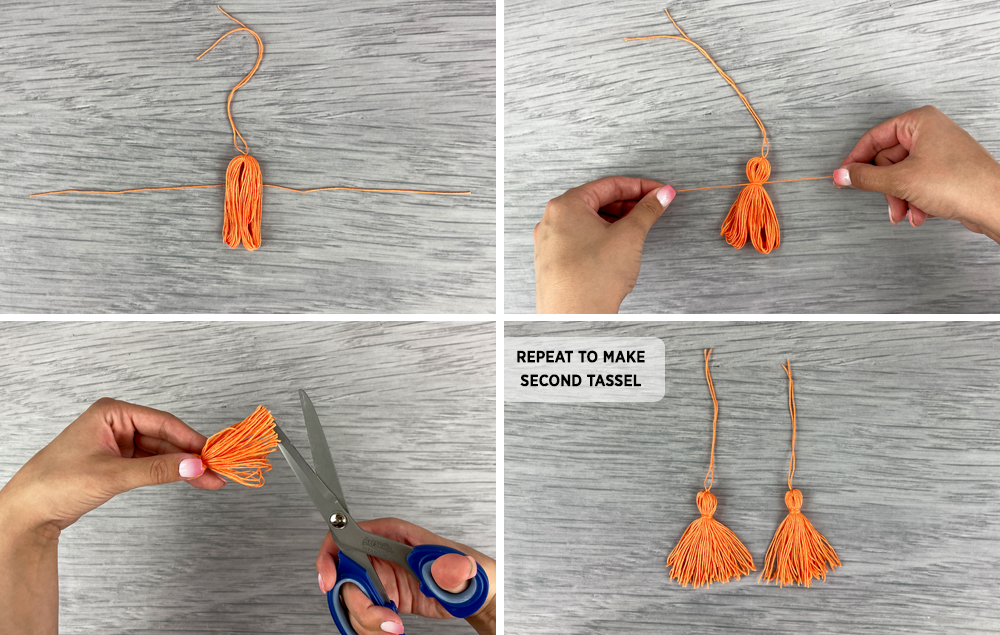
A) Lay the tassel over the second string. Leave about ¾" above the string.
B) Tie the string around the tassel and knot it in place.
C) Cut open the loops at the bottom of the tassel.
D) Repeat the process to make a second tassel for the other end of the garland.
STEP 7:
A) Attach a tassel to one end of the garland by tying the excess string at the end of the garland to the string at the top of the tassel.
B) Pull tight to secure the tassel close to the garland and knot it in place.
C) Trim off the extra strings.
D) Repeat Steps 5 through 7 to attach the second tassel to the other end of the garland.
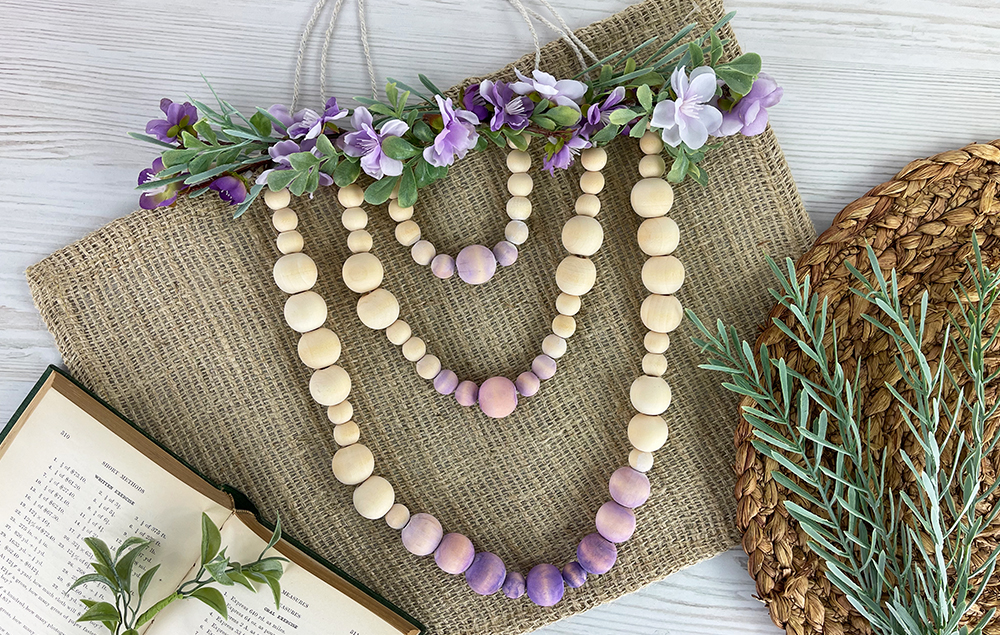
Add a natural, floral touch to your home decor with this beaded wall hanging! Macrame cord and wooden beads combine with artificial flowers for a springtime vibe. A subtle ombre effect adds the final touch...
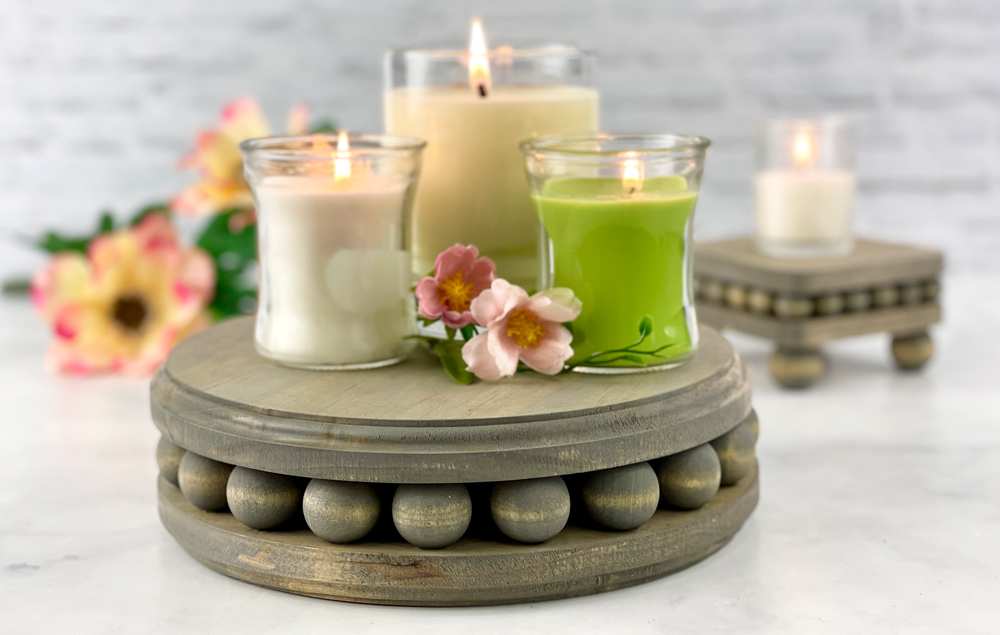
This beautiful DIY wood riser is so simple, but it makes quite an impact! The size is customizable, so you can follow this tutorial to create a wood bead riser suitable to your home decor needs...
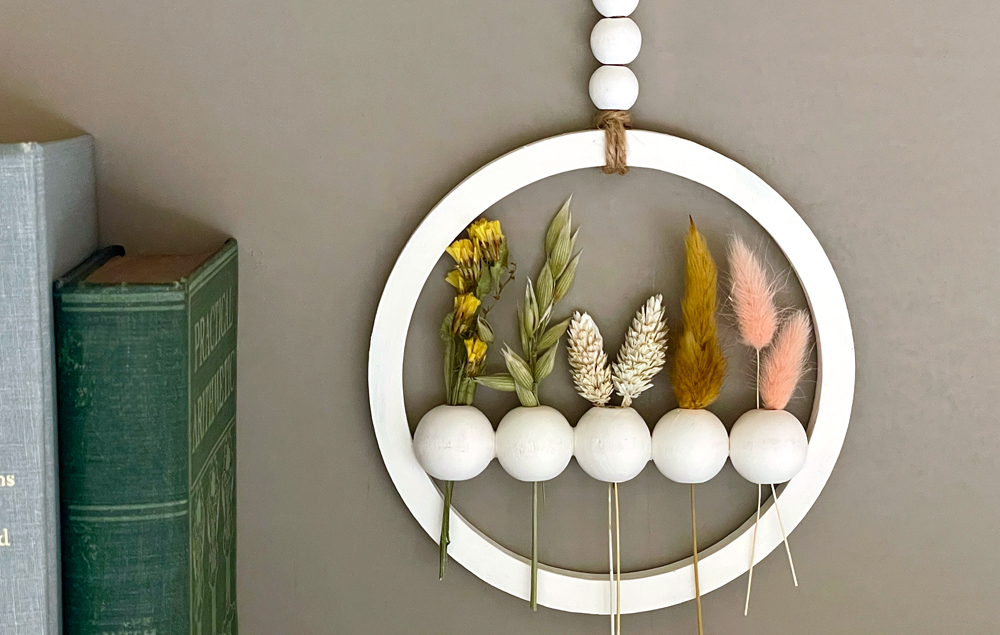
Create a trendy boho floral wreath for your home! Dried summer flowers bring the outside in. The small size is adorable, but you can use the technique to make a larger statement wreath as well...