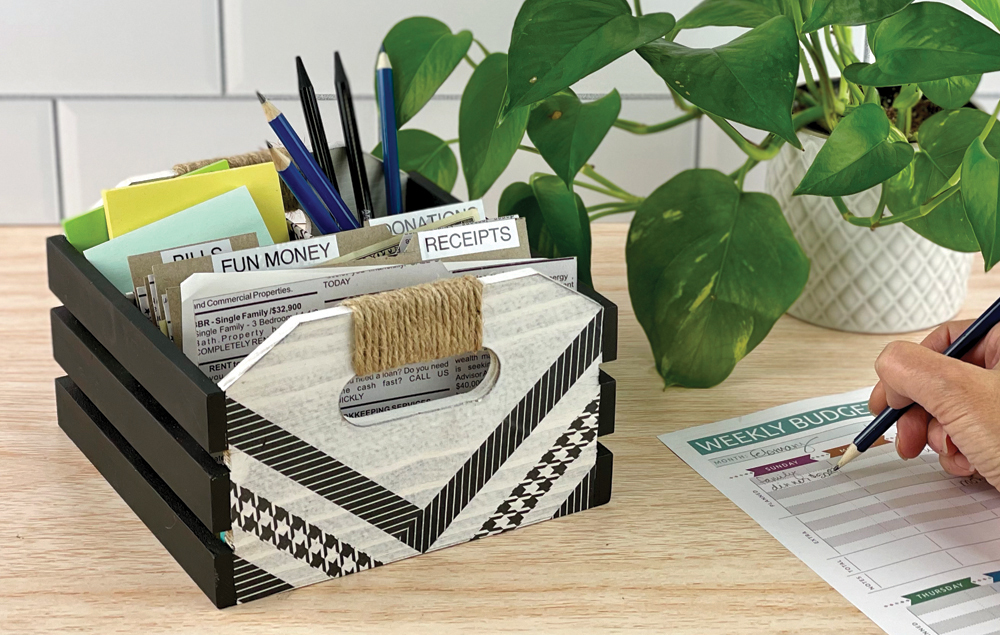
DIY Budget Filing System
January 1, 2022

Create a stylish DIY organizational system to file receipts, hold note paper and pencils, and keep your area neat and tidy! 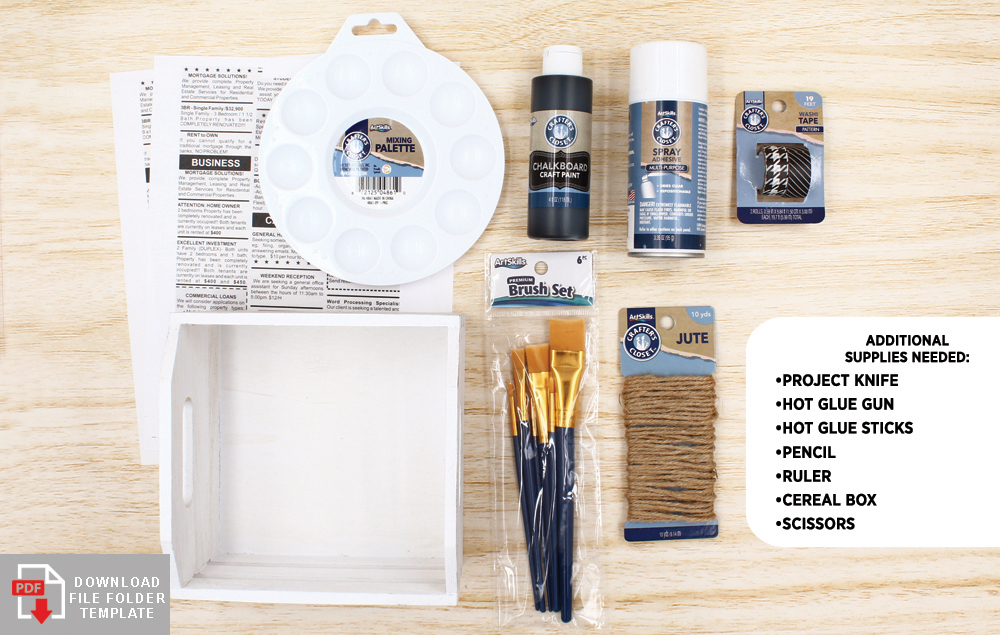

What You'll Need:
- Crafter’s Closet White Wash Crate
- Crafter’s Closet Pattern Washi Tape
- Crafter’s Closet Project Knife
- Crafter’s Closet Jute
- Crafter’s Closet Chalkboard Black Craft Paint
- Crafter’s Closet Hot Glue Gun
- Crafter’s Closet Hot Glue Sticks
- Crafter's Closet Multi-Purpose Spray Adhesive
- Paint Brush
- Scissors
- Pencil
- Cereal Box
Let's Get Started
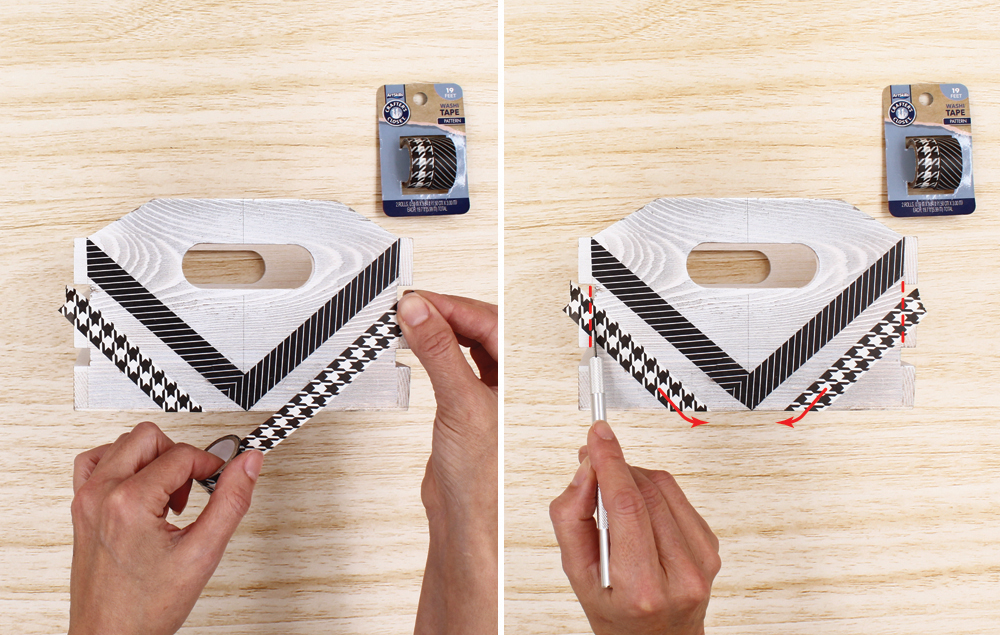
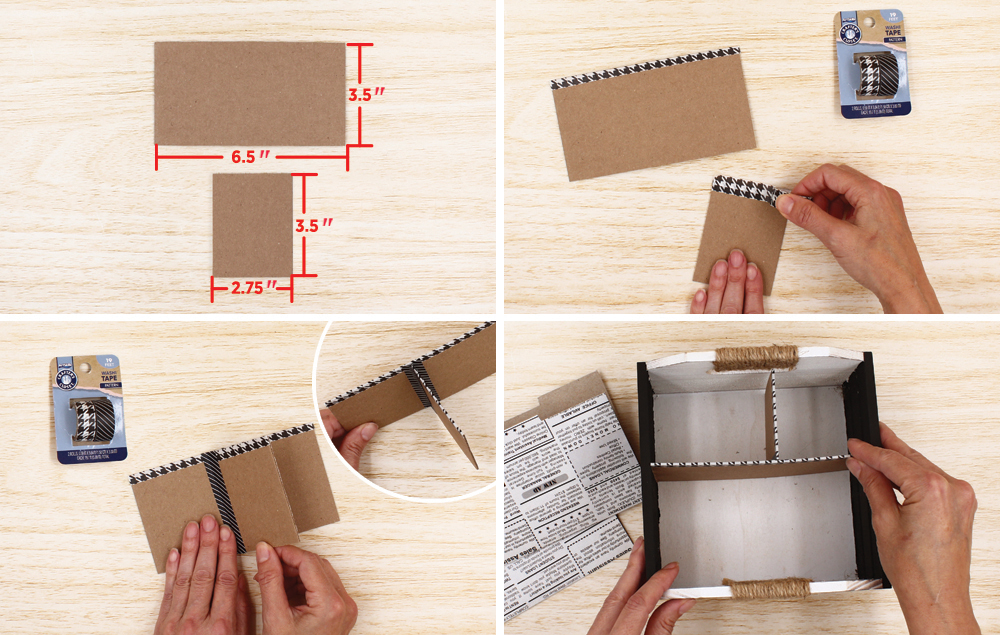
STEP 1:
A) Measure the side of the box to find the center. Lightly draw a line with a pencil.
B) Adhere a strip of washi tape at an angle from the top corner to the center line. Tip: Extend the washi tape past the bottom of the box.
C) Adhere a second piece of washi tape to mirror the first piece.
D) Use a craft knife to trim the bottom ends of the washi tape into a point. Trim the sides to be even with the box.
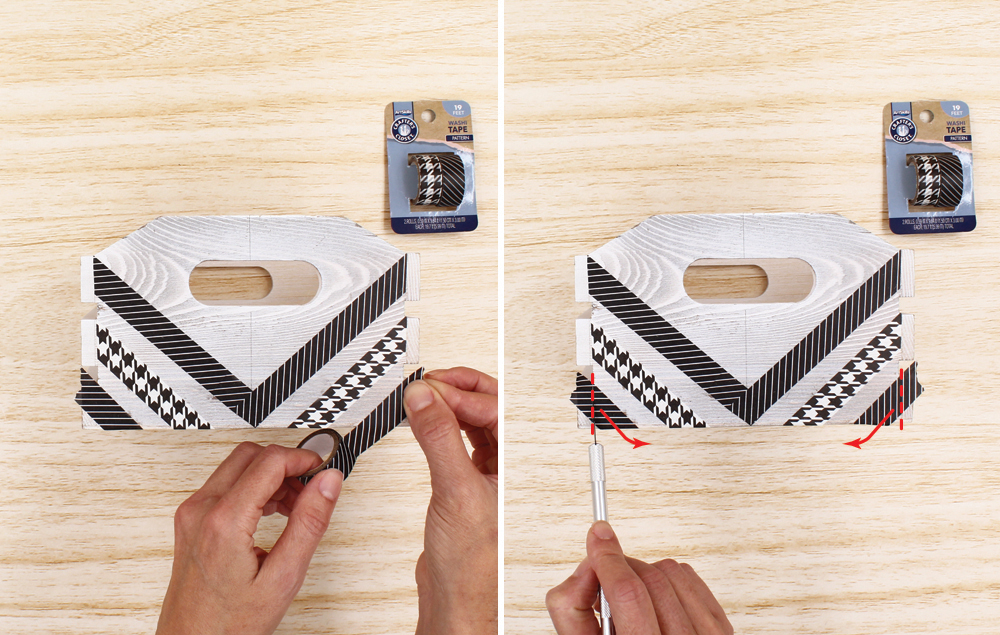
STEP 2:
A) Adhere a second pattern of washi tape in the middle of the box using the method from Step 1.
B) Use a craft knife to trim the washi tape. It should be even with the sides of the box. Fold the excess washi tape under the bottom of the box.
STEP 3:
A) Return to the original washi tape pattern and add a third stripe on each bottom corner of the box.
B) Use a craft knife to trim the washi tape. It should be even with the sides of the box. Fold the excess washi tape under the bottom of the box.
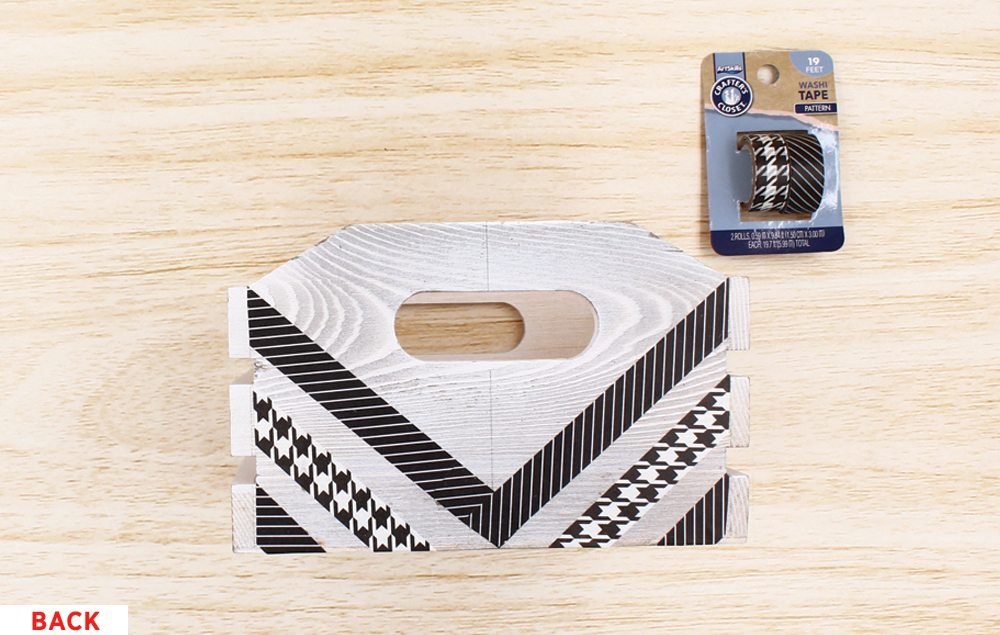
STEP 4:
A) Repeat the above steps to add washi tape to the other side of the box.
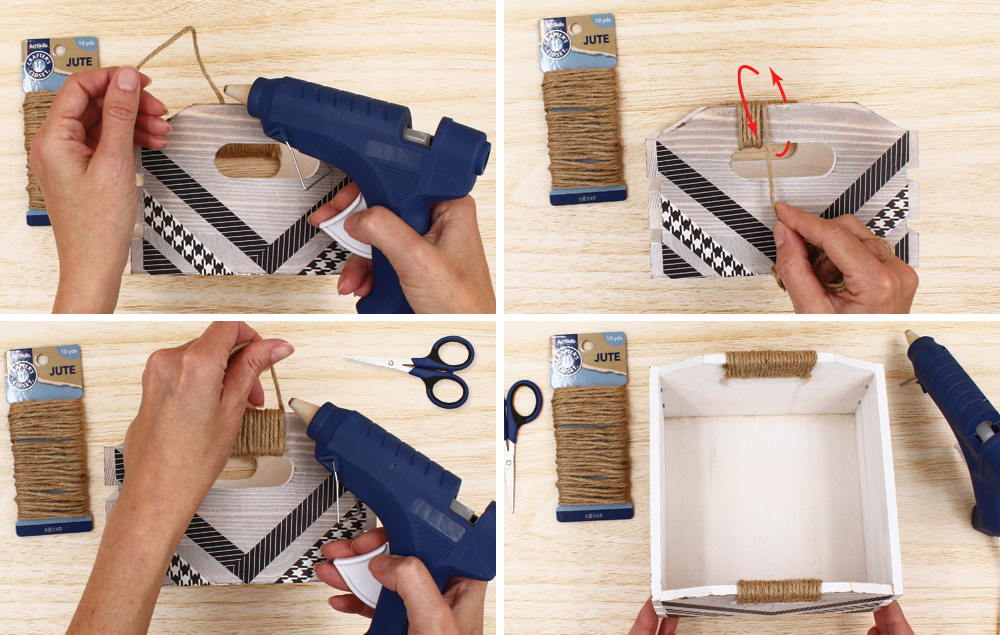
STEP 5:
A) Hot glue jute to the inside of the handle.
B) Wrap the jute around the handle until it’s covered.
C) Cut the jute and glue the end inside the box.
D) Repeat steps to wrap the other handle of the box.
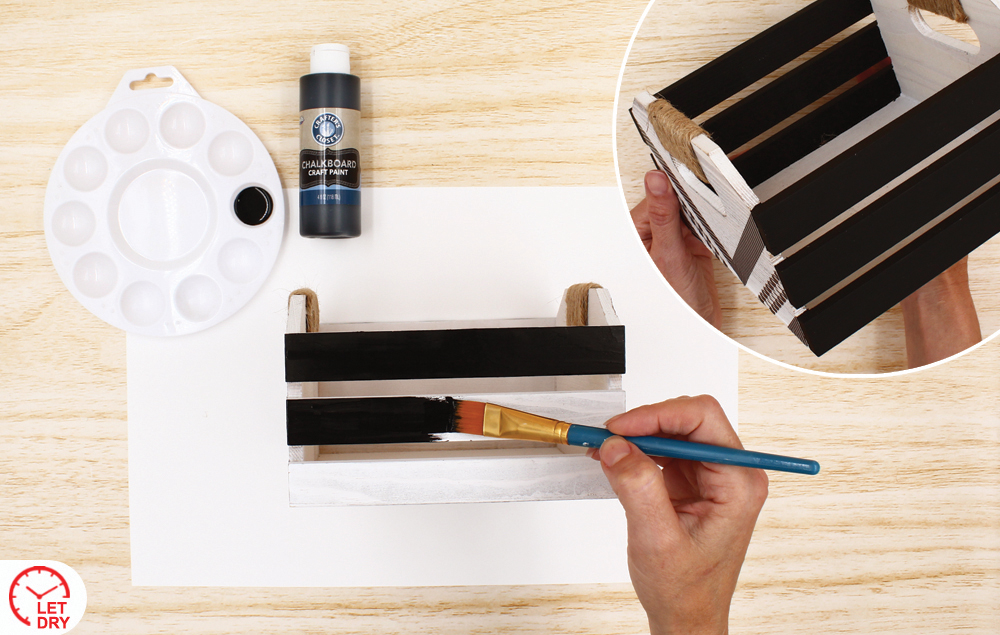
STEP 6:
A) Paint the front and back of the box with black chalkboard paint. Let dry.
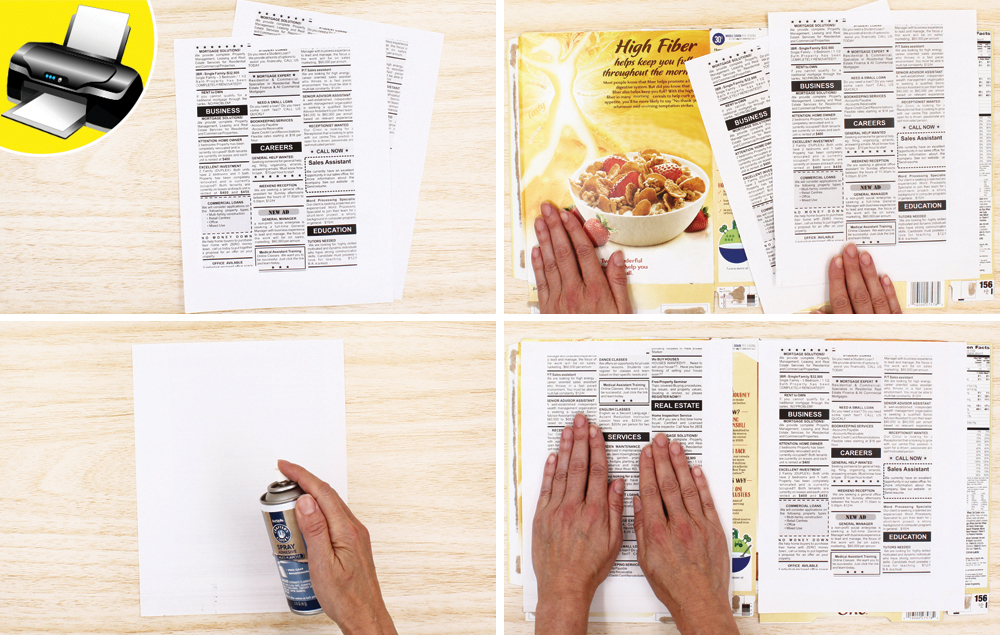
STEP 7:
A) Print two of the folder templates.
B) Cut open a cereal box and lay it flat. Make sure the templates fit on the front and back panels of the box.
C) Apply spray adhesive to the back of the templates.
D) Lay the templates, adhesive side down, on the printed side of the cereal box. Rub to secure.
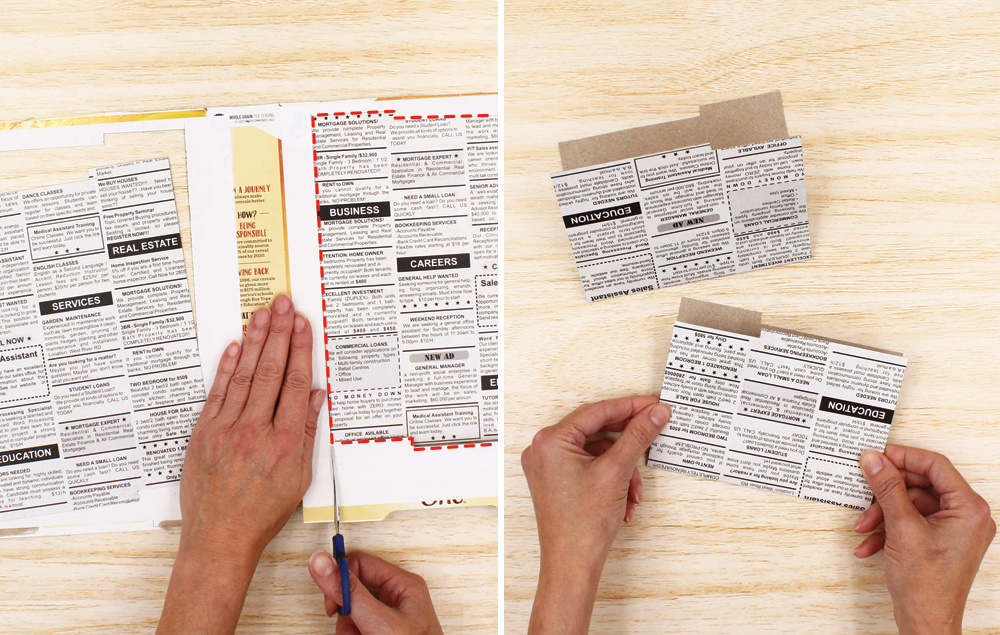
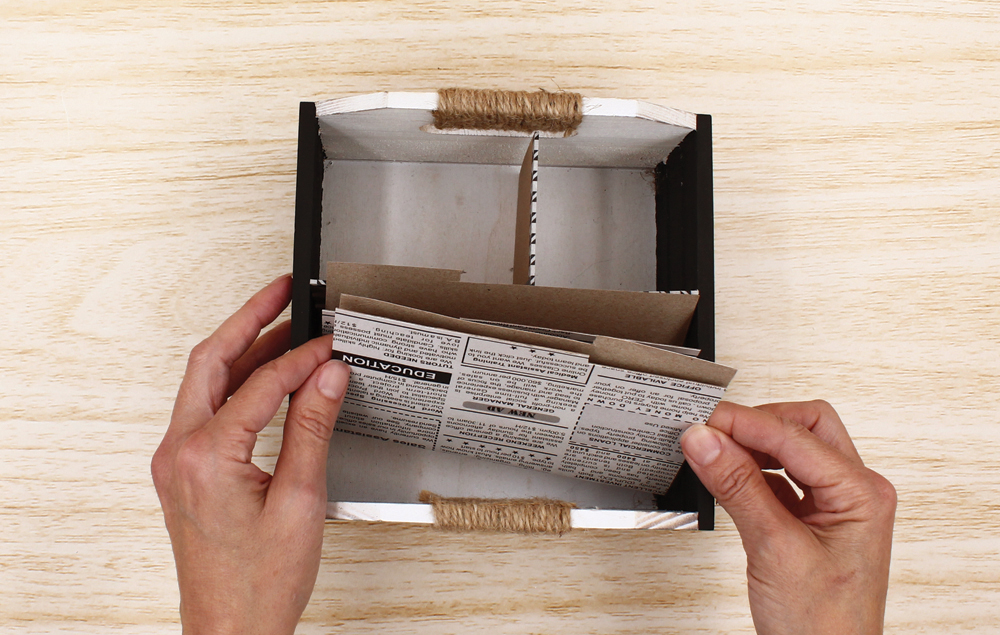
STEP 8:
A) Cut out folders with a project knife or scissors.
B) Fold the folders in half.
STEP 9:
A) Use another cereal box to cut out the divider pieces.
B) Fold washi tape over the top of the dividers.
C) Use washi tape to attach the small divider to the large divider.
D) Place the divider in the box.
STEP 10:
A) Place the folders in the box.
Related Posts

Stay organized and stylish with a few simple supplies! Natural jute and cord materials are accented with a pop of color on the fun tassel. This cute basket would look great in the kitchen, bathroom, or office...
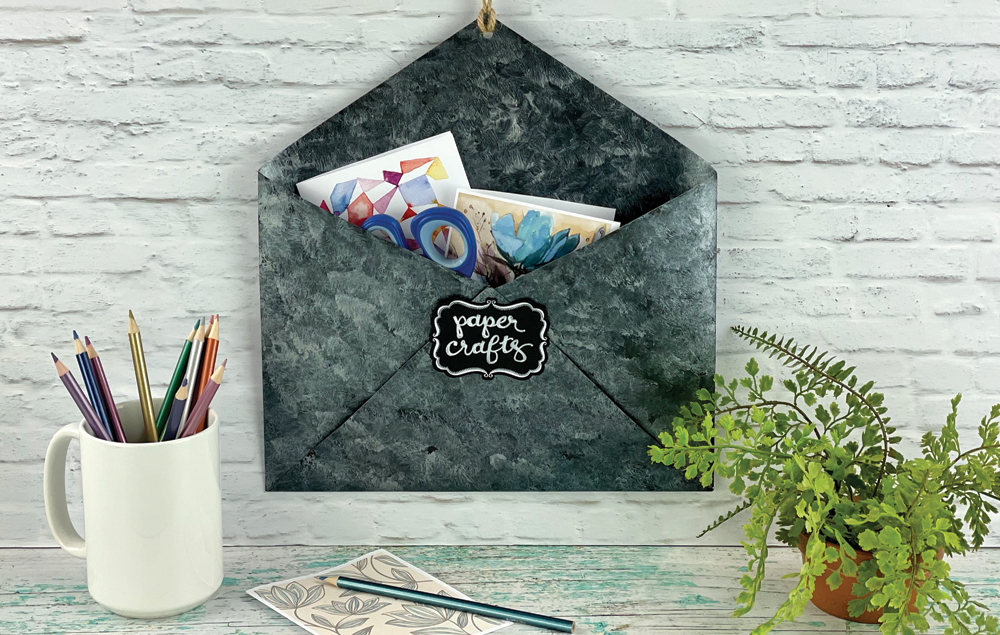
Craft a realistic faux metal envelope using poster board and paint! Easily slip mail, bills, or other important papers into this stylish open envelope. Stay organized with this pretty piece of home décor...
Related Products
Categories


