Snowman Chocolate Bark
October 13, 2023

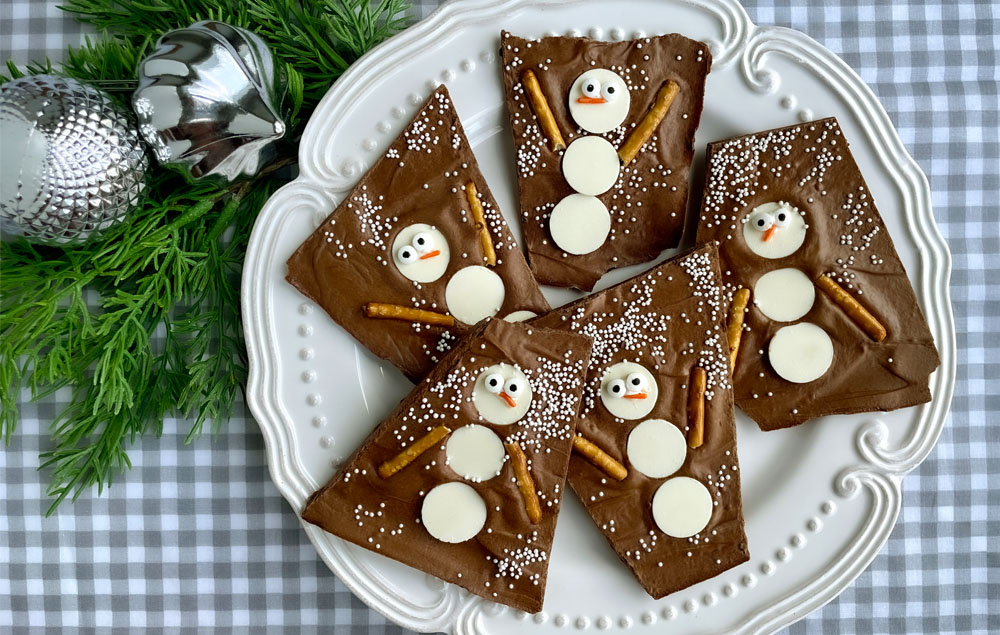
Snowman Chocolate Bark is a fun, easy-to-make seasonal delight! It’s the perfect recipe to involve the kids. Loved ones won’t be able to resist these cute treats!
What You'll Need:
- Baked with Love Light Cocoa Melting Wafers
- Baked with Love White Chocolate Melting Wafers
- Baked with Love Angled Spatula
- Baked with Love Mini Candy Eyes
- Parchment Paper
- Crafter’s Closet Fabric Scissors
- Pretzel Sticks
- White Nonpareils
- Rainbow Sprinkles
- Small Plastic Bag
- Baking Sheet
- Spoon
- Knife
Let's Get Started
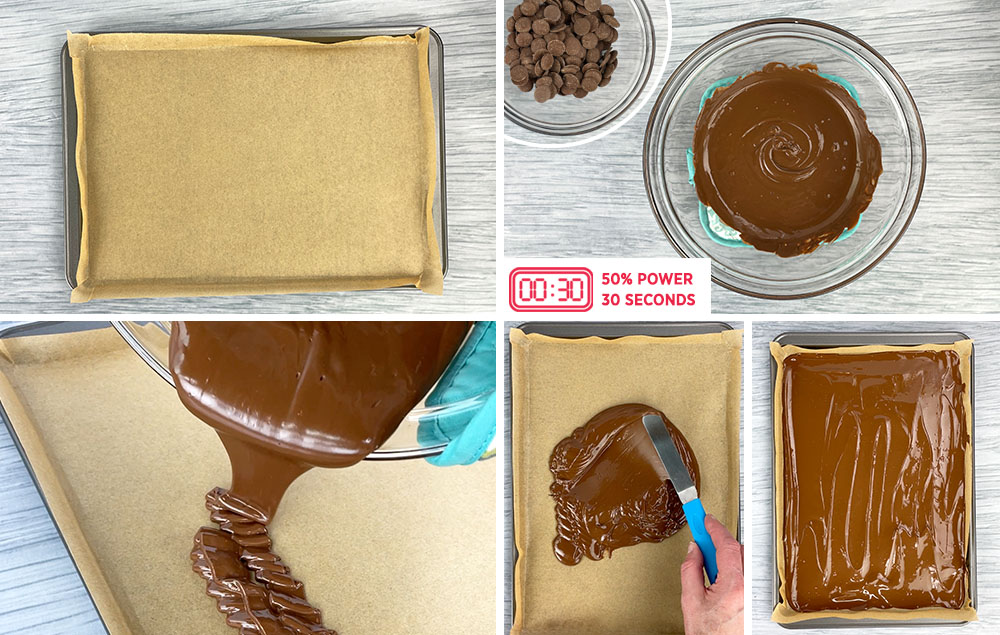
STEP 1:
A) Place a sheet of parchment paper on a baking tray.
B) Follow the directions on the package to melt the chocolate melting wafers.
C) Pour the melted chocolate onto the pan.
D) Use a spatula to evenly spread the melted chocolate.
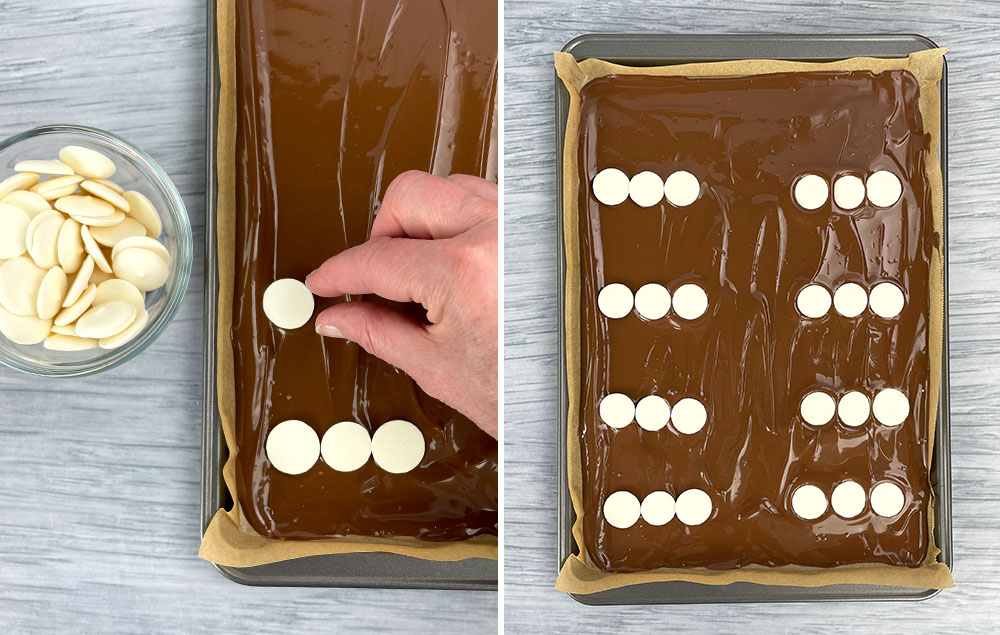
STEP 2:
A) Place groups of three white melting wafers into the melted chocolate to create snowman bodies. Be sure to leave space between each snowman.
B) Fit as many snowmen as you can, with enough space between them for their arms.
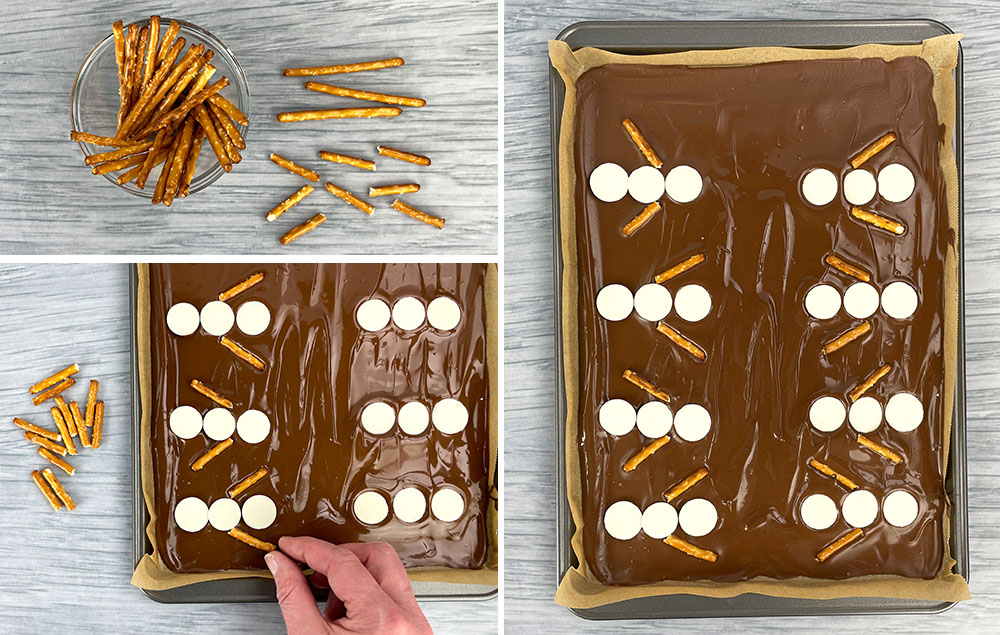
STEP 3:
A) Break pretzel sticks in half.
B) Place a pretzel stick piece on each side of the snowman’s body to create arms.
C) You can place some arms up and some arms down if that will help with spacing.
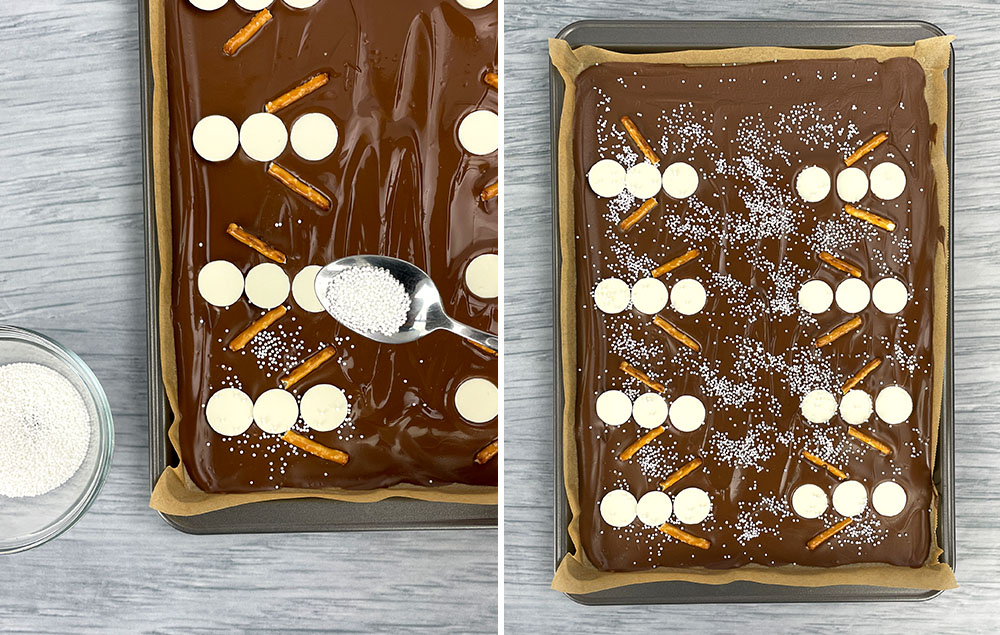
STEP 4:
A) Use a spoon to sprinkle white nonpareils over the melted chocolate.
B) This will give the effect of snow falling around the snowmen.
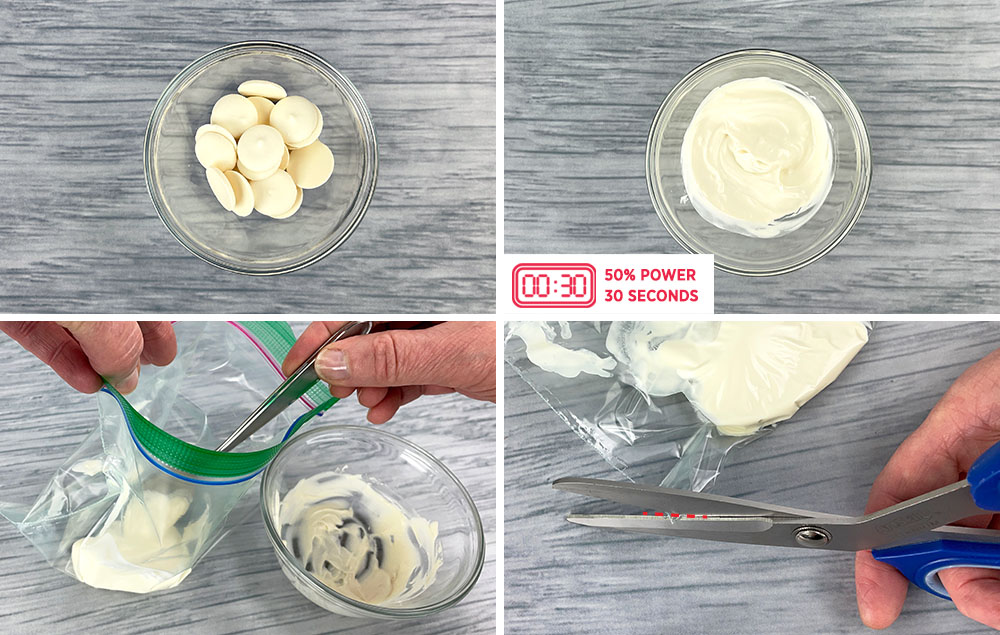
STEP 5:
A) Place a few white melting wafers into a bowl.
B) Follow the directions on the package to melt the white melting wafers.
C) Spoon the white melted chocolate into a small plastic bag.
D) Cut a tiny corner off the plastic bag.
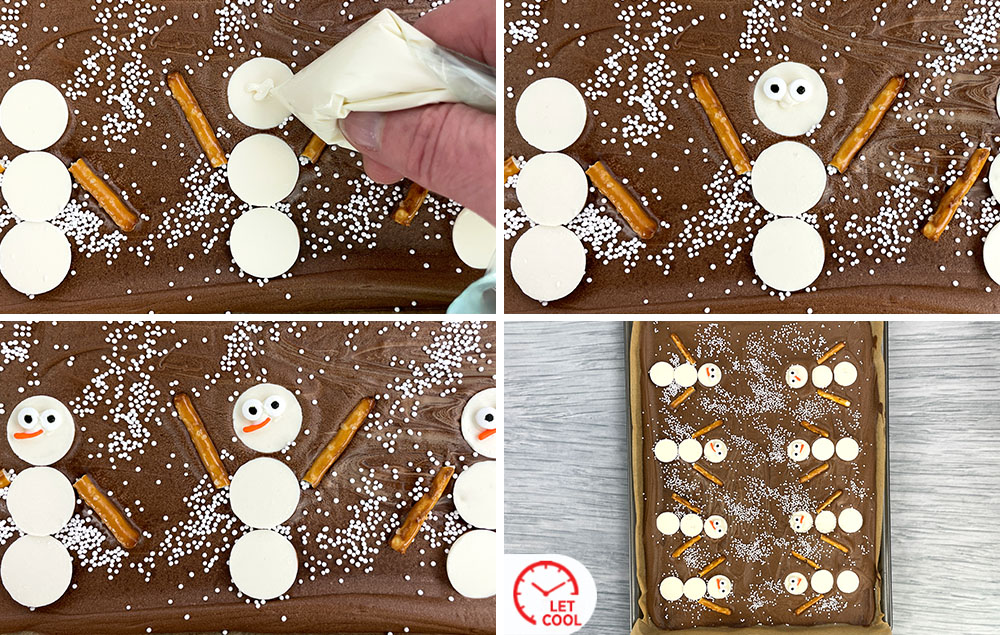
STEP 6:
A) Use the plastic bag to pipe a few tiny dots of melted chocolate onto the head of the snowman.
B) Set two candy eyes into the melted chocolate.
C) Set an orange rainbow sprinkle into the melted chocolate to create a nose.
D) Make all of the faces for your snowmen. Let all of the chocolate cool and harden.
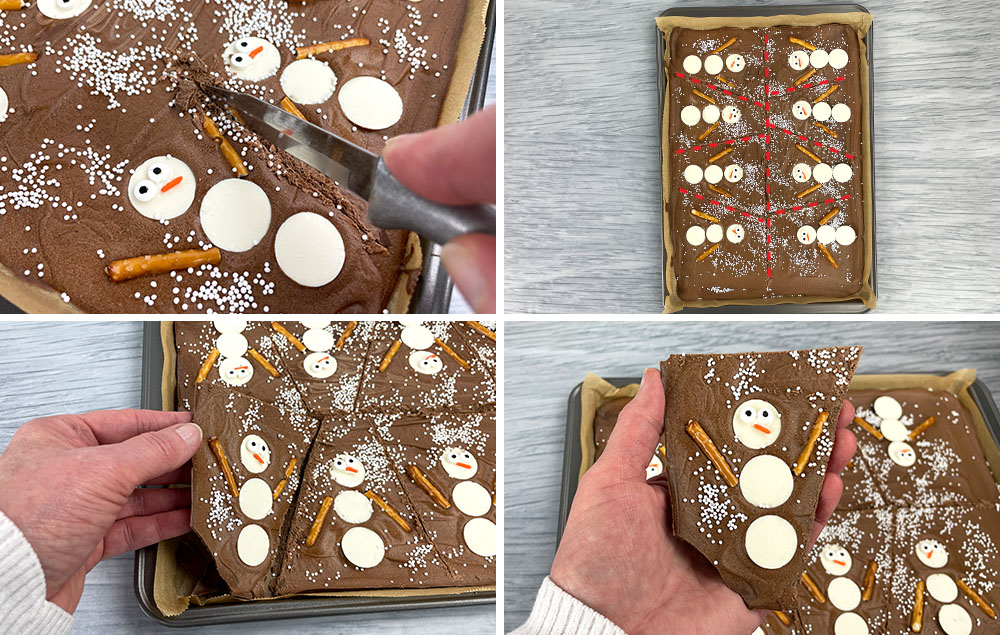
STEP 7:
A) Use a knife to score lines in between each snowman.
B) Make multiple light passes with the knife until you cut through.
C) Gently snap a piece of bark along the score lines.
D) Remove the snowman bark from the sheet.
Categories


