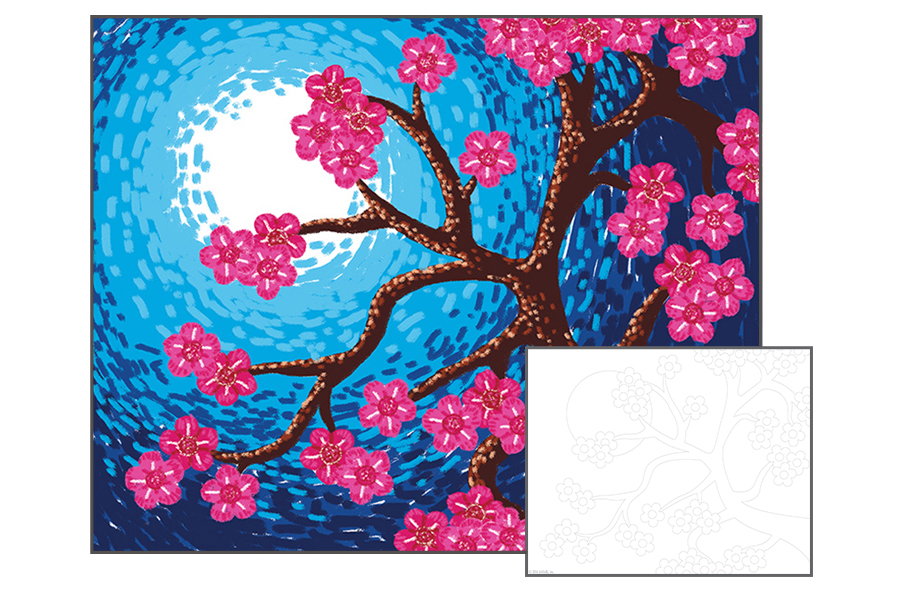
This printable project teaches you the tips and techniques about the vibrant Oil Pastel medium,
perfect for artists of any age! Follow the steps below to guide you through and you will be quickly on your way to creating these Cherry Blossoms.
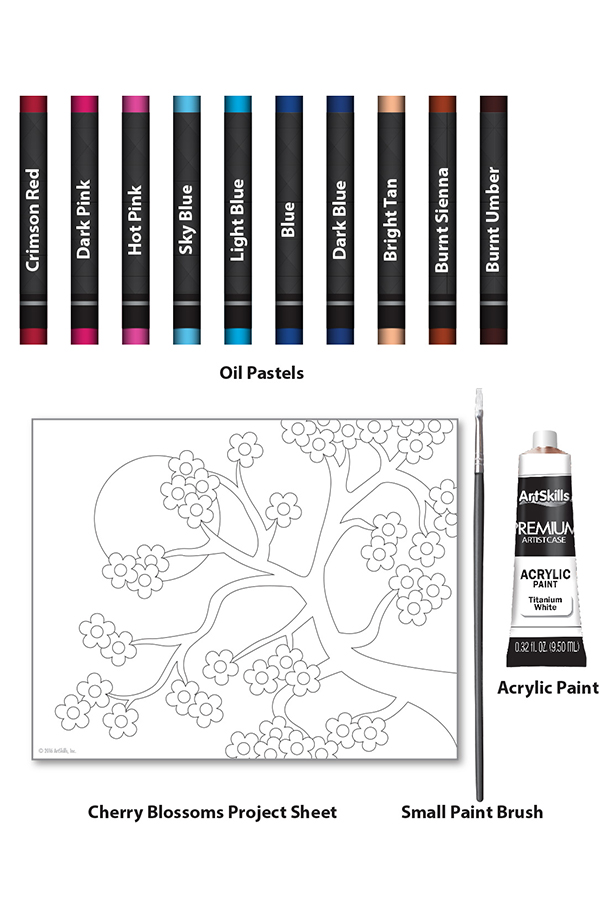
Supplies Needed
This project works best when using the materials shown below. These items can be found in the ArtSkills Premium Artist Case!
Test the colors of your pastels and how well they blend together before applying them to your actual work. This helps you avoid putting any unwanted colors on your final piece.
Consistently Clean
Keeping a paper towel nearby will come in handy. Wiping off your pastels ensures that your colors will not become muddy.
Let's Get Started!
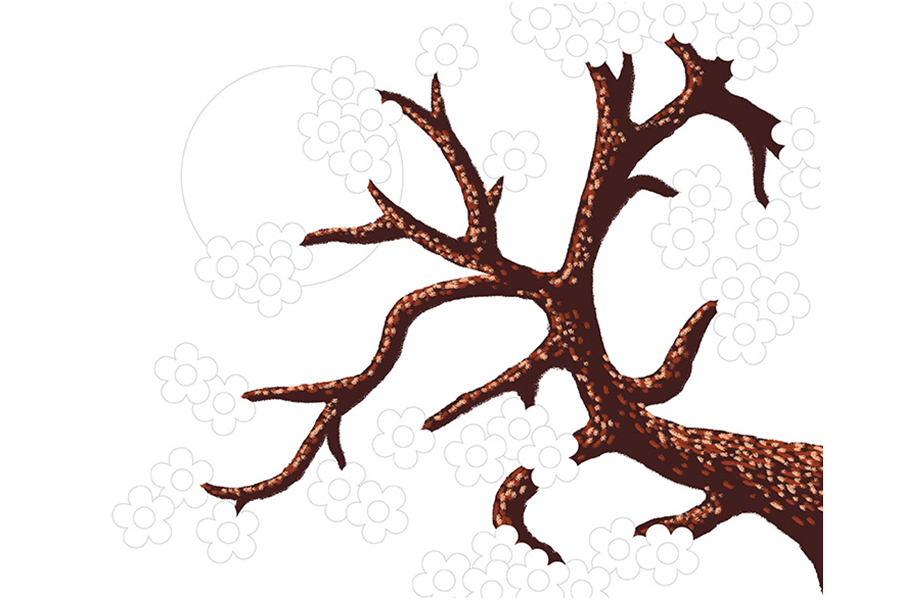
STEP 1: Begin with the Tree Branch
Use Burnt Umber, Burnt Sienna, and peach. to fill in the tree branch. Lay down the Burnt Sienna first, in small dashes moving in the direction of the branch. Use the same technique and create bold highlights on the branch with peach. These dashes can overlap the Burnt Sienna ones to give the image a bark-like texture. Then fill in the remainder of the branch with Burnt Umber, still moving with pastel in the direction of your previous marks.
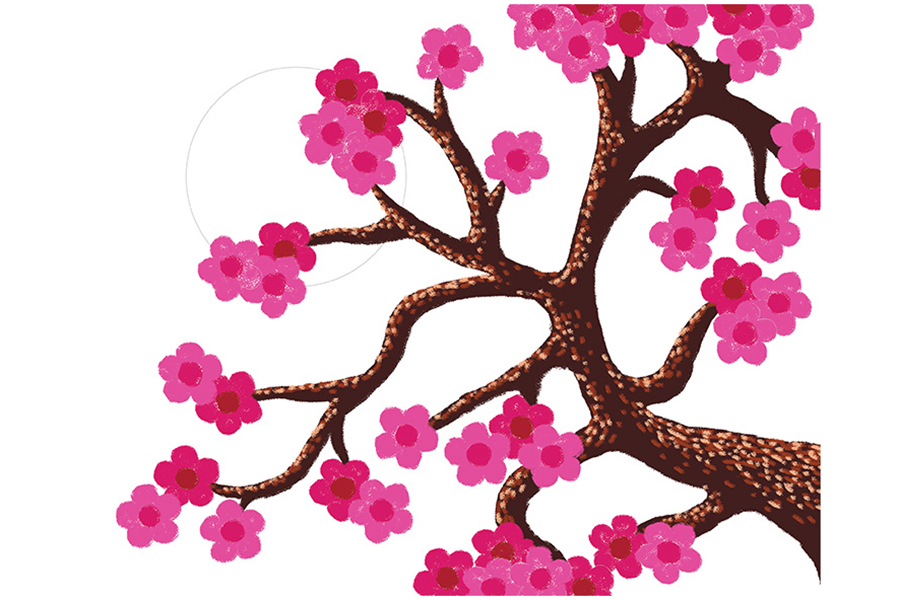
STEP 2: Add More Color
Start to fill in the flowers with bright colors in a variety of shades to bring them to life. Use your pinks and red for this step. The center of each flower should be the next darkest shade of the pink used to color it in. Do not use Crimson Red for the color of the petals of any flowers.
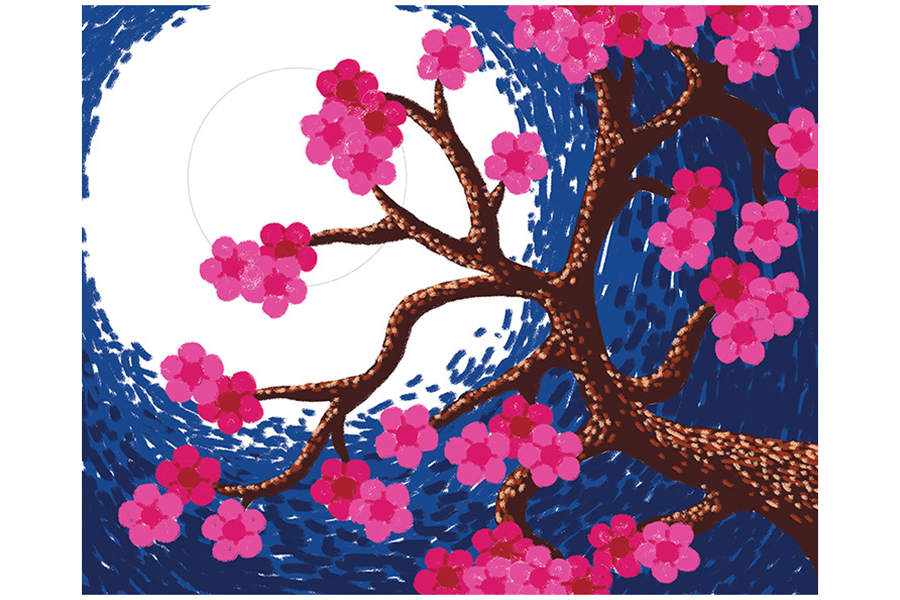
STEP 3: Begin the Background
Begin to fill in the sky, using contrasting colors that will help the pink flowers stand out. Use Dark Blue around the edges of the paper, and carefully transition to lighter blue more towards the circle at the center of the sky. Leave a large white area around the circle. Move your strokes in a circular direction around this area, radiating out towards the edges of the page. Add small lines on each flower to separate the petals, using the color of the center of the flower.
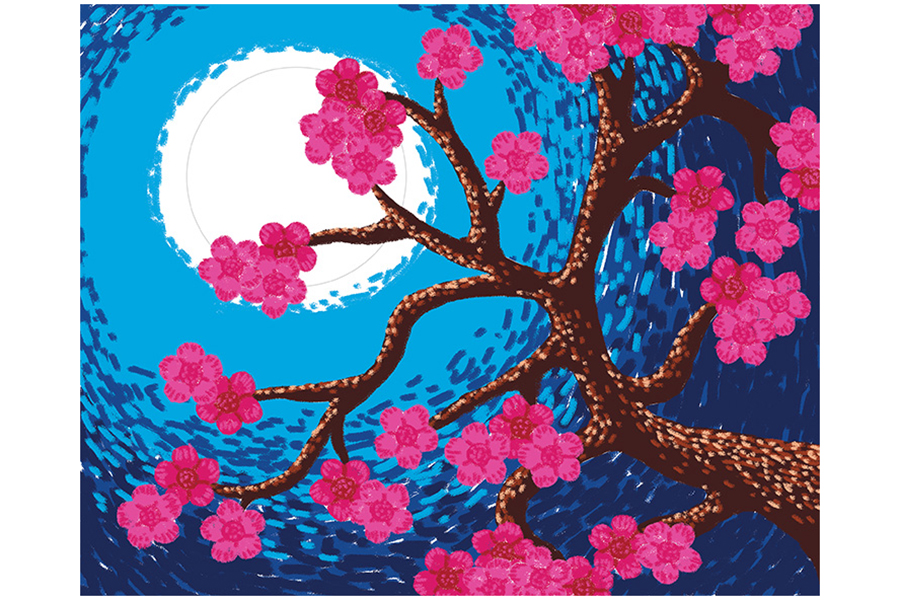
STEP 4: Add More Realism
Continue filling in the sky with Bright Blue. Still leave a white space in the sky, having it slowly close in on the circle with each new color you add. Overlap your blues with small, circular directional strokes to match what you did in the previous step. Use the same pinks as before to add more detailed lines to each flower petal. Use the thin edge of your pastels for this step to achieve fine lines.
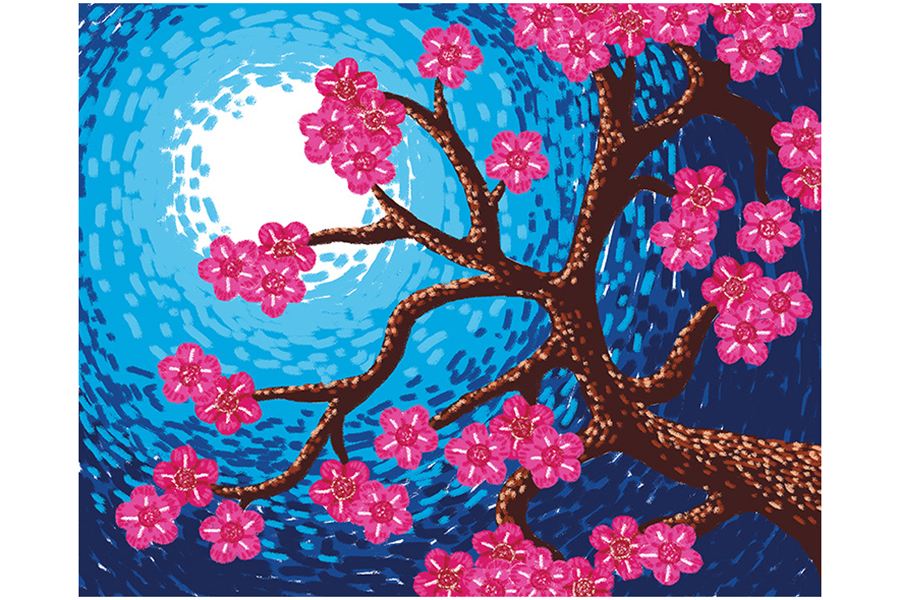
STEP 5: Finalize Yur Artwork
Finish the sky with continued circular dash marks using your lighter blue closest to the center of the white circle. Use white acrylic paint to add small, highlighted details to each flower. Create small, thin lines in the center of each petal with the paint as well. Using your smallest brush, add tiny specks of white to the flowers for a finishing touch.