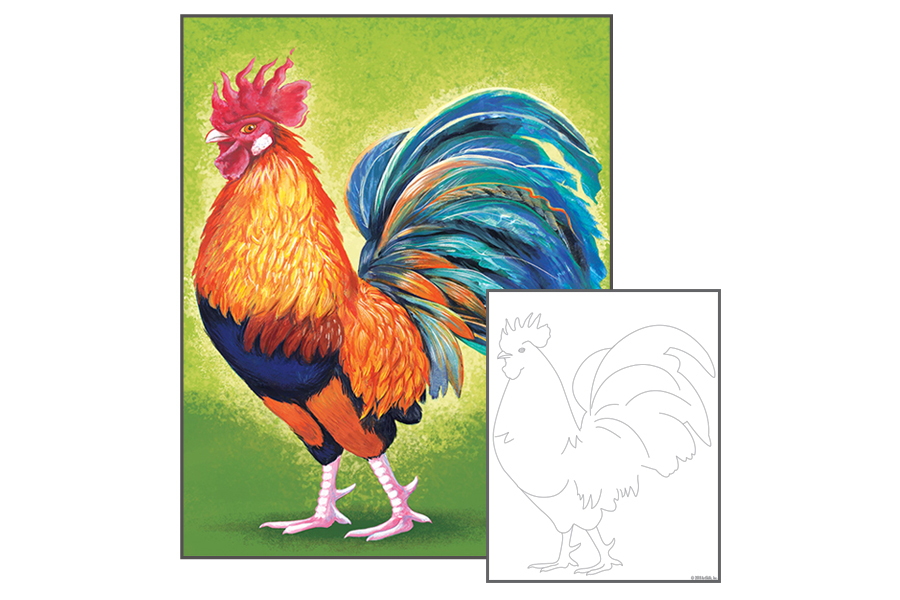
This printable project teaches you the tips and techniques about the smooth Acrylic Paint medium, perfect for artists of any age! Follow the steps below to guide you through and you will quickly be on your way to creating this Rooster.
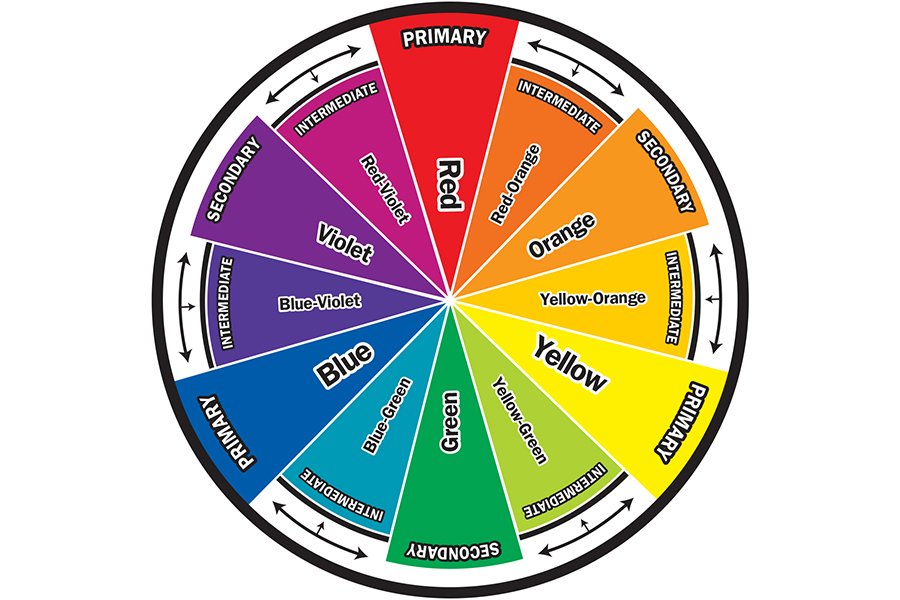
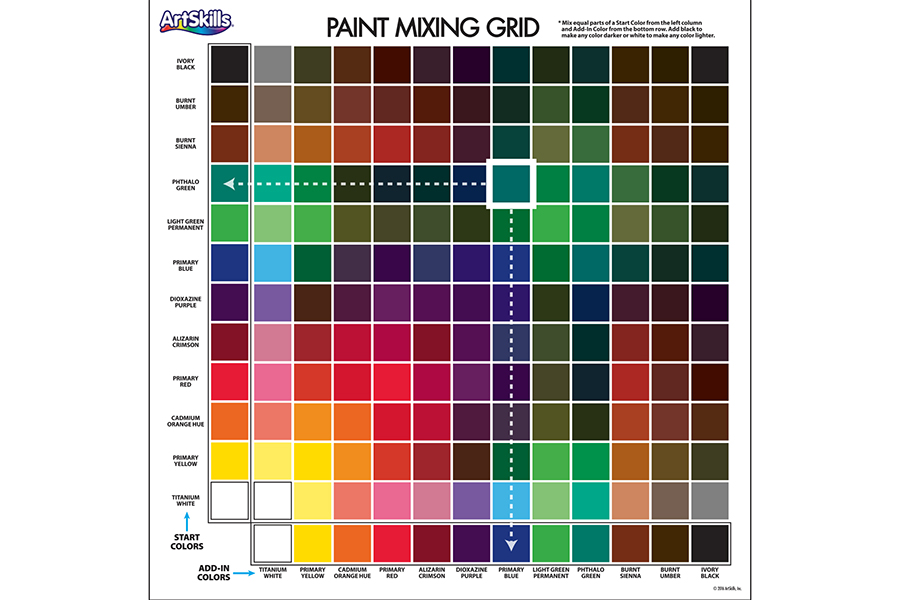
Color Guides Use the color wheel and paint mixing grid to create a variety of hues.
Tips & Tricks
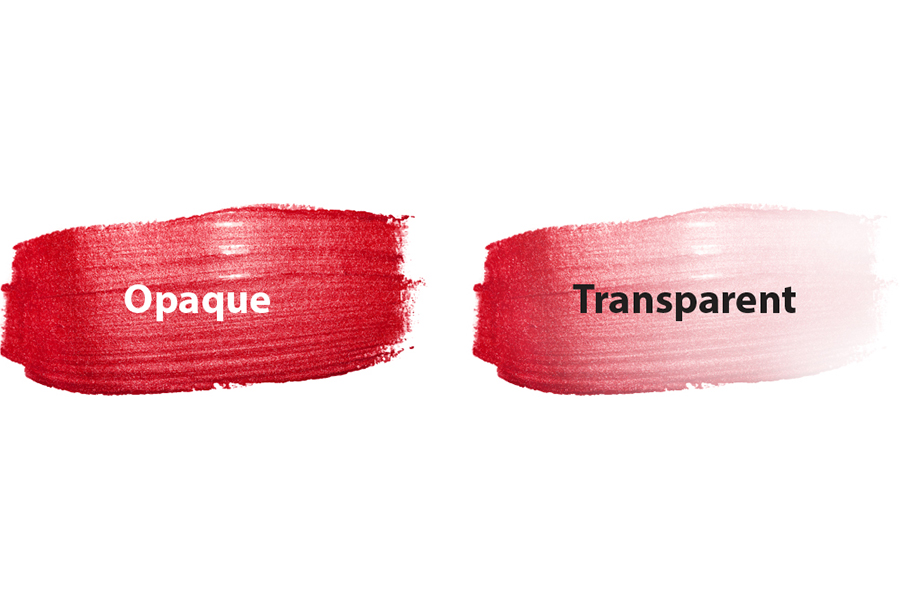
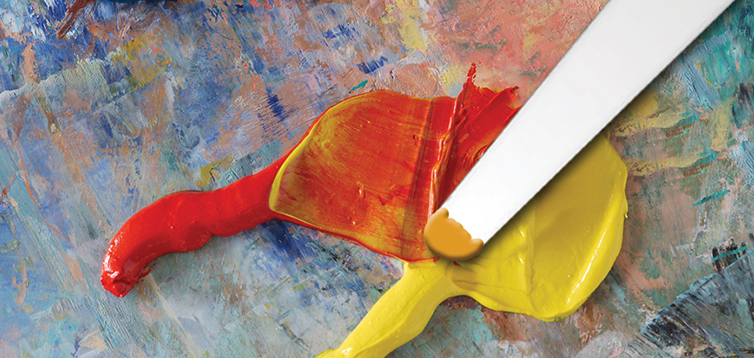
Opaque vs. Transparent Paint Acrylic paint can be used as opaque (non-transparent) if used straight from the tube, but can become transparent by adding water.
Blending Paints Together Acrylics dry very quickly, so be sure to blend your colors immediately after laying them down on your surface. Extend your blending time by spritzing water on your painting with a spray bottle.
Adding Texture to Paintings Using the "impasto technique" will add unique, 3D layers and textures to your painting. To achieve this, use a generous amount of paint on a palette knife and apply thick layers on to your surface.
Let's Get Started!
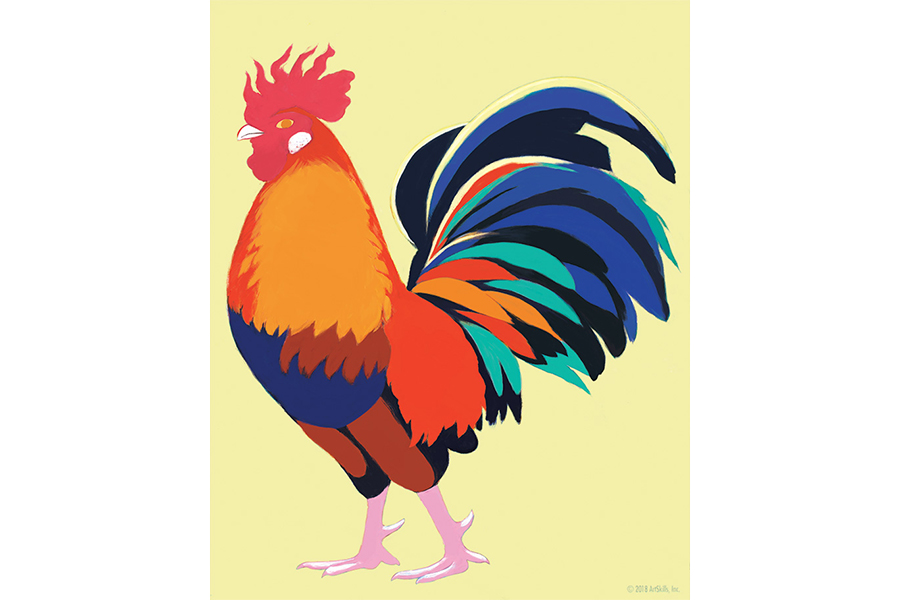
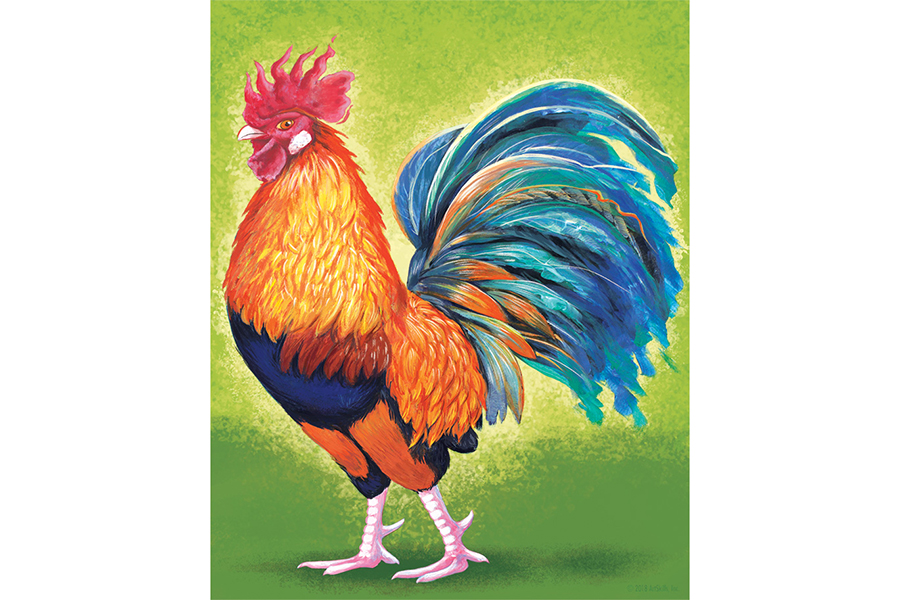
STEP 1:
Begin by painting in the base colors of the rooster. Be sure to cover the gray lines. Don’t blend any colors in this step. Use a thicker brush for this step and be sure to clean the brush when switching colors.
STEP 2:
After all of the base colors are painted in, your next step is to begin adding depth to the body. Do not start painting the tail yet. Highlight the orange body feathers, and add darker tones to the edges of the dark blue feathers. Paint in white details on the feet and a pupil for the eye.
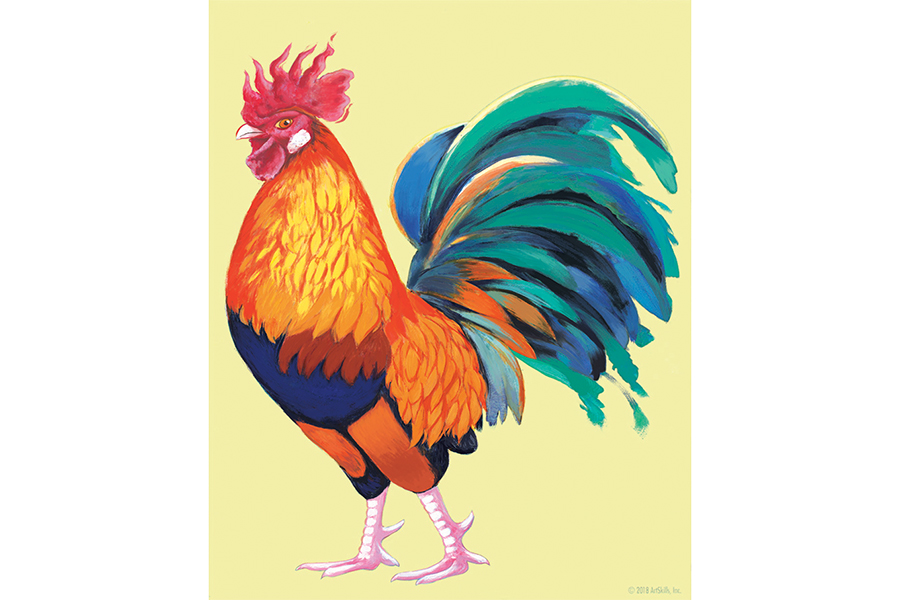
STEP 3:
Define the feathers further with quick strokes of a deeper orange on the body, and an even darker orange brown to shade the neck. Blend together the blues in the feathers for added dimension. In this step you will also want to further shade the feet and face.
STEP 4:
Switching to the tail, paint in darker hues at the edges of the feathers, and lighter hues towards the middle, where the light would hit, to start building up tonal value in the tail feathers.
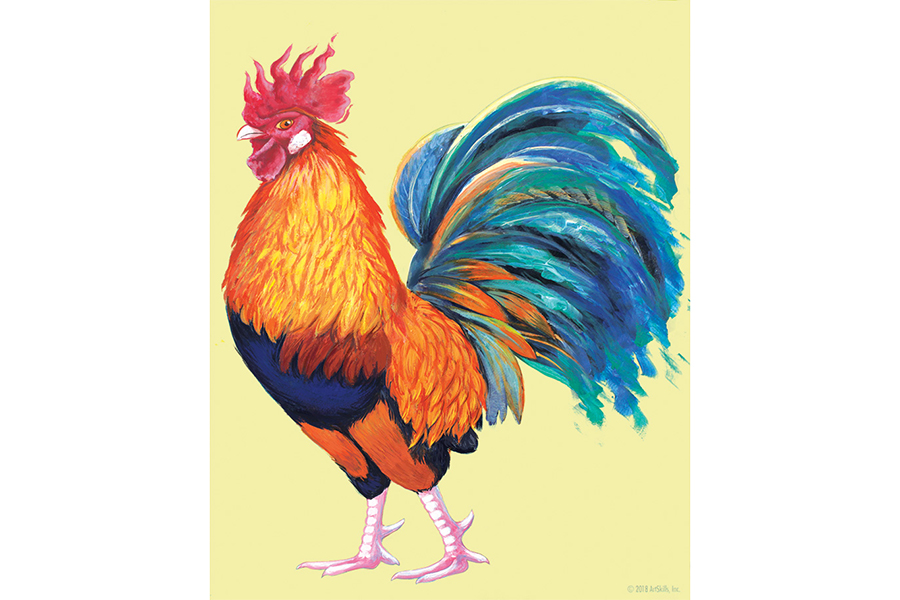
STEP 5:
Layer over the original tail feathers with quick, gestural strokes of lighter blues and teals for visual contrast. Add small strokes of red around the crown of the rooster to mimic the gestural strokes in the tail to bring together the loose, painterly feel.
STEP 6: To achieve the fine detail of the rooster’s feathers, you will want to switch to a finer tipped brush to gain more control over your marks. Begin to paint in delicate lines, varying the values of the color you are using. Add small, dark strokes to the edge of the feathers to suggest shadows, and brighter colors on the fronts of the feathers for highlights. Add yet another layer of tail feathers without losing definition on the smaller tail feathers near the base. Go back in with a dark blue to define the edges of any feathers beginning to get lost under detail. Highlight the eye and define the iris for a striking gaze, and consider adding subtle, blue tones to the feet.
STEP 7:
Before moving on to the final step, clean off your fine tipped brush to remove all the color. Use white paint to add bright highlights in the feathers. Use a completely dry brush to dab in a darker green around the edges of the painting to add some detail to your simple background.