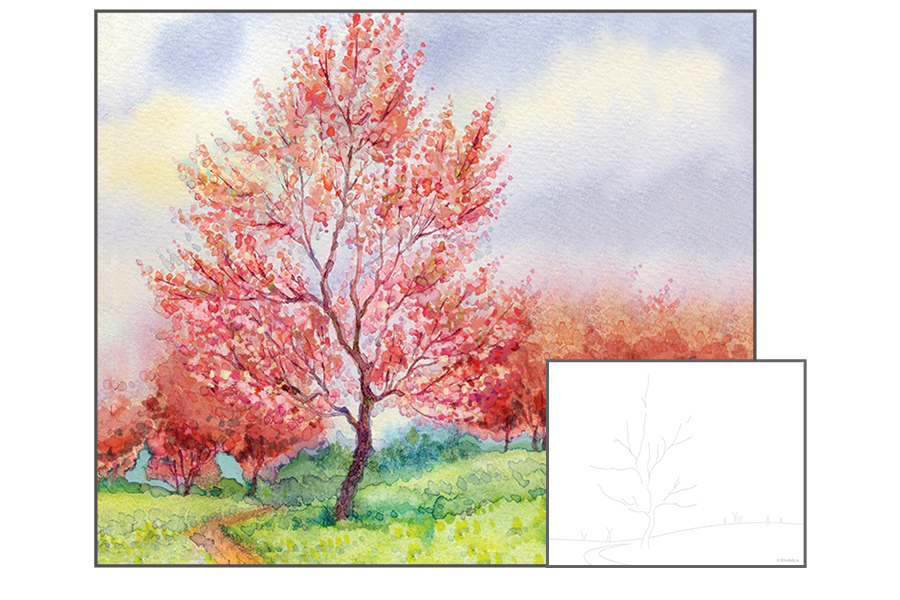
This printable project teaches you the tips and techniques behind the vibrant Watercolor medium, perfect for artists of any age! Follow the steps below to guide you through and you will quickly be on your way to creating this Beautiful Tree Landscape.
With watercolor paint, a color will always appear more intense (vibrant and darker) when it is wet. As it begins to dry the color will lose its intensity.
Test a Color First
Watercolor paint dries very fast. Therefore, it's best to test a color on a scrap piece of paper.
Keep Water Clean
To prevent colors from getting muddy, it is important to wash off your brush when switching colors. Periodically replace the water in your cup to help keep your colors clean and bright.
Let's Get Started!
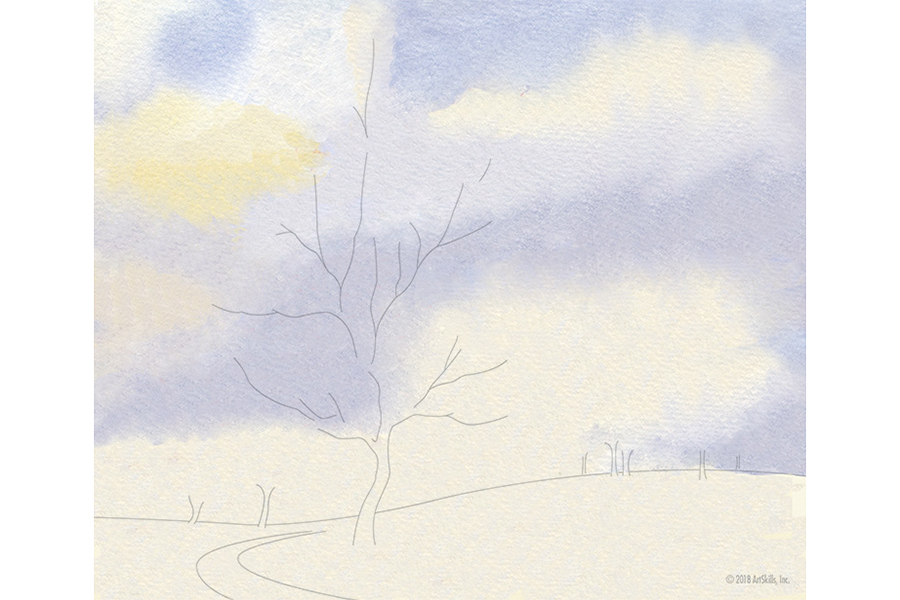
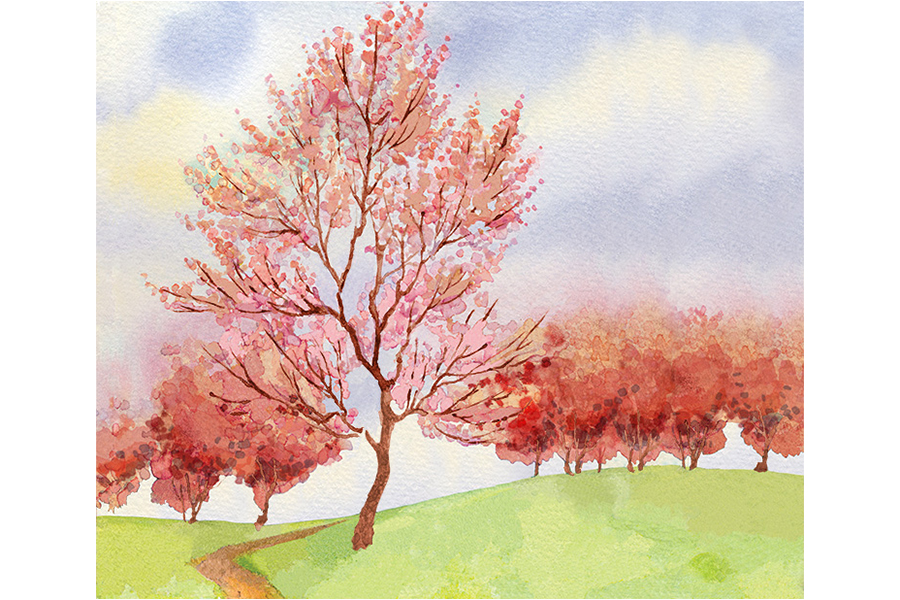
STEP 1:
Begin painting your sky by using very watered-down blue paint. Plan out where you would like your clouds to be by leaving patches of the paper, above the grass, unpainted. Go back into the tops of the clouds with watered-down yellow for the effect of an autumn sky. Make sure to wait for the paint to dry before the next step.
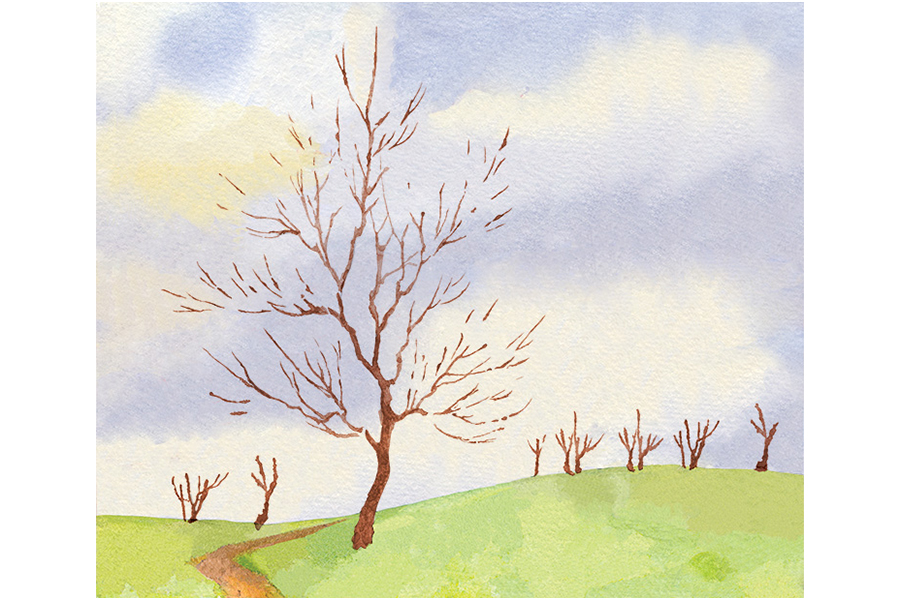
STEP 2:
The key to a beautiful watercolor painting is layering. Start by painting light green across the grassy area and go back in with thin layers of olive green to add patches of darker grass. Using a thin brush, follow the guides to paint in a tree in the foreground as well as some small trees in the background. Feel free to add extra branches.
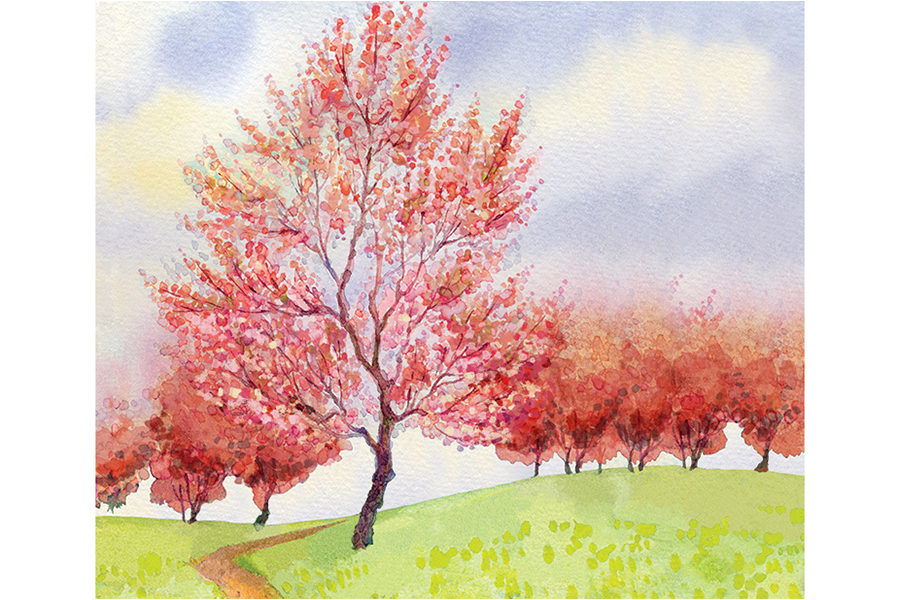
STEP 3:
Using the very tip of the brush, stipple in reds and pinks for the leaves of the tree. Do this by applying quick dots of color without much pressure. Make sure your brush is not too wet. Using a larger brush allows for a natural variation in size and amount of paint that is put down on the paper.
STEP 4:
Wait for the tree to dry. Mix red and brown for a brownish red to paint in a thin layer for the background trees. Brush on layers of stippled color as the paint dries.
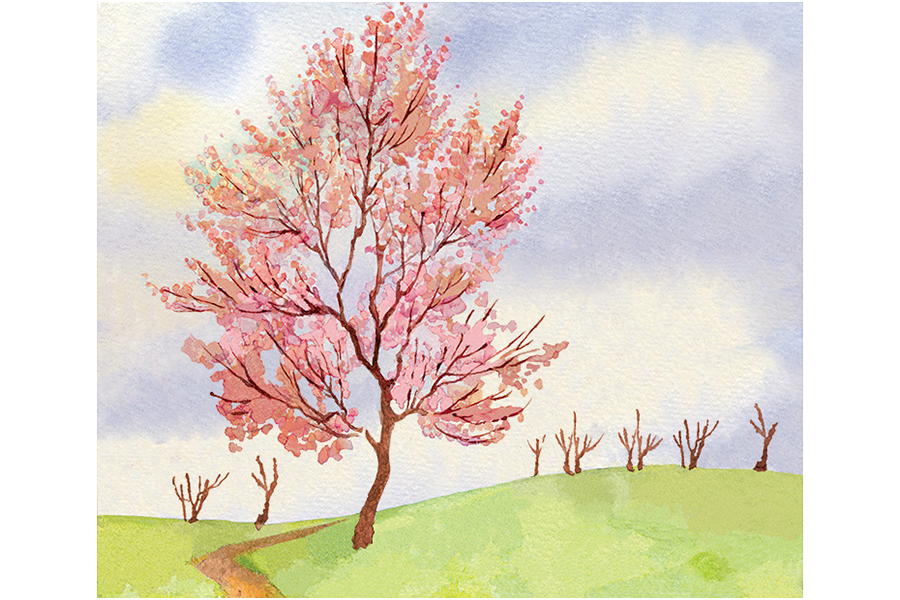
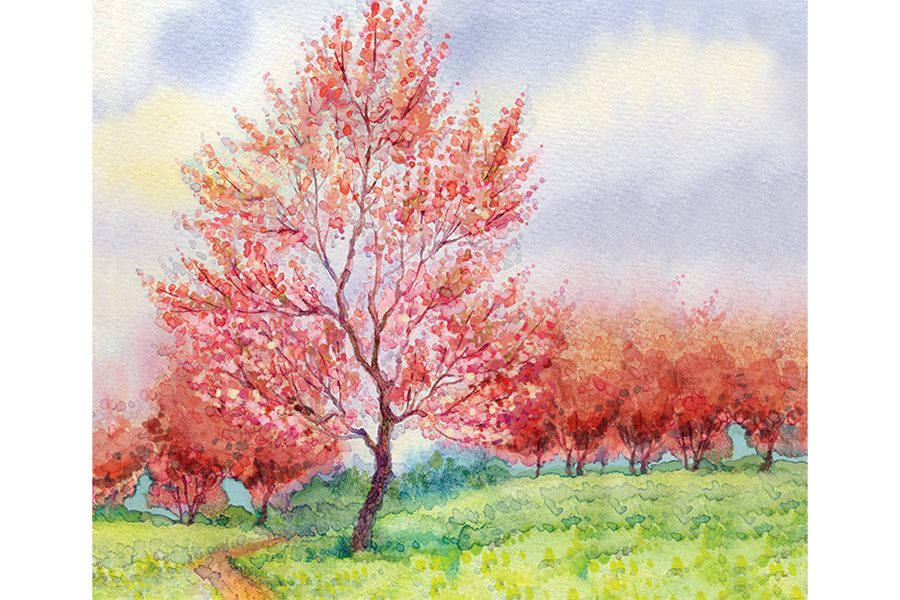
STEP 5:
After the painting has dried again, dab in more vibrant pinks and reds to the trees. Your trees should be filling out with layers of leaves that give it a sense of fullness. Stipple in dabs of light green towards the bottom of the grass. This will add light details to the part of the grass closest to the viewer that will bring it forward in space.
STEP 6:
Using a dark green, stipple in grass towards the back of the hill reaching to the horizon, to add shading to the hill. Paint past your horizon, below the trees, with blues and greens to hint at trees or mountains beyond what you can see. The further back in space you want a detail to look, the more blue than green you will use.