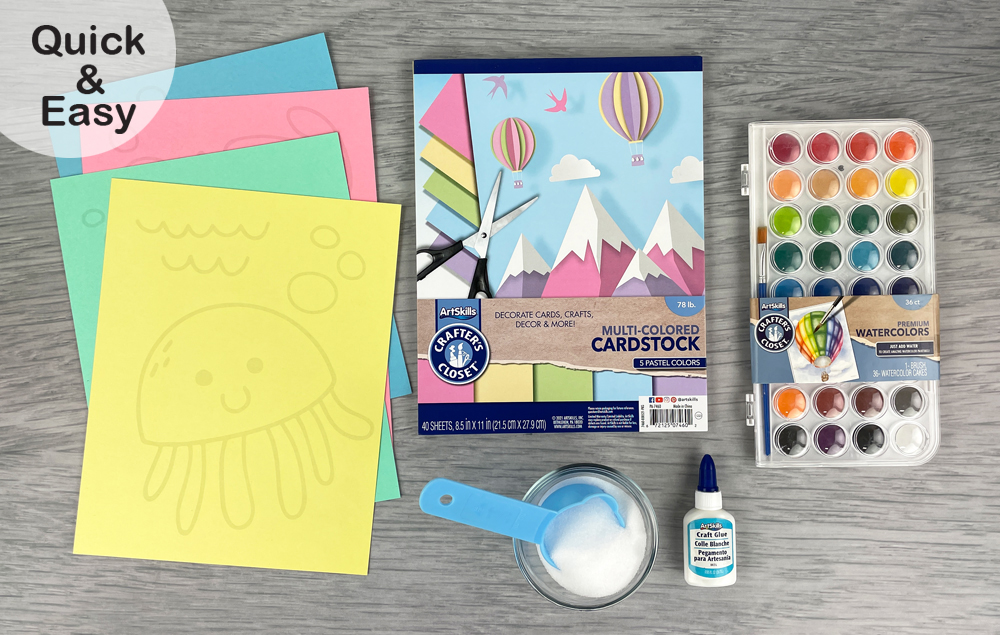
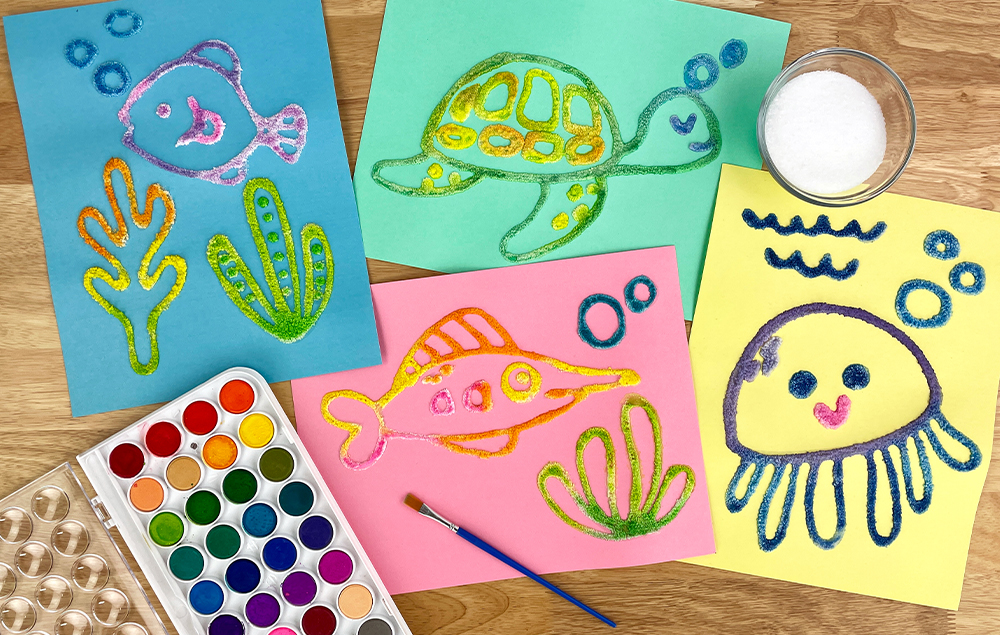
Engage your students' creativity with the captivating art of salt painting! This hands-on craft involves drawing glue lines, sprinkling salt, and applying watercolors to create mesmerizing effects as the colors effortlessly blend into the salt medium.
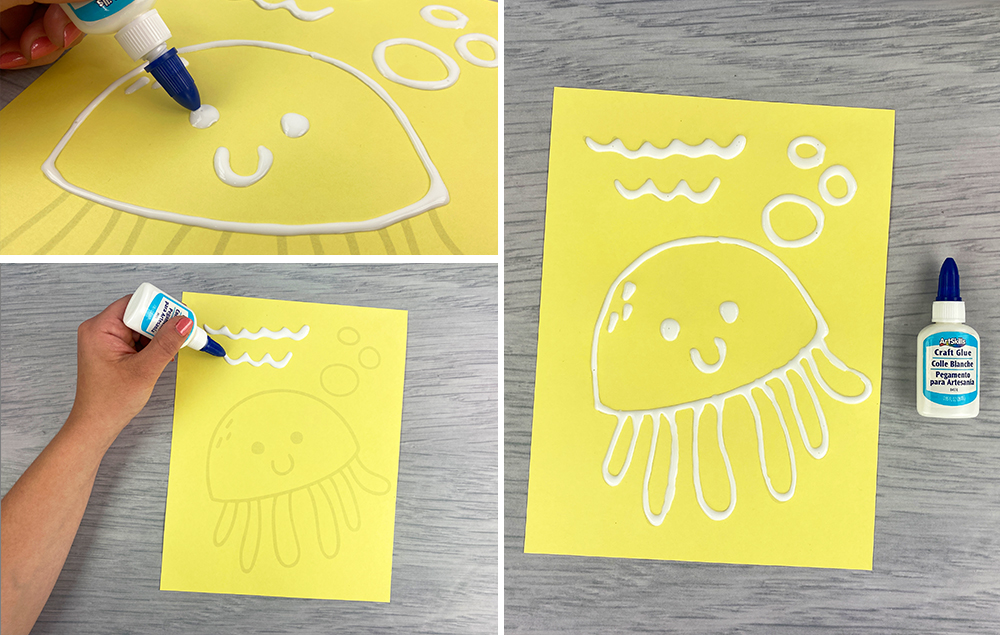
A) Carefully trace the template with the tip of a white glue bottle, applying an even line of glue.
B) Slowly and carefully apply lines of glue to the template.
C) Make sure all the lines on the template are covered with glue.
STEP 3:
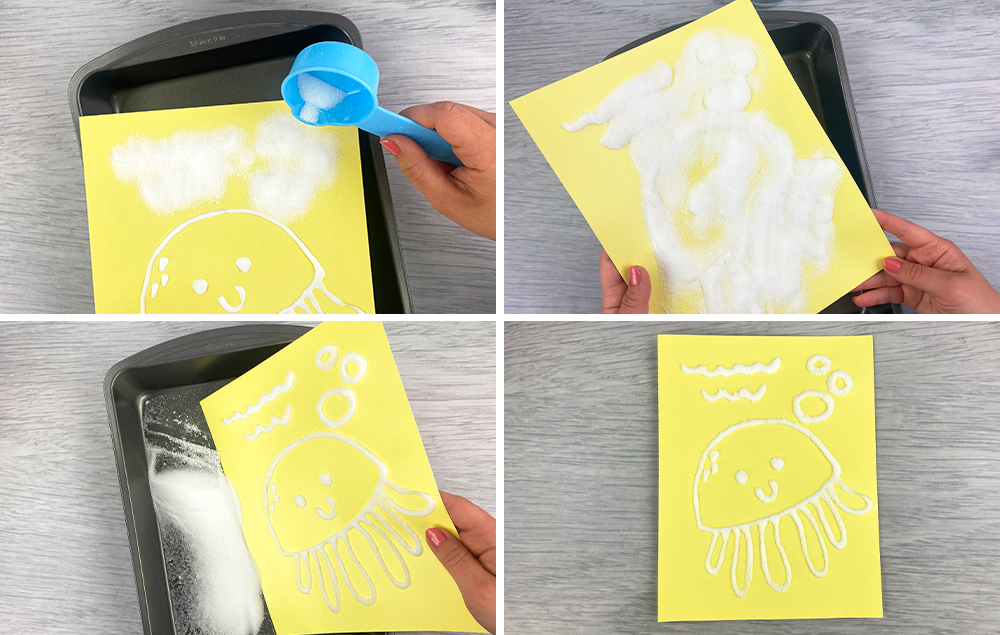
A) Sprinkle salt over the lines of glue. Tip: Work over a pan to catch excess salt.
B) Be sure to cover the glue lines completely.
C) Once the whole template is covered, turn the paper sideways and gently tap the excess salt into the pan. Tip: Scoop up the excess salt and use it on other templates. Save the salt for future craft projects when you are done, as it is no longer edible.
D) You are now ready to add color!
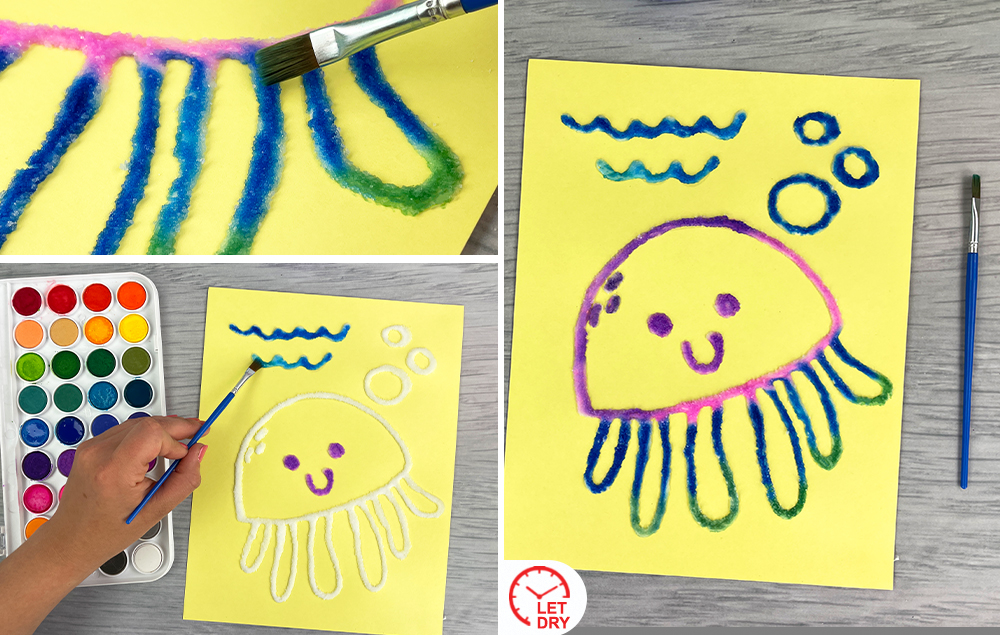
STEP 4:
A) Saturate a paint brush with watercolor and gently tap it on the salt painting. Tip: Do not overload the brush with water, as it will bleed into the paper.
B) Watch the magic as the color seeps into the salt painting!
C) Have fun coloring in the painting! Let it dry completely when done. Note: Some salt may fall off the painting after it dries.
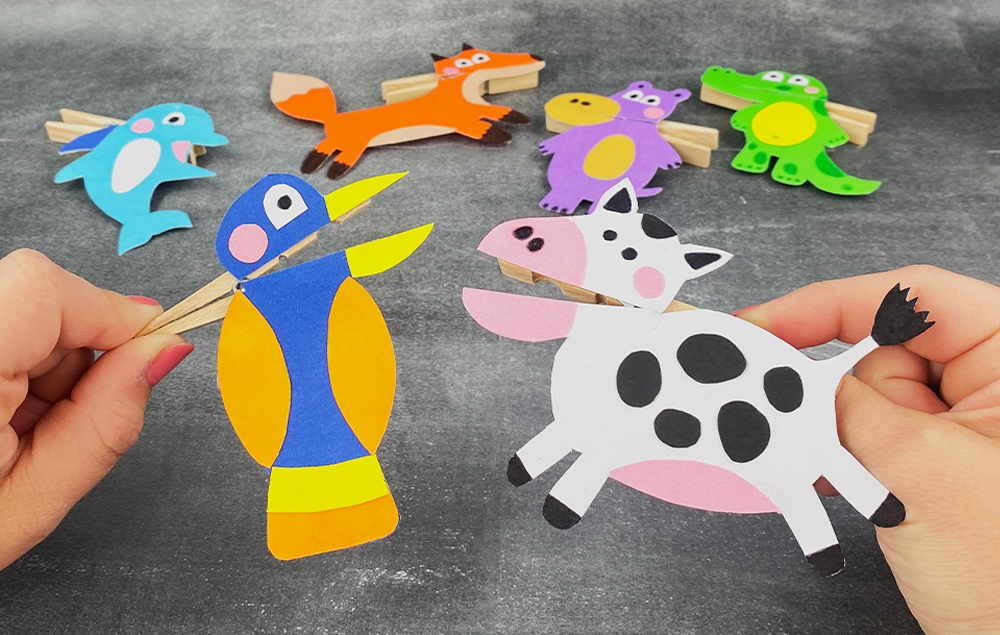
Spark your students' imaginations with an adorable clothespin puppet craft! Attach cute cardstock animals to clothespins so their mouths open and close, bringing puppet characters to life with a simple pinch...
This cute and easy-to-make DIY pencil jar project will add a touch of creativity and organization to any teacher's workspace, making it the perfect classroom decor item...