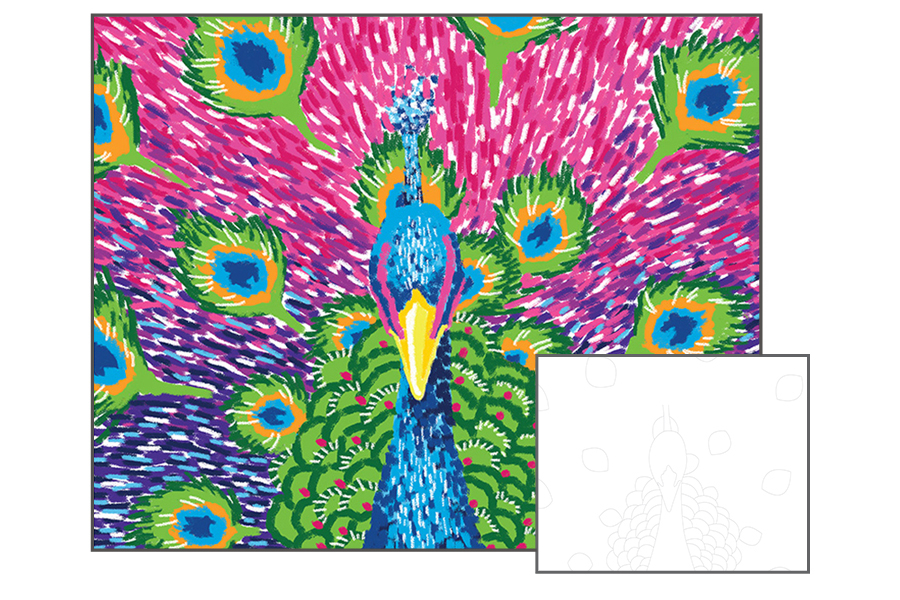
This printable project teaches you the tips and techniques about the vibrant Oil Pastel medium, perfect for artists of any age! Follow the steps below to guide you through and you will be quickly on your way to creating this Brilliant Peacock.
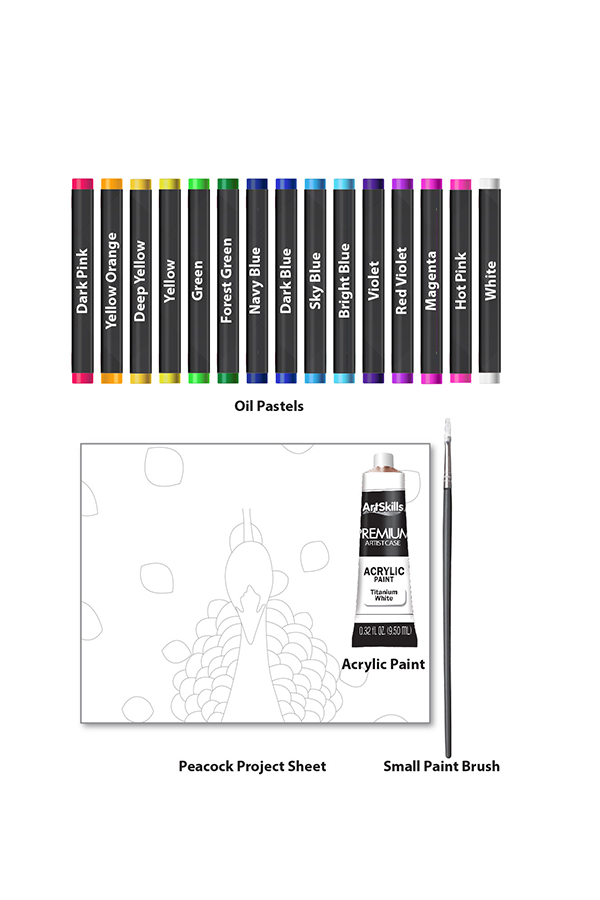
Supplies Needed
This project works best when using the materials shown below. These items can be found in the ArtSkills Premium Artist Case!
Test the colors of your pastels and how well they blend together before applying them to your actual work. This helps you avoid putting any unwanted colors on your final piece.
Consistently Clean
Keeping a paper towel nearby will come in handy. Wiping off your pastels ensures that your colors will not become muddy.
Let's Get Started!
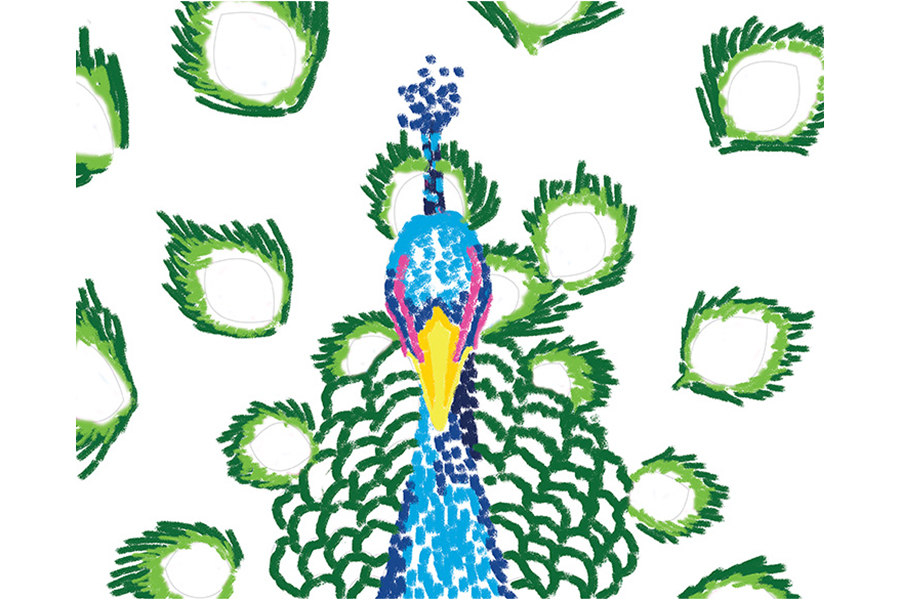
STEP 1:
Begin by outlining and laying down the basic shapes of the peacock and its feathers. Use loose, dashed marks for a feather-like texture. When coloring the tail feathers, leave some white space between the outlines and your Green marks. This will get filled in a later step.
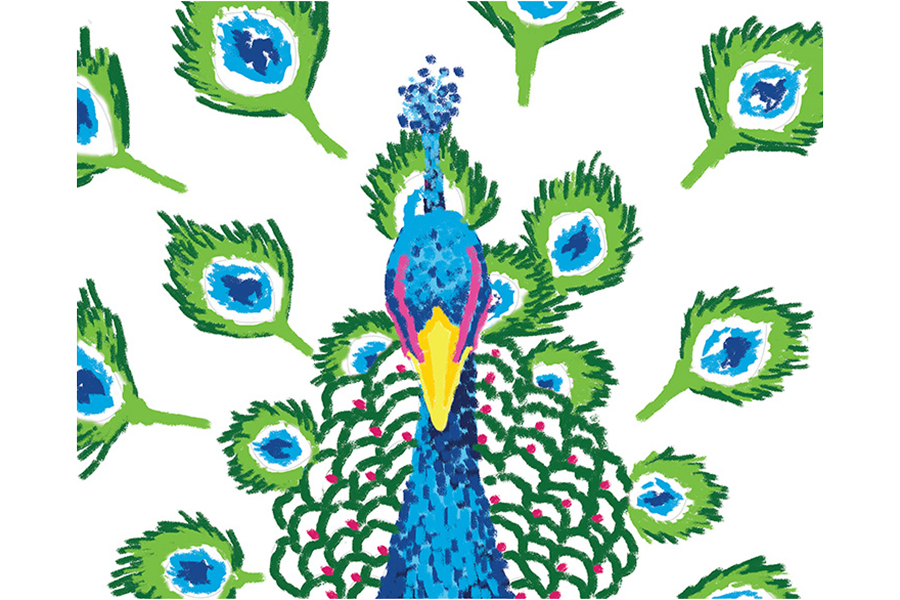
STEP 2:
Start to fill in the peacock’s head and neck a lighter blue. Add dark blue under the beak and along the neck to create a deep shadow. Use red or pink to draw small details on the scalloped tail feathers. Fill in more green on the tail feathers, still leaving some white space. In the centers of these feathers, add eye shapes with light and dark blue.
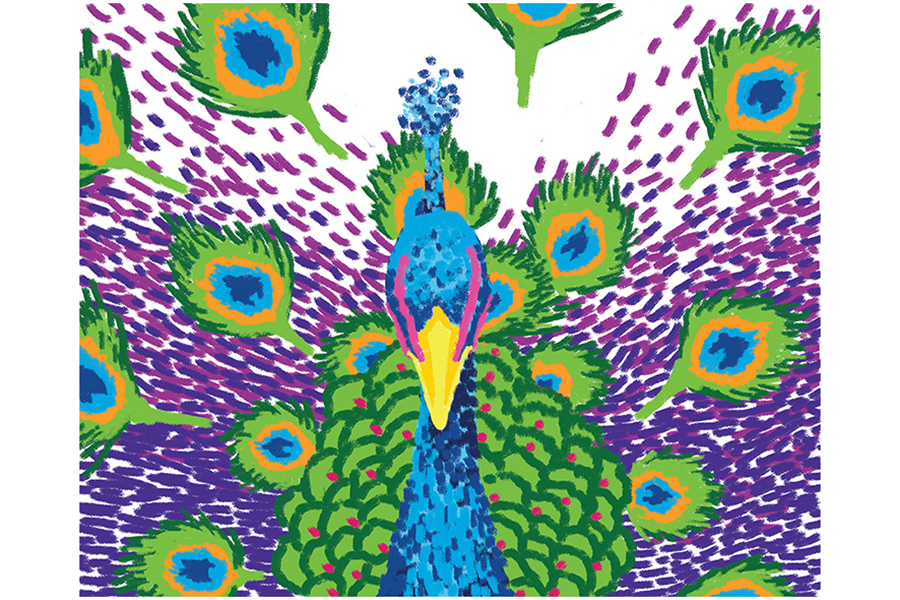
STEP 3:
Fill in the white spaces in the eye-shaped feathers with yellow and orange. Also fill in thescalloped feathers with Light Green. Add Violet in the lower portion of the background with short, quick strokes that work outwards towards the edges of your project sheet. Gradually transition these strokes into Red Violet strokes that continue in the same direction.
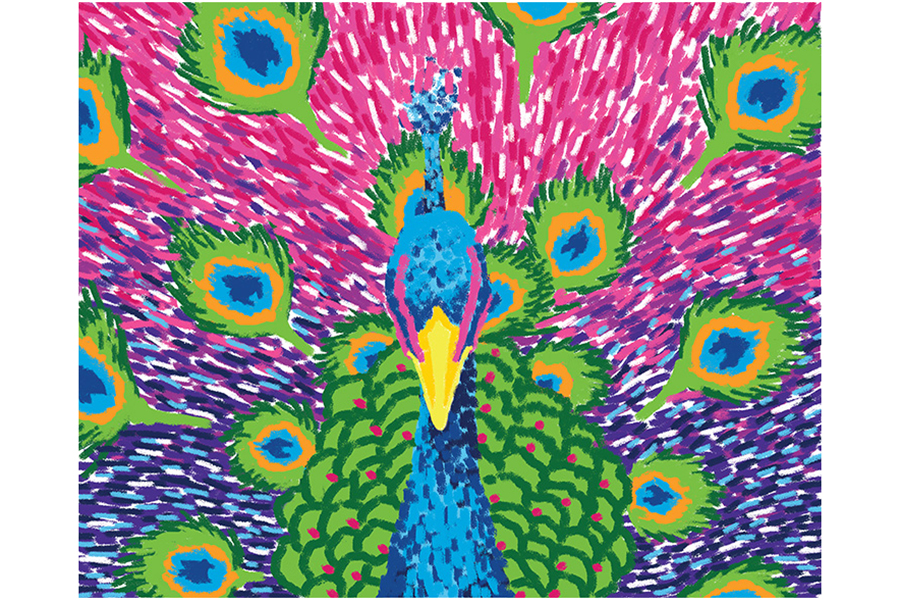
STEP 4:
Continue filling the background with hot pink strokes that layer into the existing strokes. Be sure to overlap all of your strokes to create a smooth transition between colors.
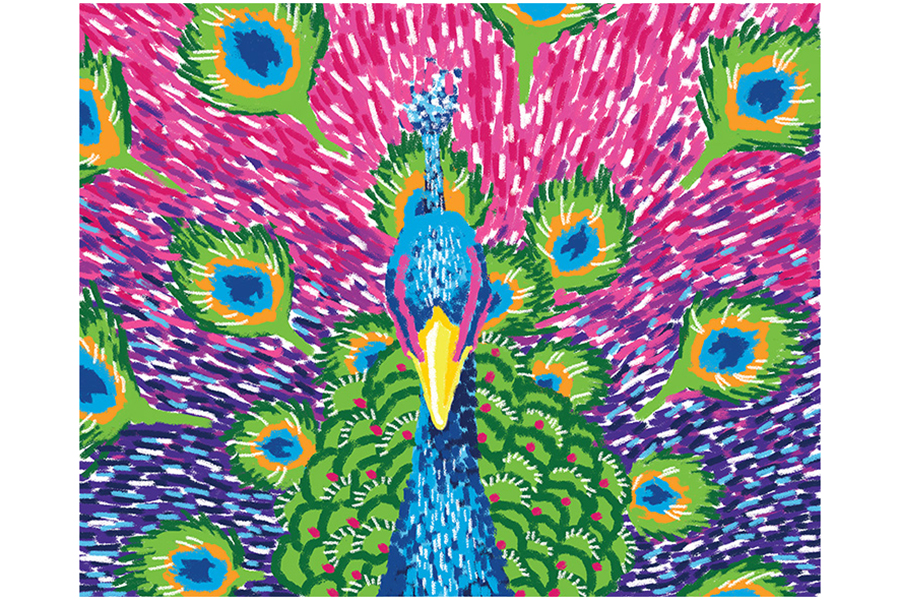
STEP 5:
Fill in the remaining white areas in the background with Red Violet. Use your light blue in the bottom and center of the background to create small, dashed highlight strokes. Use Dark Blue to create shadow strokes.
STEP 6:
Take a small amount of White Acrylic Paint and your smallest Paint Brush to add final white highlights throughout your artwork, in areas such as the tail feathers and the peacock’s head and neck.