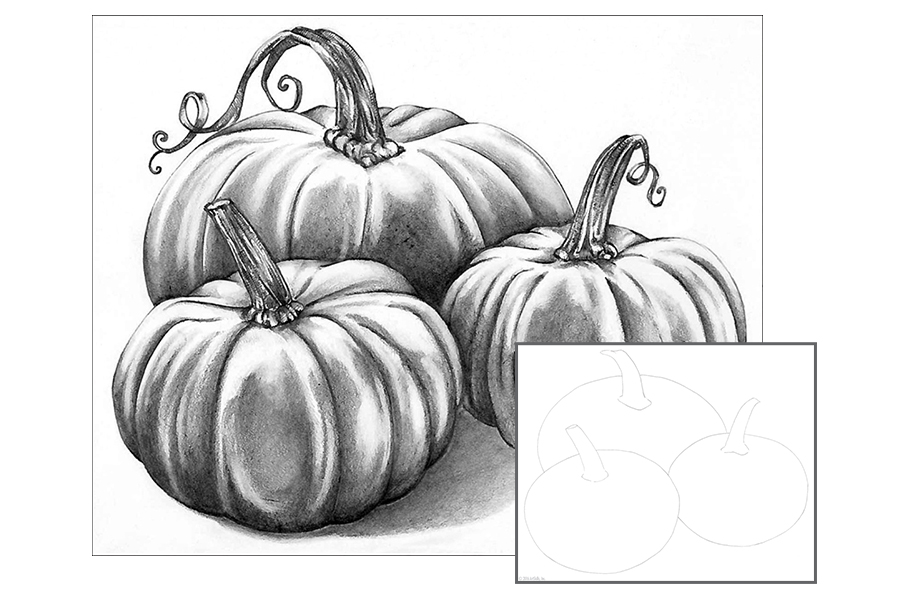
This printable project teaches you tips and techniques about the traditional graphite pencil medium, perfect for artists of any age! Follow the steps below to create your own Pumpkin Patch.
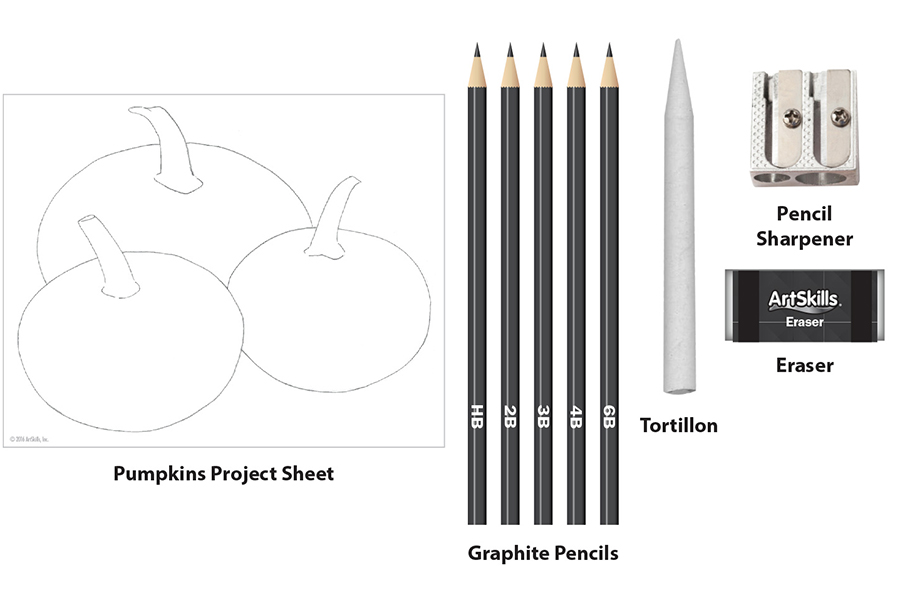
Supplies Needed
This project works best when using the materials shown below. These items can be found in the ArtSkills Premium Artist Case!
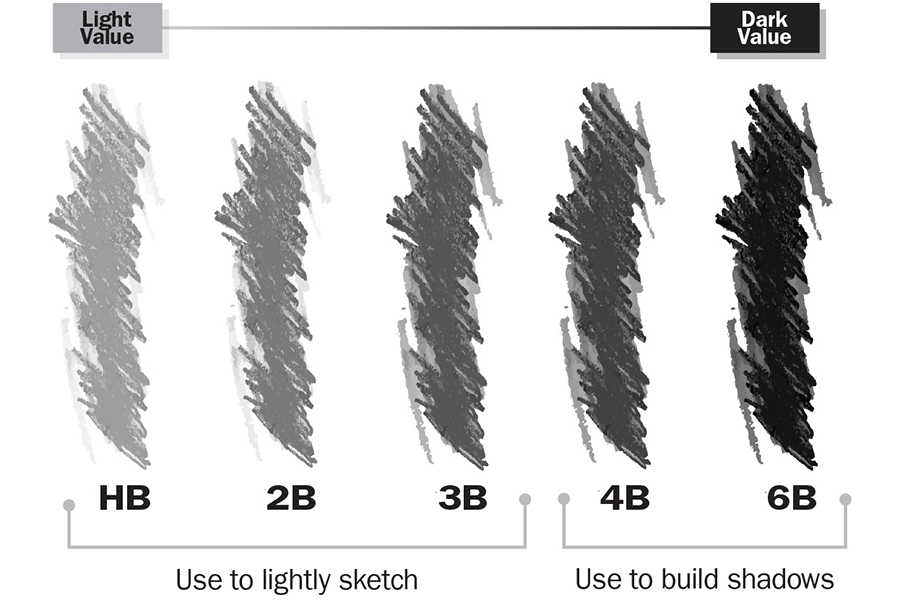
Varying Degrees of Firmness Graphite can be baked and compressed into different degrees of firmness. A pencil's mark will be lighter or darker depending on how the graphite is baked and compressed. The softer a pencil's firmness, the darker of a mark it will leave; similarly, the firmer a pencil is, the lighter its mark will be. Use the chart below as a quick guide to your pencils' levels of firmness and darkness.
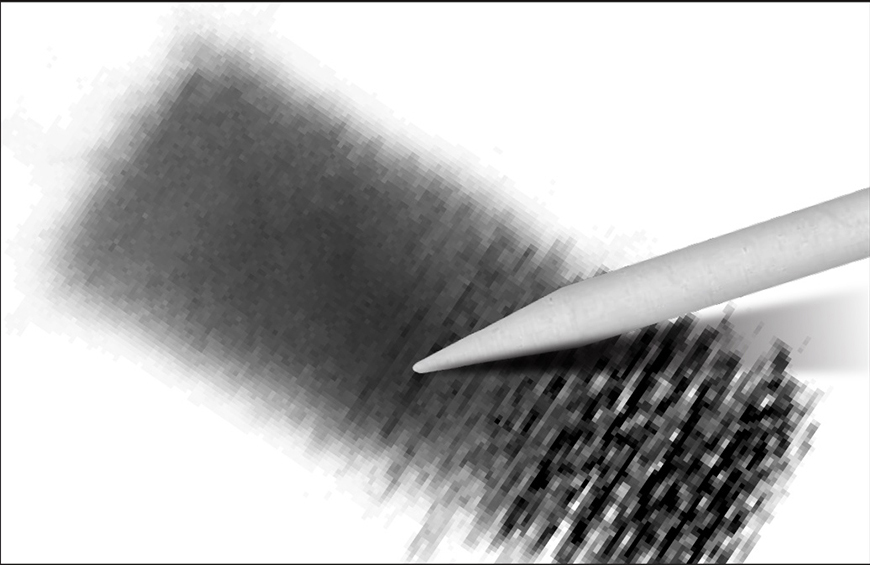
Using the Tortillon A tortillon, also known as a blending stump, is used to "smudge" or blend marks made with graphite pencils. Push lightly to gently soften your marks, and smudge harder to blend them together seamlessly. Rub a graphite-covered tortillon over a white area on your page to create a light, smooth shade. To clean a tortillon, simply peel off the outer layer of paper.
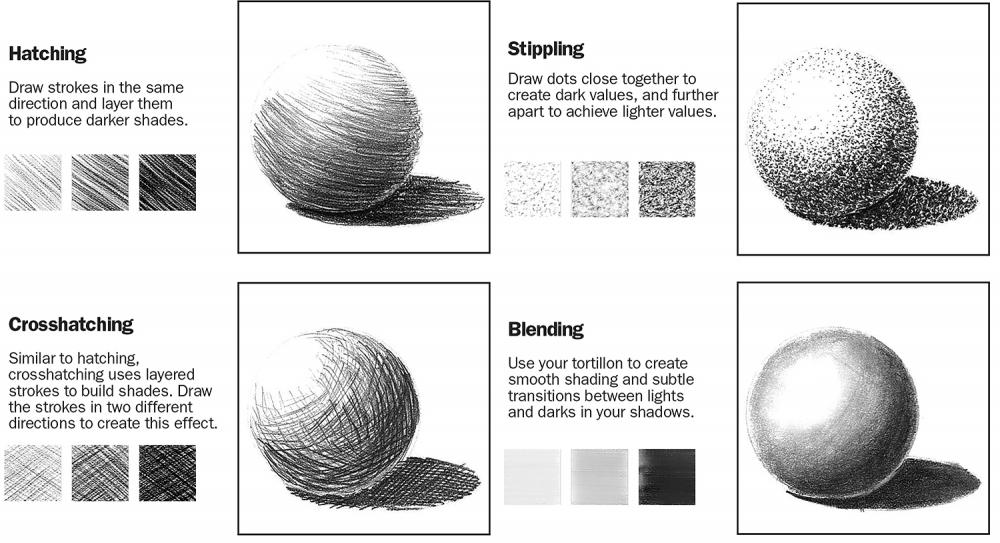
Quick Shading Techniques
Graphite can be layered in many different ways. Depending on how you lay down your marks, you can achieve different styles. Look at the examples below for some unique shading techniques that you can apply to any graphite drawing.
Let's Get Started!
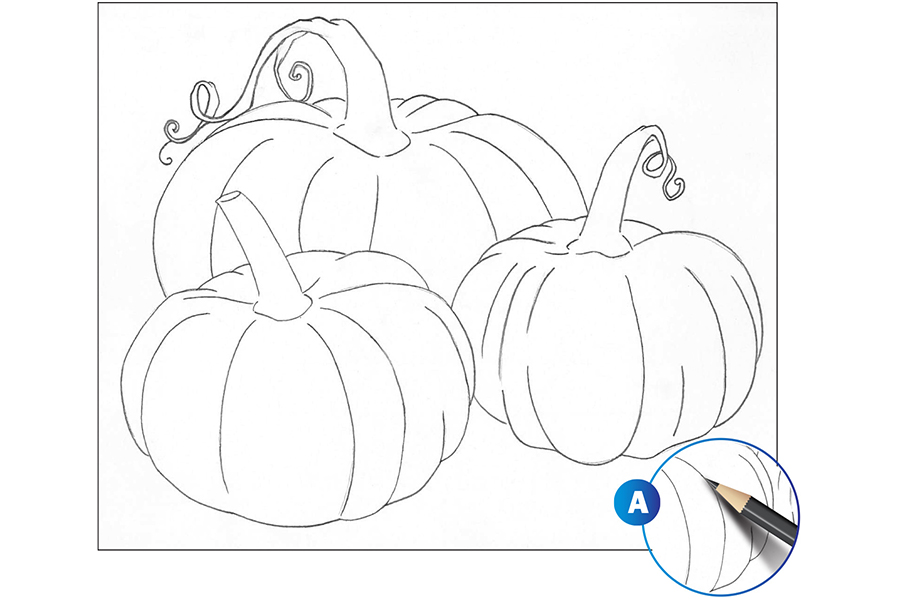
STEP 1: Sketch the Basic Outlines
With the printed outlines on the project sheet as a guide, use your 2B pencil to lightly sketch the more-defined outlines of the pumpkins. Draw the ridges of each pumpkin and have them overlap slightly to indicate dimension. Make the lines of the ridges curve over the pumpkins to show roundness (see Ex. A). Add delicate vines to the stems that curl and twist over themselves. Be sure to sketch lightly when first creating these outlines, and push harder with your pencil when you are happy with what is on your page.
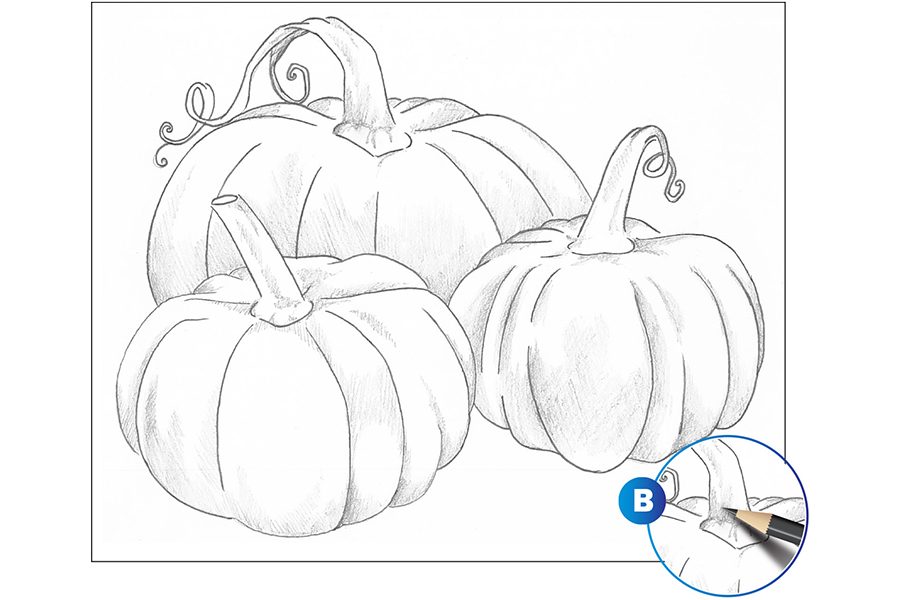
STEP 2: Start to Shade
Using your 3B and 4B pencils, start to add shading to your pumpkins. Use the hatching technique to lay down your lightest shades in this step. Put shading on the underside of the ridges and the bottoms of the pumpkins. Layer your marks slightly more on the backmost pumpkin, where the other two pumpkins overlap it. Add some shading to the stems in areas where the texture will create shadows and crevices (see Ex. B).
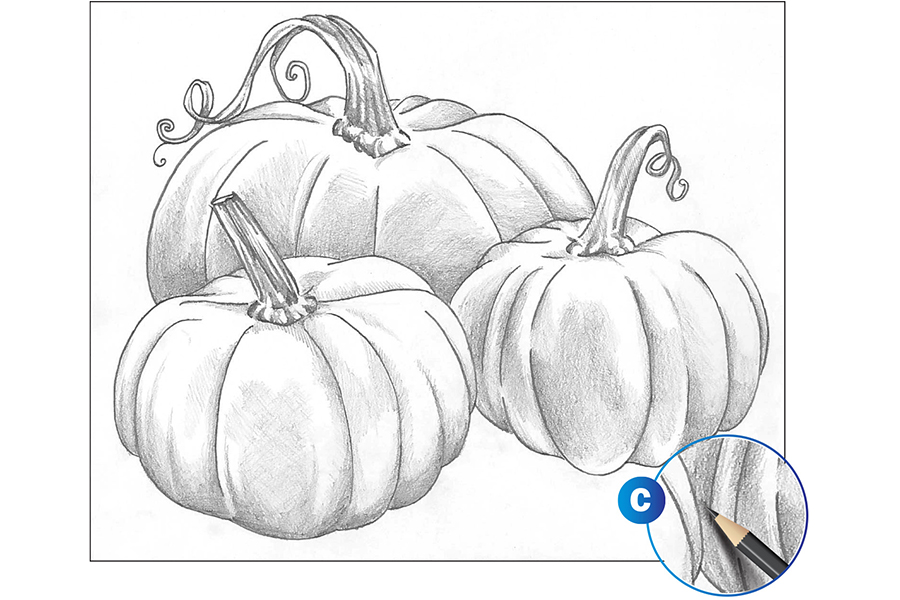
STEP 3: Continue Shading
Once all of the shadows are lightly sketched in, you can build them up and create dimension. Lay harder strokes down on the darkest parts of the pumpkins (see Ex. C). Add lighter shades starting from where the shadow stops, and ending where the highlights begin. Remember that the shadows are more dramatic on the backmost pumpkin, because the other two pumpkins are overlapping it. Create darker crevices and details in the stems as well.
STEP 4: Build Dimension
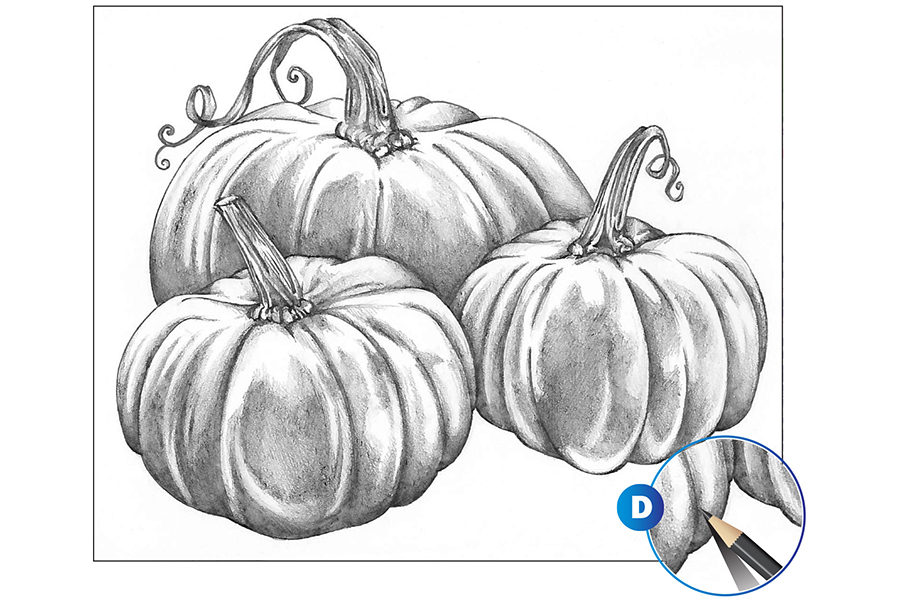
Using your 4B and 6B pencils, add the darkest shadows to the pumpkins. Darken their bottoms to keep the light source obvious. Deepen the shadows around the ridges, so that the hard outlines blend into the natural shading of the pumpkins (see Ex. D). Continue to bring the shading up higher on the pumpkins for a dramatic effect. Sharpen your pencils and add fine, dark details to the stems to show texture and direction.
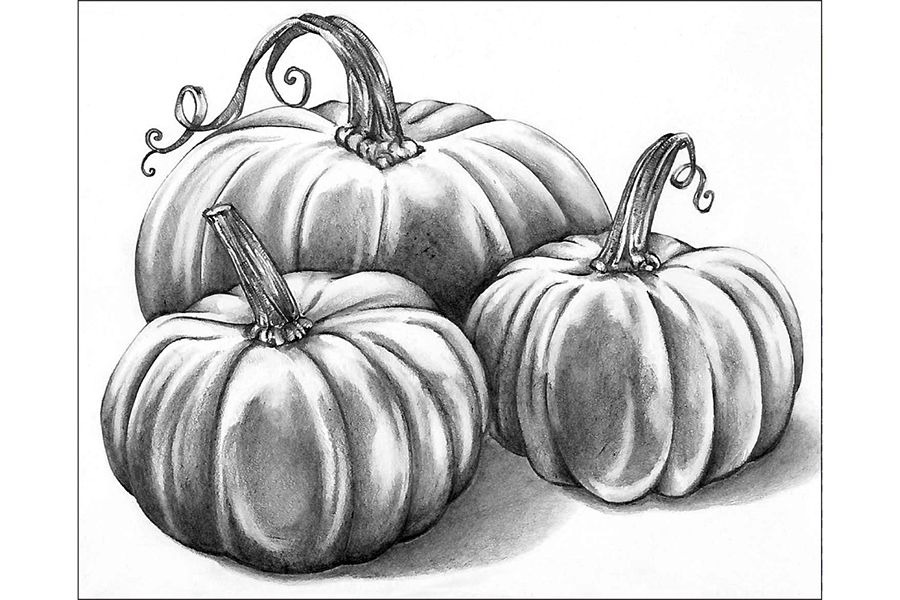
STEP 5: FInalize Your Artwork
Use your tortillon to blend your shades together and make them look smooth and realistic. After blending, you may notice that some of your darkest shadows lose their intensity. Simply take your 6B pencil and shade on top of these shadows after blending to make them as dark as possible. Add a soft cast shadow under the pumpkins to ground them in their environment. Use your eraser to brighten highlights after everything has been blended. Use a sharp 4B or 6B pencil to add in any final details that may have gotten lost after using the tortillon.