Gingerbread Gift Bag
October 13, 2023
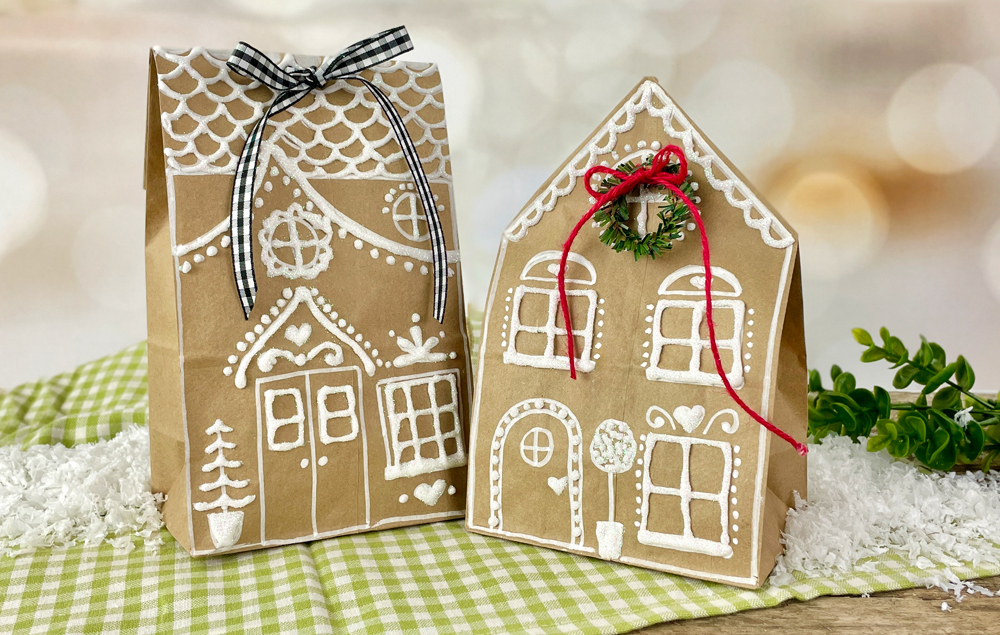
Transform a simple paper lunch bag into a delightful gingerbread gift bag, complete with sweet decorations and cozy charm! This whimsical craft is a unique way to package your gifts, especially when it’s personalized with your own design.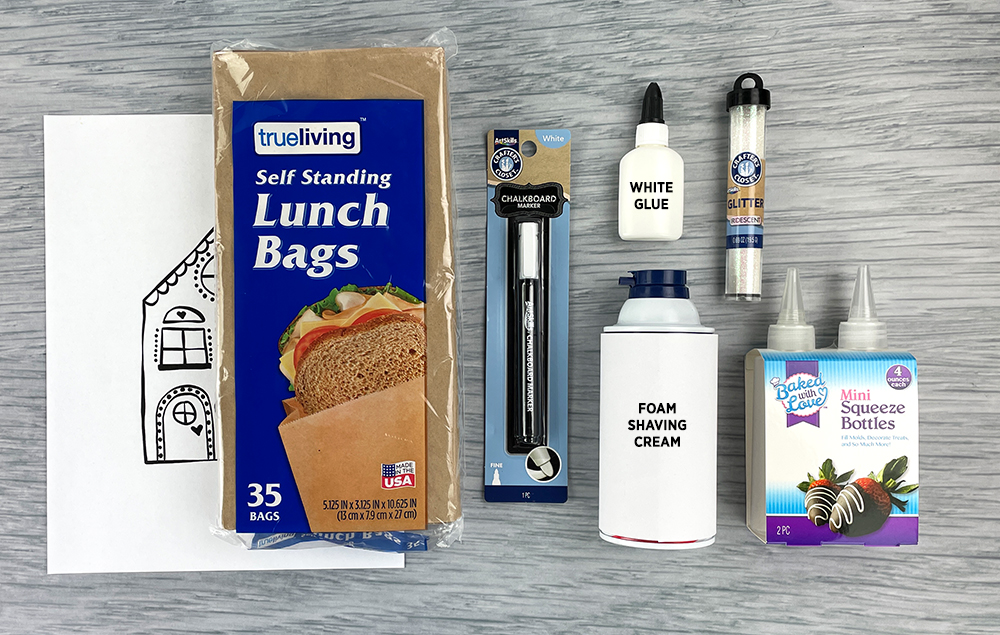


What You'll Need:
- Self Standing Paper Lunch Bags
- Crafter’s Closet White Chalkboard Marker
- Crafter’s Closet White Glitter
- Baked with Love Squeeze Bottles
- Crafter’s Closet Fabric Scissors
- Foam Shaving Cream
- White Glue
- ¼ Cup Measuring Cup
- Sandwich Bag
- Accents
- Template
Let's Get Started
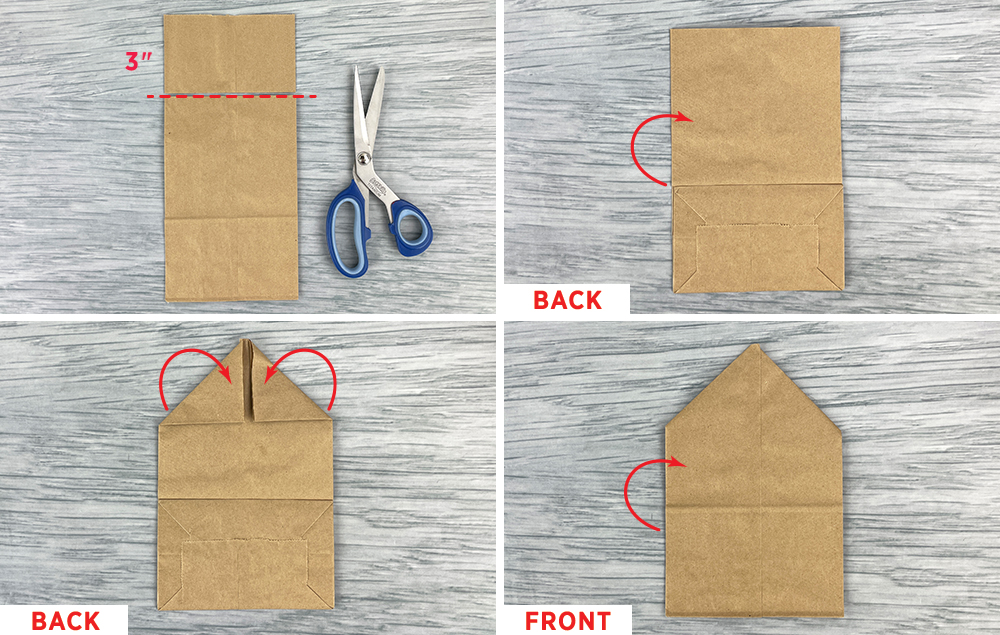
STEP 1:
A) Trim 3" from the top of the bag.
B) Flip the bag over to the back.
C) Fold the sides in on the top to meet in the middle, making a point.
D) Flip the bag back over to the front.
STEP 2:
A) Mix ¼ cup of foam shaving cream into ¼ cup of white glue.
B) Spoon the mixture into a plastic bag.
C) Cut a small corner off of the plastic bag.
D) Insert the open corner of the plastic bag into the squeeze bottle and squeeze the mixture into the bottle.
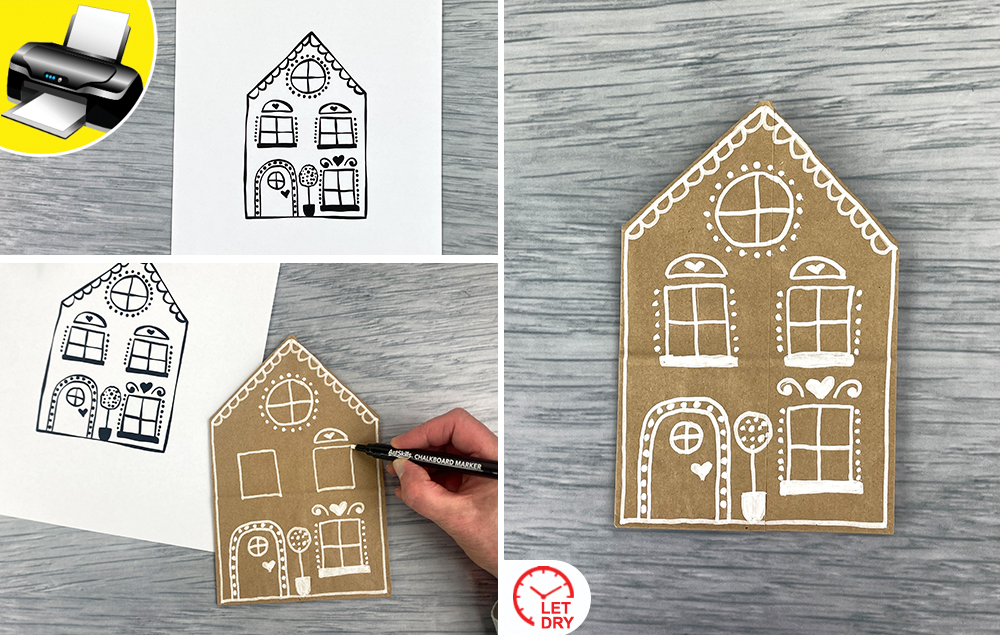
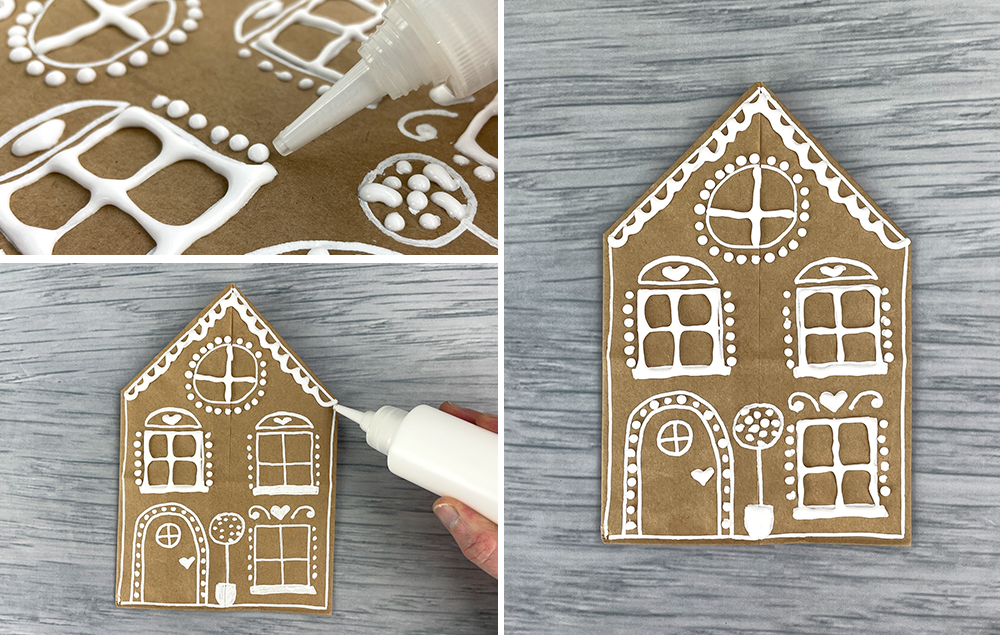
STEP 3:
A) Print out the template to use as guidance when drawing the house. Note: Feel free to create your own gingerbread house design!
B) Use the chalkboard marker to draw the house design on the bag.
C) Let the design dry.
STEP 4:
A)A) Use the squeeze bottle to draw over the chalkboard marker lines with the mixture. Tip: Let some chalk lines uncovered for added dimension.
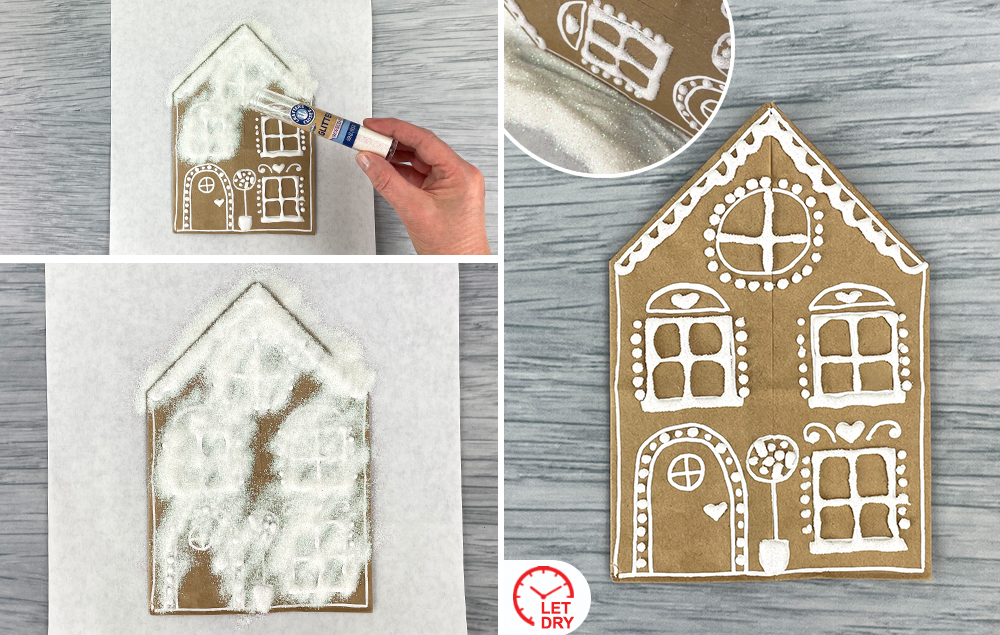
STEP 5:
A) Sprinkle glitter on the mixture while it is still wet.
B) Make sure to cover all of the areas that are wet.
C) Tap off the excess glitter and let the design dry.
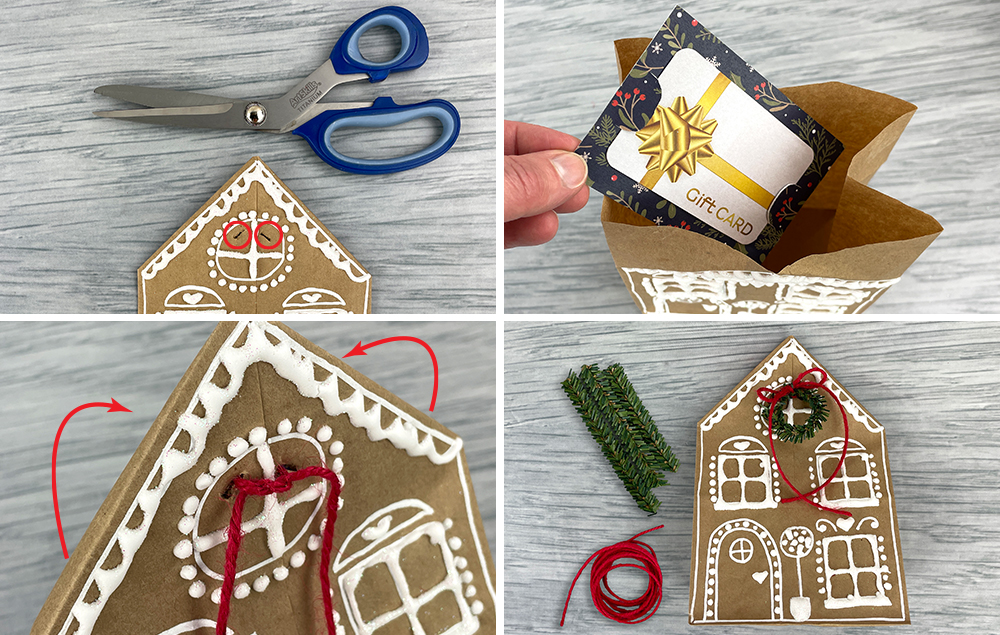
STEP 6:
A) Poke two holes in the top of the bag. Note: It’s easier to do this while the bag is empty.
B) Insert the gift into the bag.
C) Close the bag and thread ribbon through the two holes.
D) Tie a bow and add any accents that you would like!
Categories


