Colored Pencils - Apple
July 31, 2020
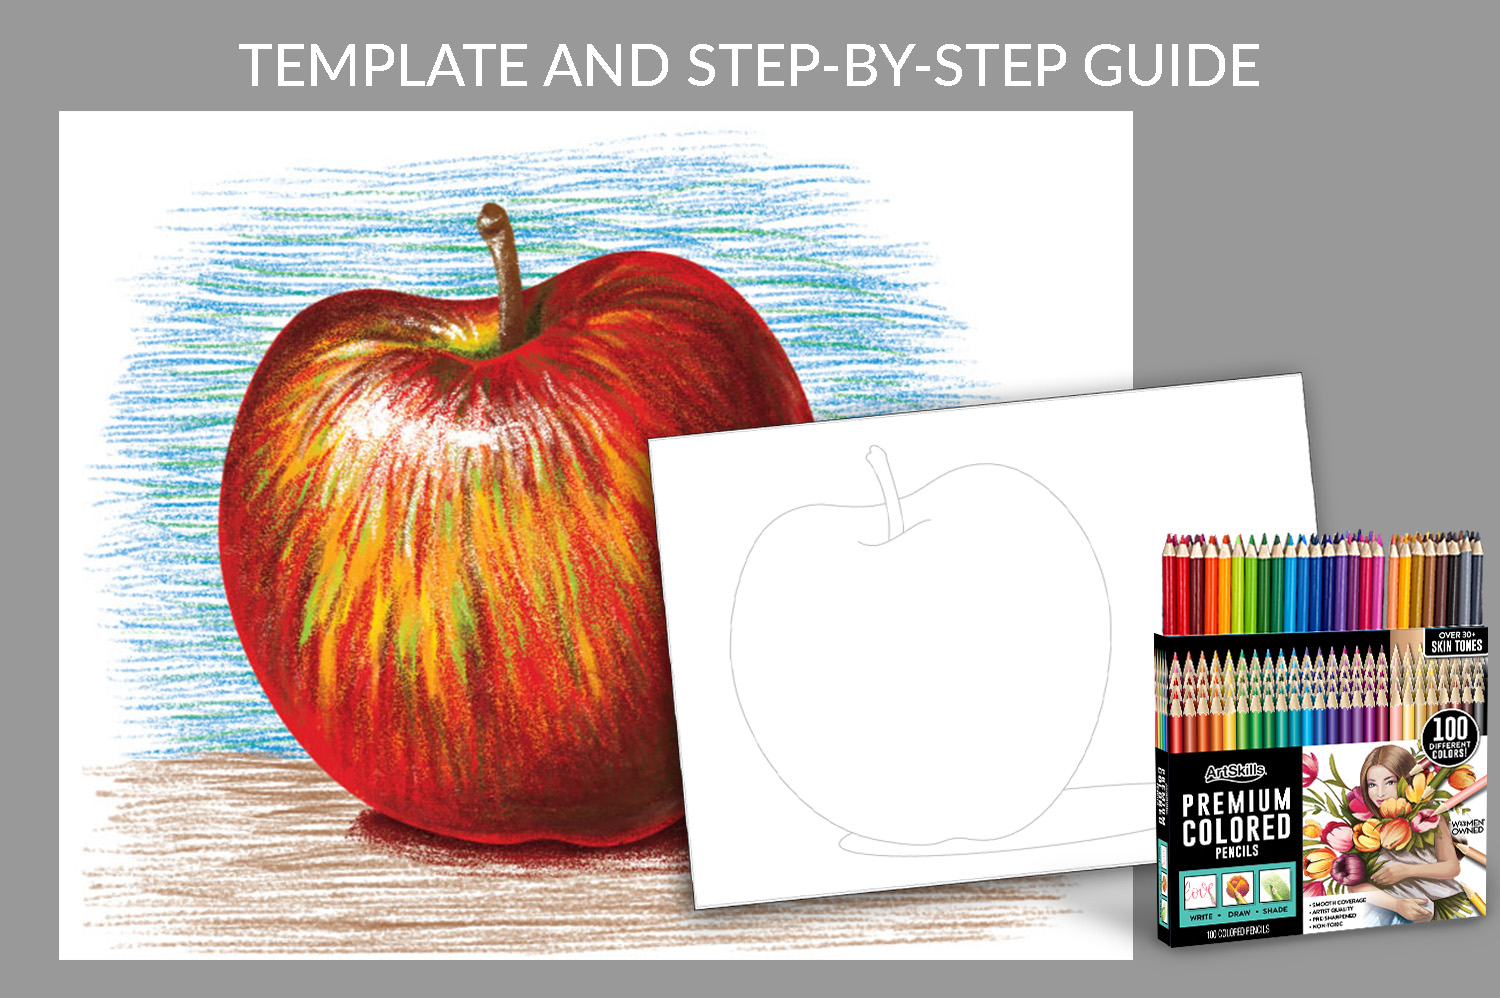
Let's Get Started!
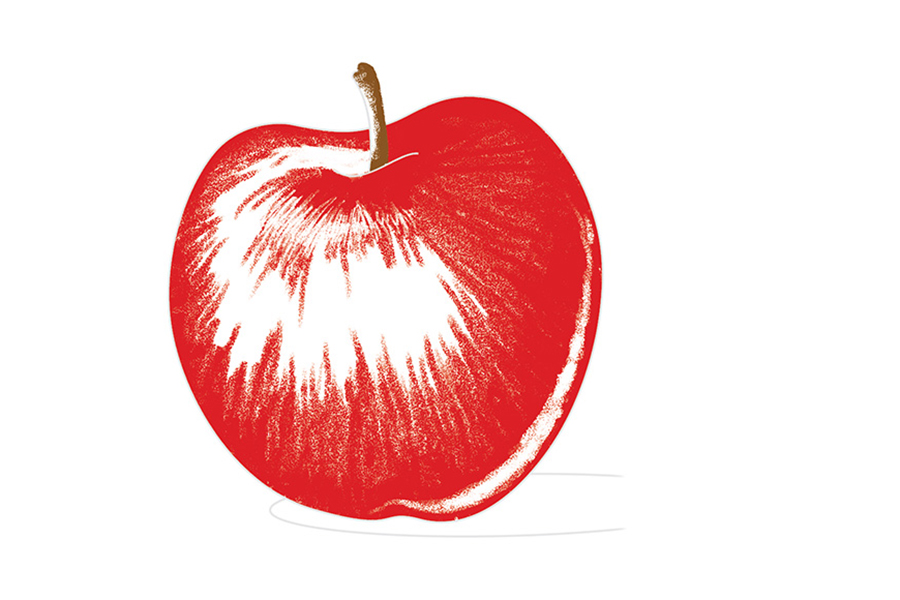
STEP 1:
Using the included project sheet, begin shading in the base color of the apple with Red, and the stem with Brown. Avoid shading areas where your Highlights will eventually be placed.
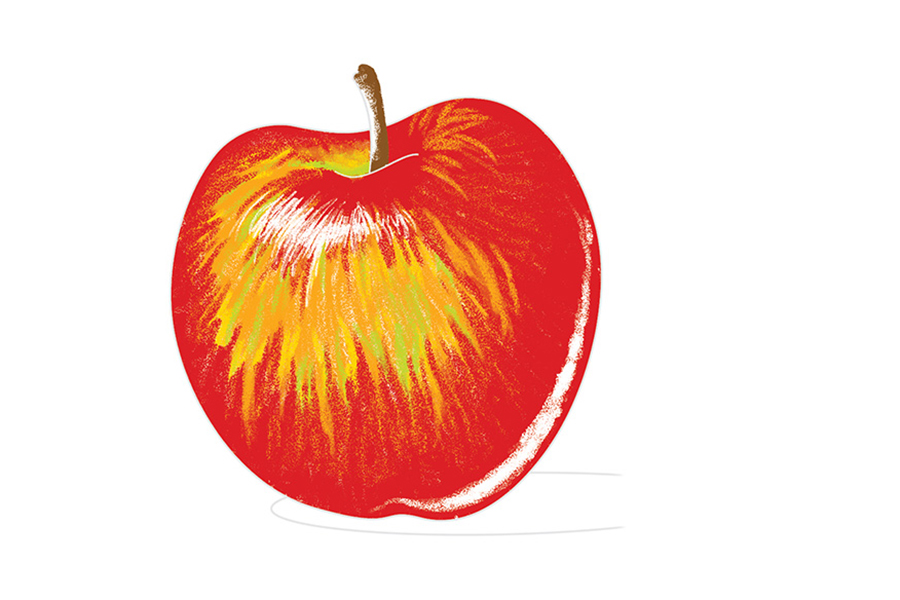
STEP 2:
Using your Yellow, Yellow Orange, and Yellow Green pencils, fill in the white spaces. Start with the yellows and oranges, and fill in sporadically with green. Do not color in the areas of the apple that will be reflected highlights.
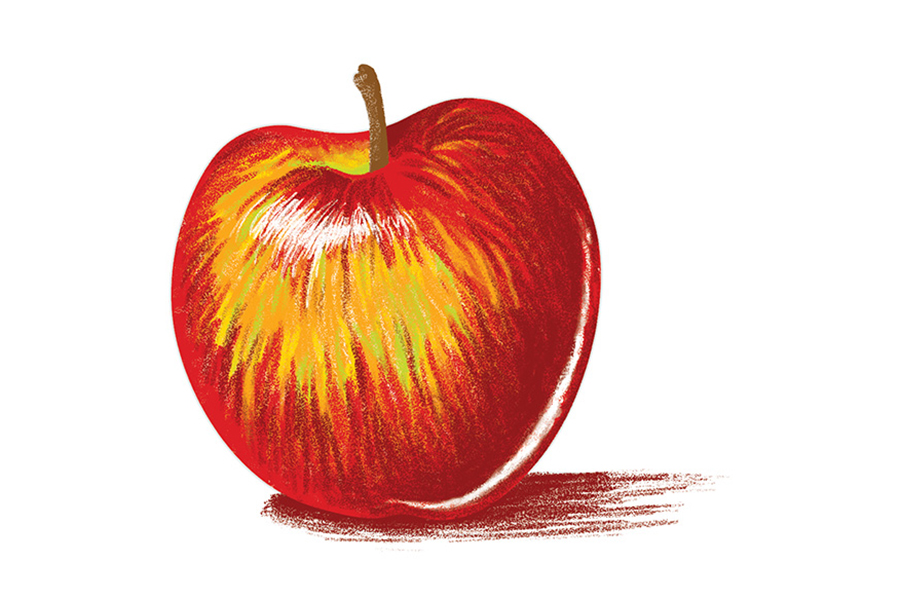
STEP 3:
Using the red and brown pencil, roughly shade in the darkest values on top of the base colors. Keep in mind that you might need to apply more pressure to your strokes in order to achieve the desired value of darkness.
STEP 4:
For a wider range of depth, use the Forest Green, pencil to accent the darkest shadows. Tone down some of the brighter values and highlights with your base colors.
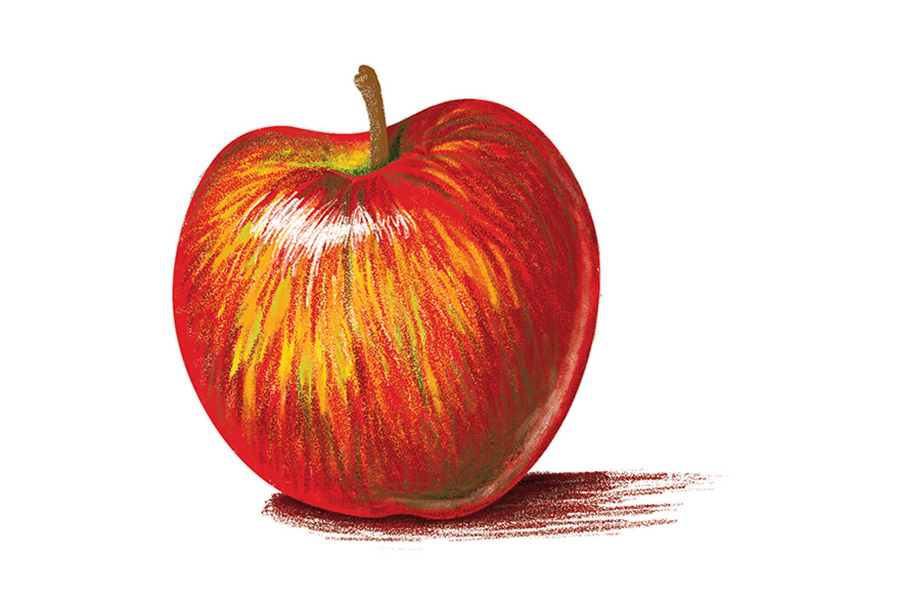
STEP 5:
Adding in the finishing details is what will give your apple dimension. In this step, you want to emphasize the darkness and brightness of the values. Start by using the red and brown pencil to build further upon your shadows. Then, using an eraser, brighten your highlights by removing color around their edges. Erase in the direction of your strokes on the apple. Once you have erased around the highlighted areas, take the White colored pencil and draw over the erased areas to further intensify the highlights.

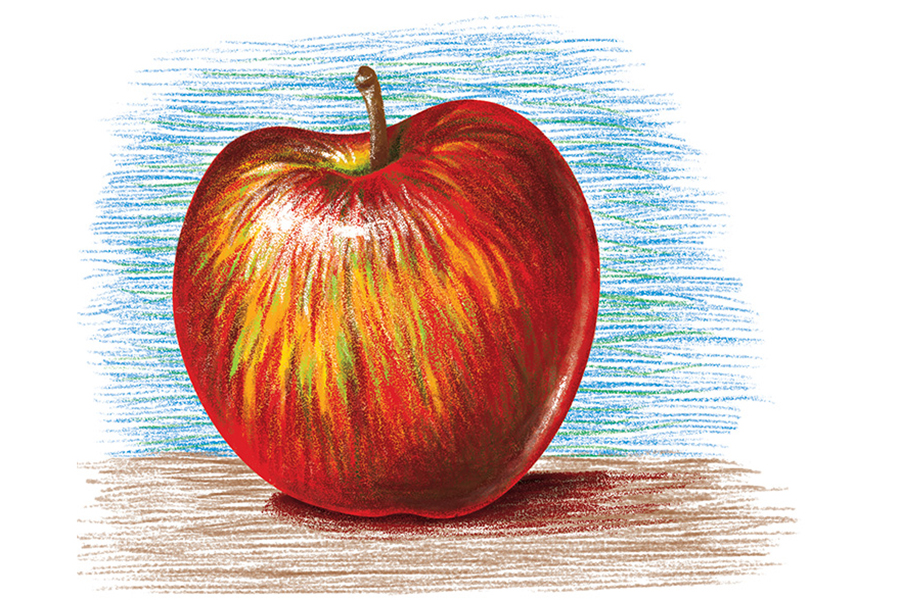
STEP 6:
Related Products


Categories


