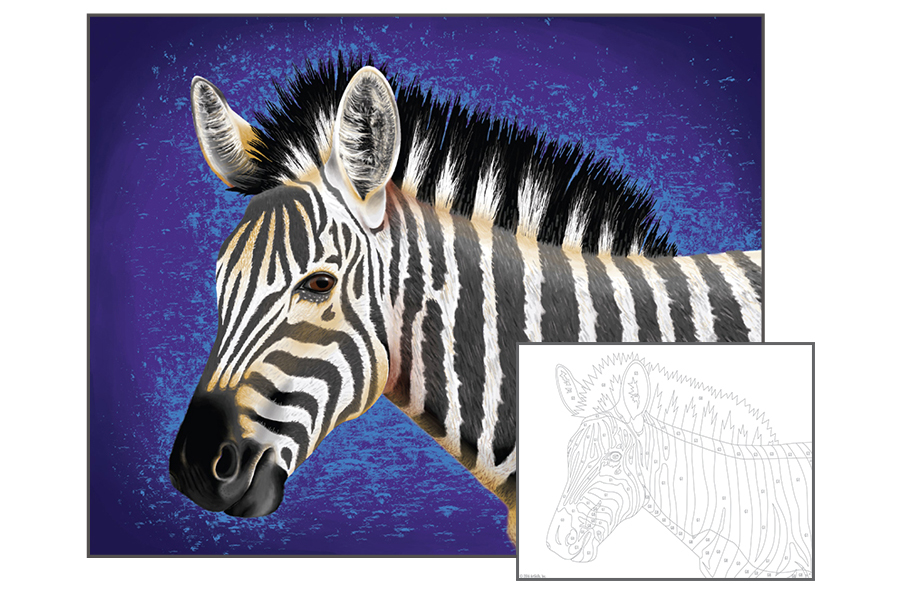
This printable project teaches you the tips and techniques about the smooth Acrylic Paint medium, perfect for artists of any age! Follow the steps below to guide you through and you will quickly be on your way to creating this Zebra.
Supplies Needed
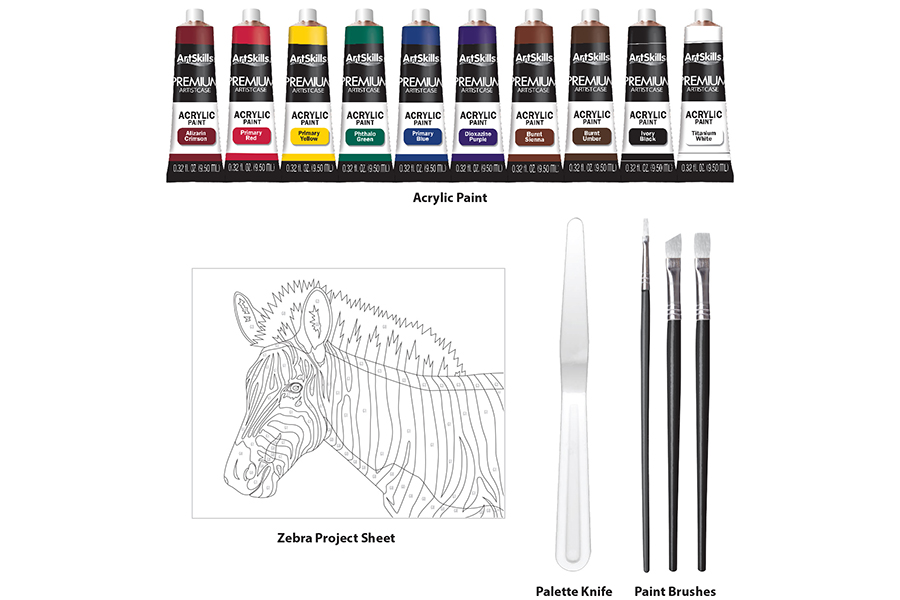
This project works best when using the materials shown below. These items can be found in the ArtSkills Premium Artist Case!
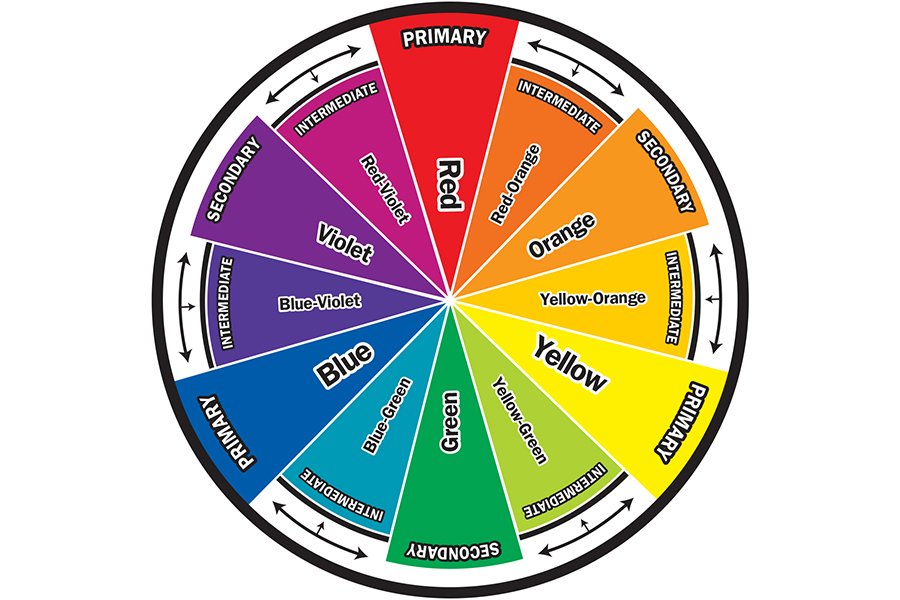
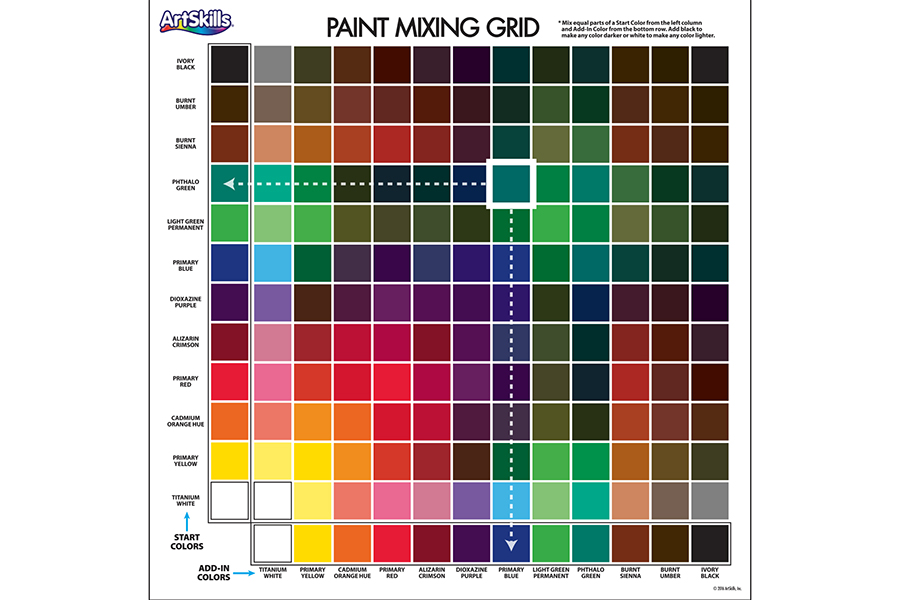
Color Guides Use the color wheel and paint mixing grid to create a variety of hues.
Tips & Tricks
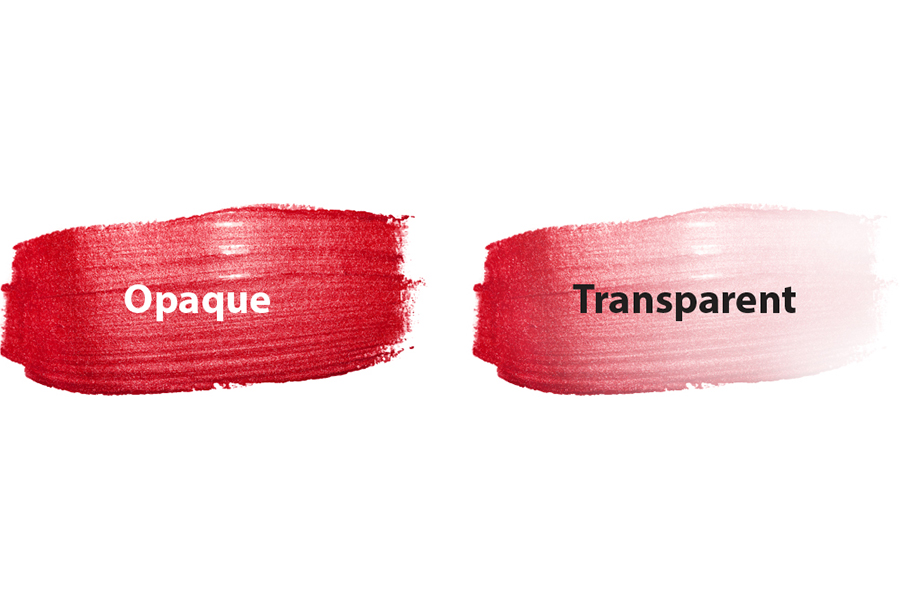
Opaque vs. Transparent Paint Acrylic paint can be used as opaque (non-transparent) if used straight from the tube, but can become transparent by adding water.
Blending Paints Together Acrylics dry very quickly, so be sure to blend your colors immediately after laying them down on your surface. Extend your blending time by spritzing water on your painting with a spray bottle.
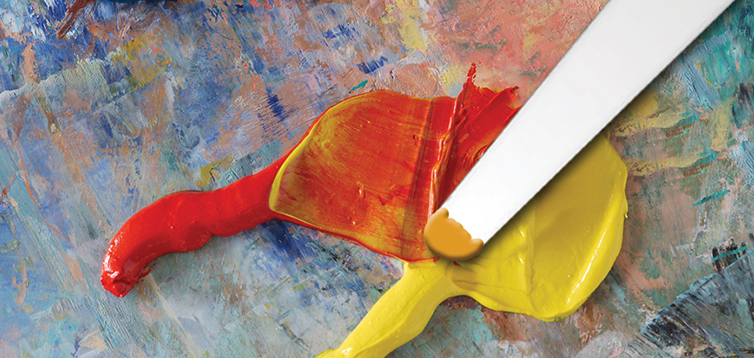
Adding Texture to Paintings Using the "impasto technique" will add unique, 3D layers and textures to your painting. To achieve this, use a generous amount of paint on a palette knife and apply thick layers on to your surface.
Let's Get Started!
STEP 1: Paint the First Layer of Colors
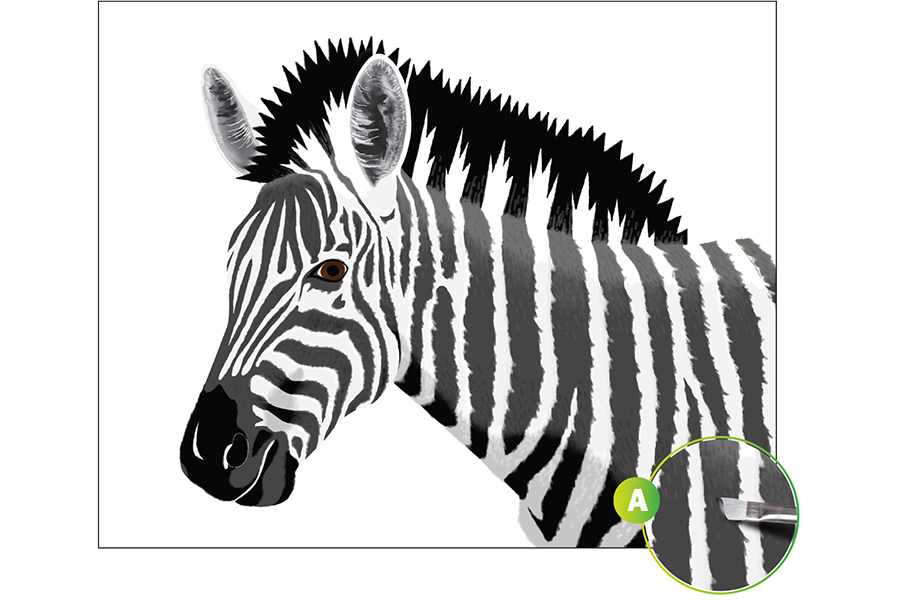
Begin by painting in the base colors of the zebra (see Ex. A). Use the Value Scale you've created, as well as the Value Key shown above, to create the gray values G8, G3, G1, and G0. Fill in these shapes as labeled on the zebra. Use quick, angled strokes to create a slight fur texture and blend your colors together. Angle your brush to gain more control when painting.
STEP 2: Blend the Different Shades
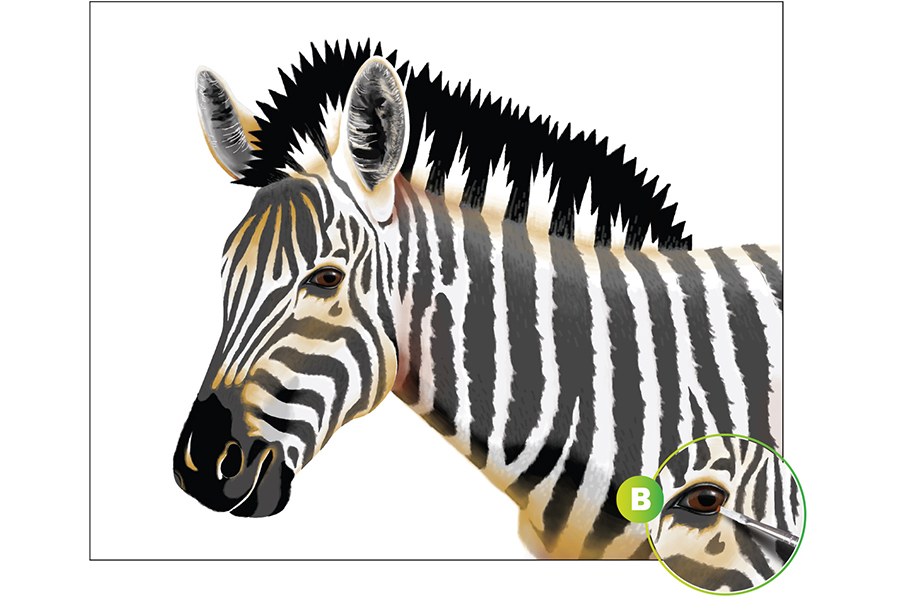
To prevent the zebra from looking flat, create additional colors to layer into the gray values in the fur. Use your Primary Yellow and Burnt Sienna paints to create different hues that will add a dynamic shading effect to the zebra. Lay a light wash of these colors down in the areas of shadow on the zebra's face, neck, and chest. Build darker brown values in the eye to really bring it to life (see Ex. B). Slowly build up these colors until there is a high contrast between the different shades.
STEP 3: Add Finer Detail
With quick strokes, brush Titanium White from the top of the stripes into the black of the mane (see Ex. C). Using values of gray, paint angled strokes on the stripes to create fur texture. Begin with the darkest grays first, then finish with the lightest grays on top. Add more detailed strokes to the inside of the ears with your smallest brush.
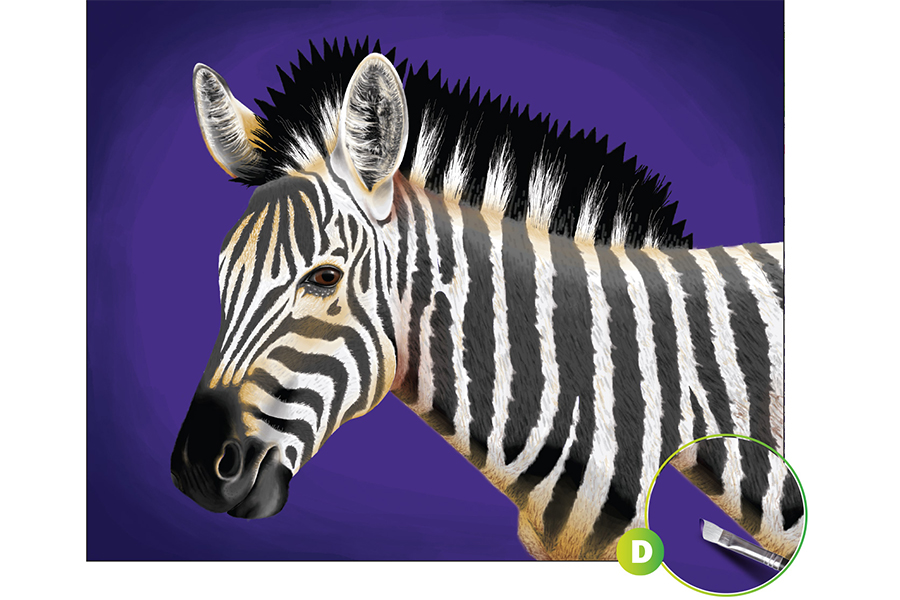
STEP 4: Develop Further Realism
Mix a light purple color and carefully paint a solid background around the zebra (see Ex. D). Before that layer dries, mix a dark purple color and blend it into the light purple. Start from the edges of the paper and work towards the center when blending to create a smooth gradient effect in your shades.
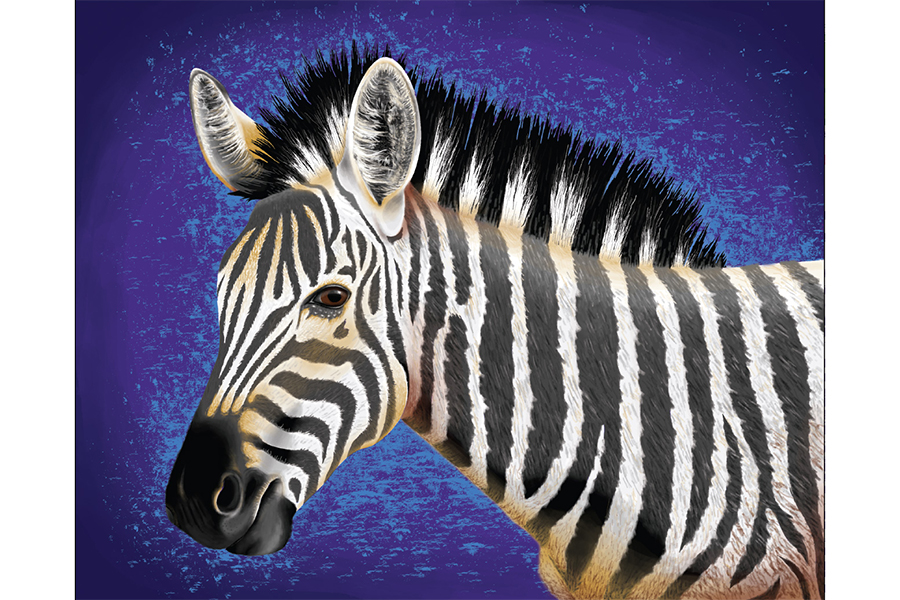
STEP 5: Finalize Your Artwork
Mix a light blue paint and paint quick brush strokes around the outside of the zebra. Paint strokes of the light blue into the spaces between the mane and the background, so that it appears as though the color is showing through the hairs. Darken and define the crease of the mouth and snout by blending shades of gray into the black. Add depth to the inside of the nostril by mixing a medium shade of gray at the bottom and blending it out towards the center. Once you have completely finished your piece, you may notice that some details of the zebra have been covered up by the background. Use your smallest brush to add back any details that you may have lost. Use very delicate and quick strokes to achieve the finest lines possible for these details.