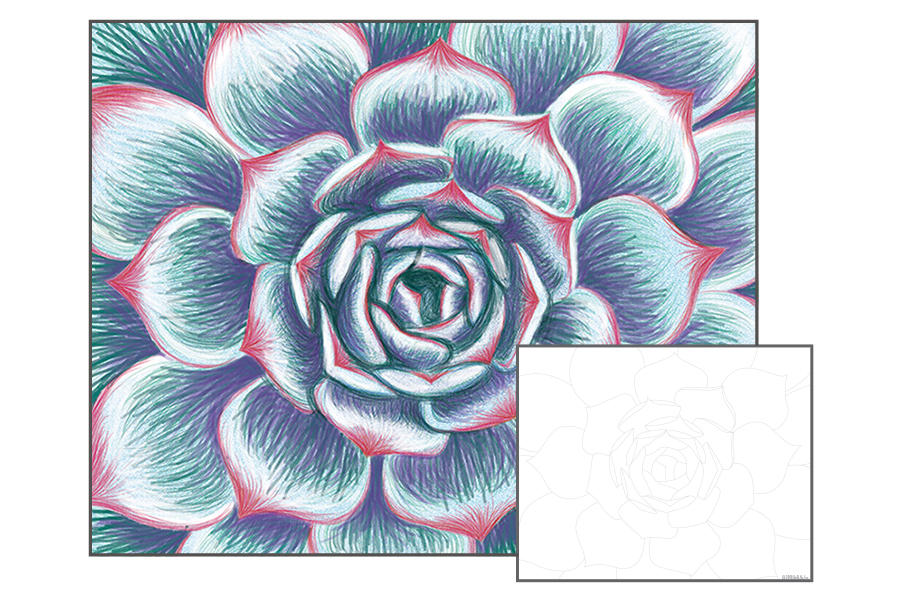
Colored Pencil - Succulent Cactus
July 30, 2020
Let's Get Started!
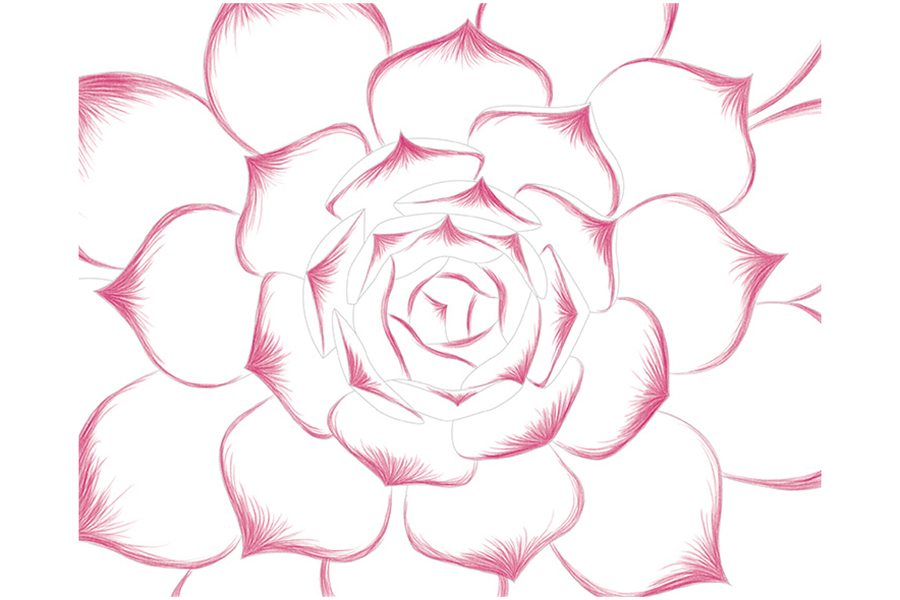
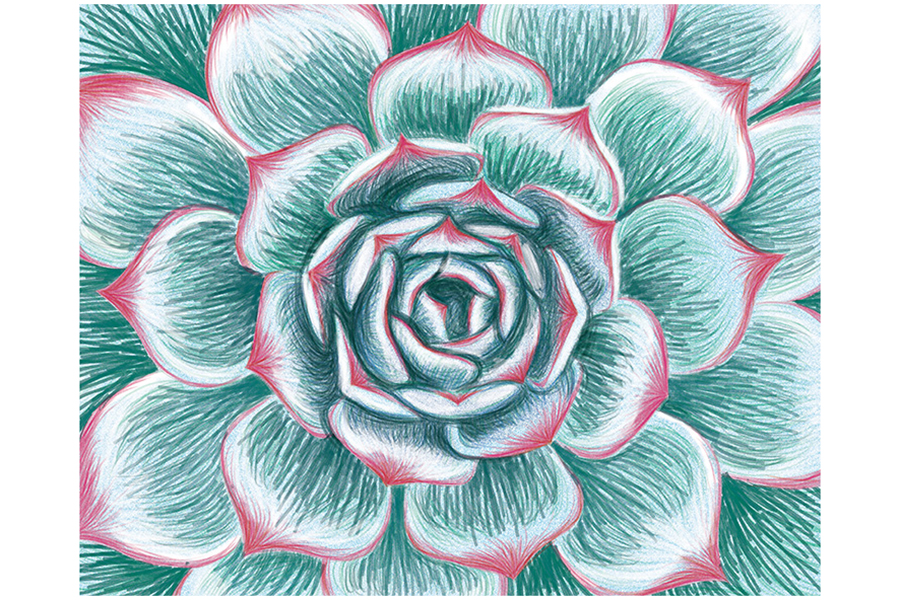
STEP 1:
Using the project sheet, start at the point of each leaf and begin adding short strokes of Red that descend towards the base of the leaf. Line the outer edges of your leaves with red as well.
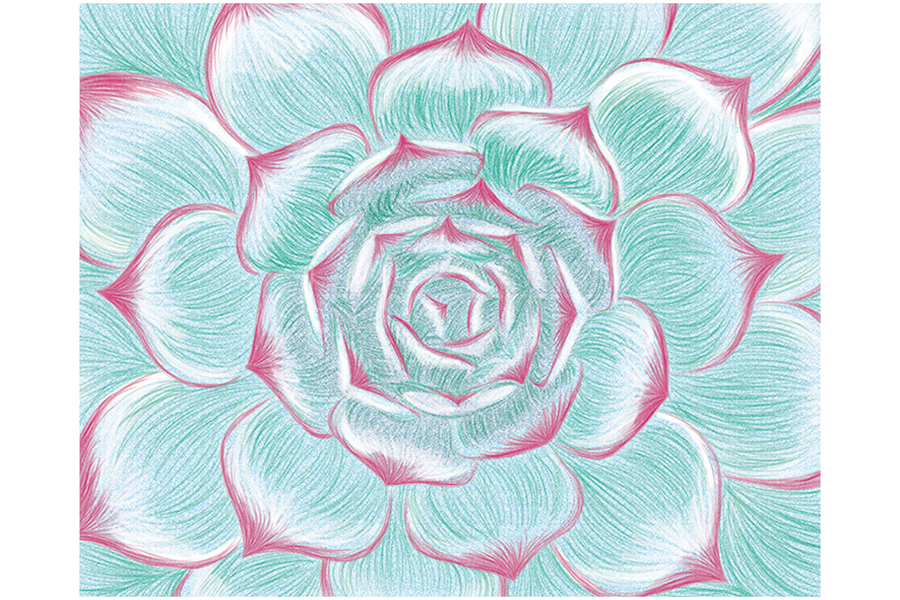
STEP 2:
Lay down a soft layer of Blue on each leaf. Then, using the Light Green pencil, start to build some shading from the base of each leaf to the tip. When coloring, be sure to follow the natural curve of each leaf. This will help to create a realistic succulent.
STEP 3:
Using the Green pencil, build your shadows by adding color to the base of each leaf until you reach mid-way. Next, take your Blue pencil and begin building up the shades in the center of the succulent.
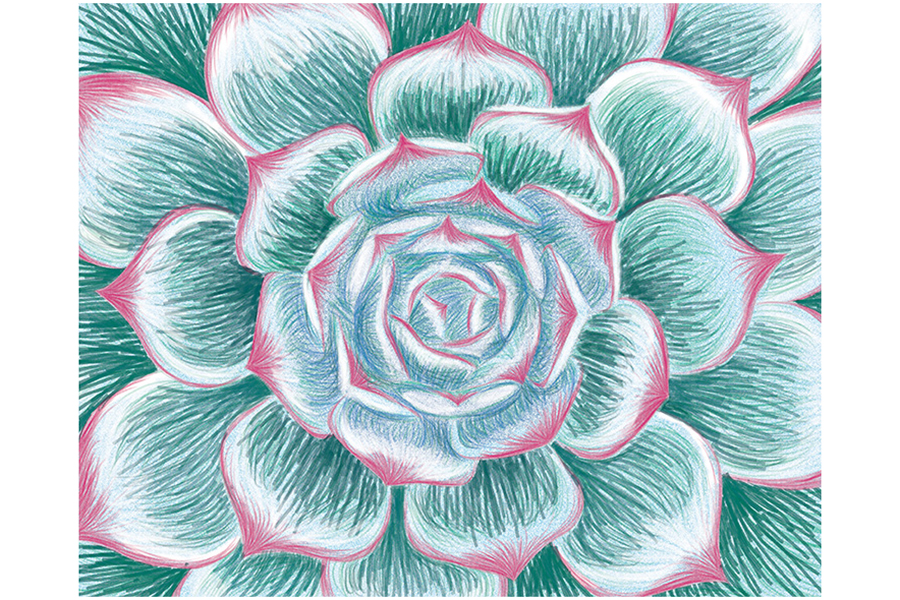
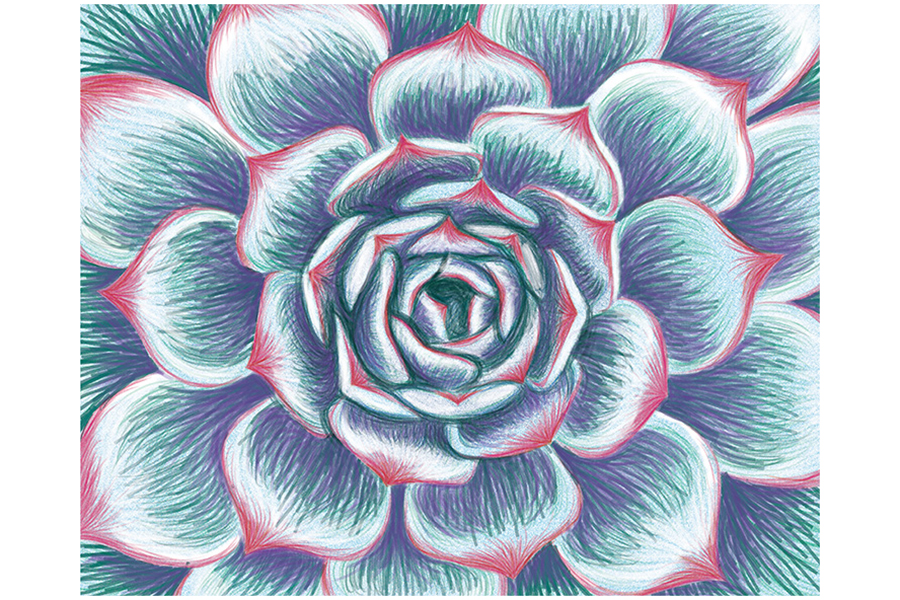
STEP 4:
Using the Blue pencil, build your shadows up even more by adding color to the center of the succulent. Focus on making the areas where the leaves meet the most dark. Take the Red pencil and add more shading to the very tip of the leaves.
STEP 5:
Take the Blue Violet pencil and overlap the darkest shadows at the base of each leaf. Use broad, directional strokes that gradually fade out towards the lighter tips
Related Products

Categories


