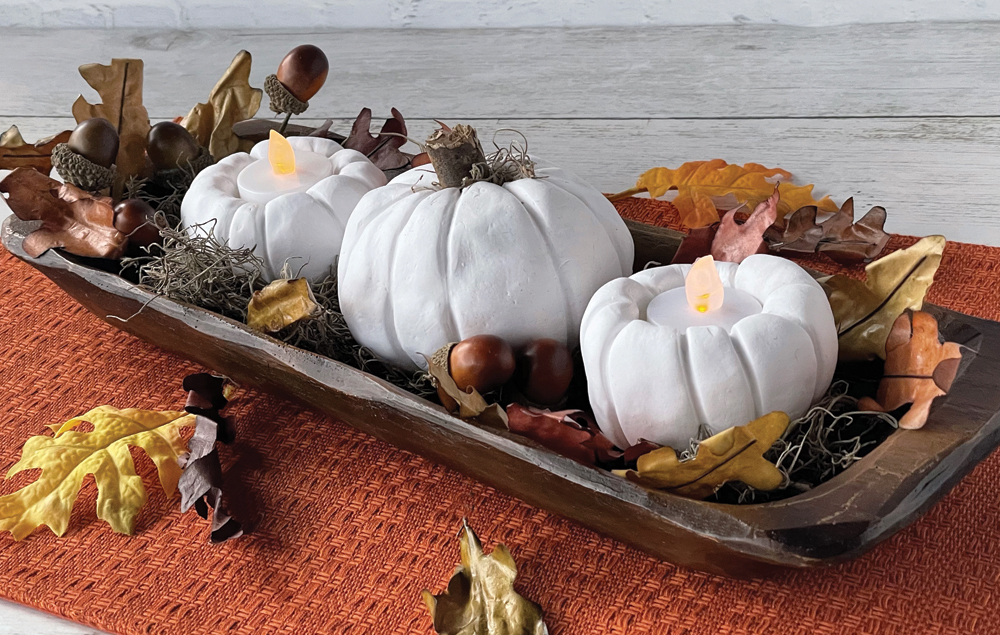
Pretty white pumpkins will make a charming accent for your fall tablescape! These clay pumpkins are easy to make using just a few supplies. You can give them sticks for stems or shape them to hold tea light candles.
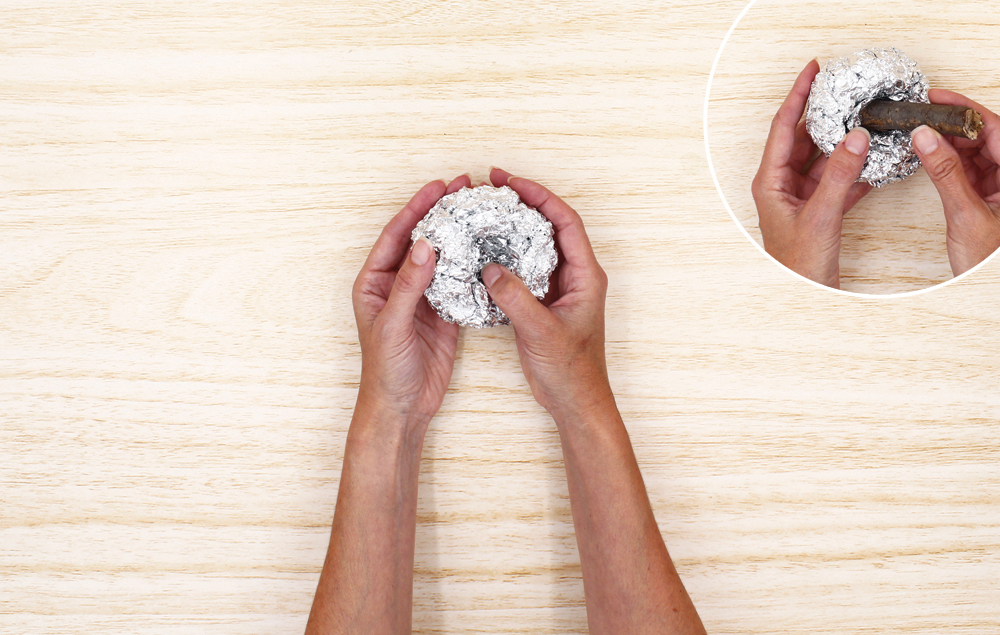
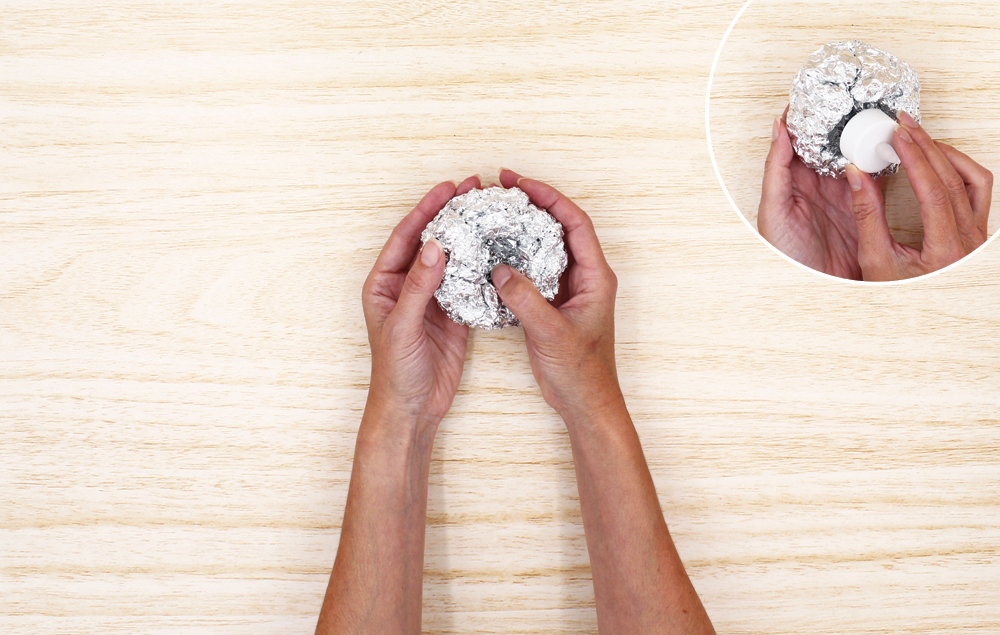
A) Form a 20" x 40" piece of aluminum foil into a ball shape, leaving the center open so that the stick for the stem can be inserted.
STEP 2:
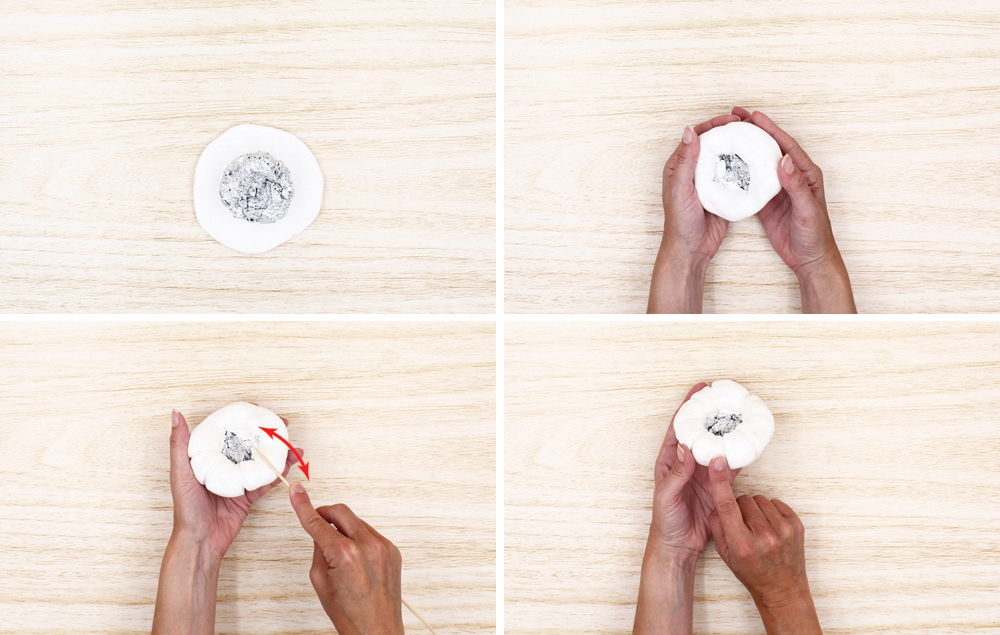
A) Roll a whole block of clay into a ball.
B) Press the ball of clay out with your fingers to make a flat circle about 6" in diameter.
STEP 3:
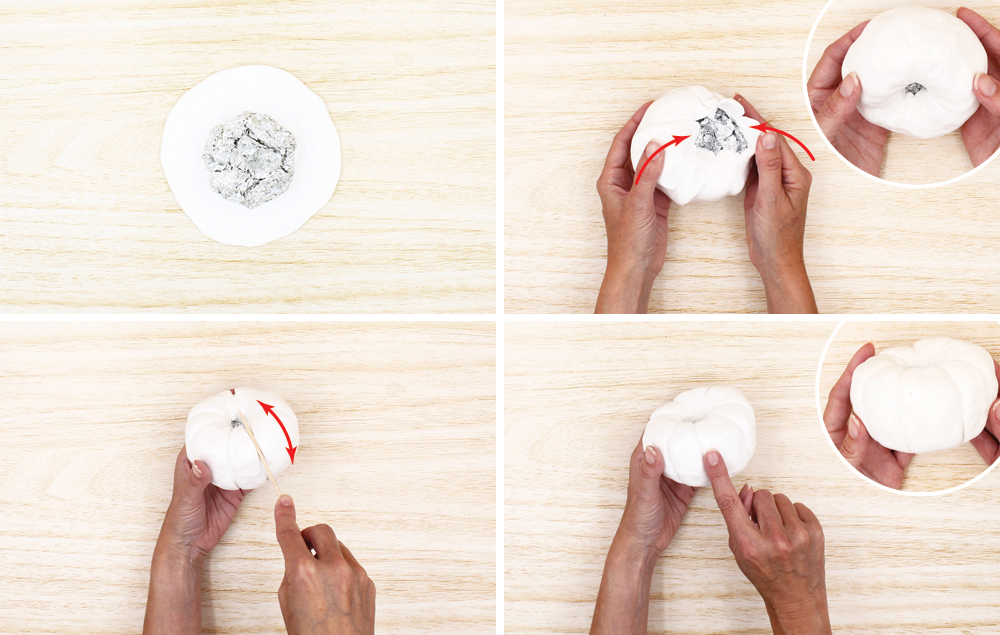
A) Place the aluminum foil ball in the center of the clay circle. The opening in the foil ball should be facing up.
B) Work the clay up and around the sides of the aluminum foil ball. Cover the ball completely, leaving the center open at the top for the stick stem. Smooth out any rough areas in the clay with your thumbs.
C) Use a bamboo skewer to make grooves in the pumpkin. To do this, rock the skewer back and forth along the side at random intervals. Tip: Make some sections of the pumpkin fatter and some skinnier for a more natural-looking pumpkin.
D) Use your finger to smooth out the grooves on the pumpkin.
STEP 4:
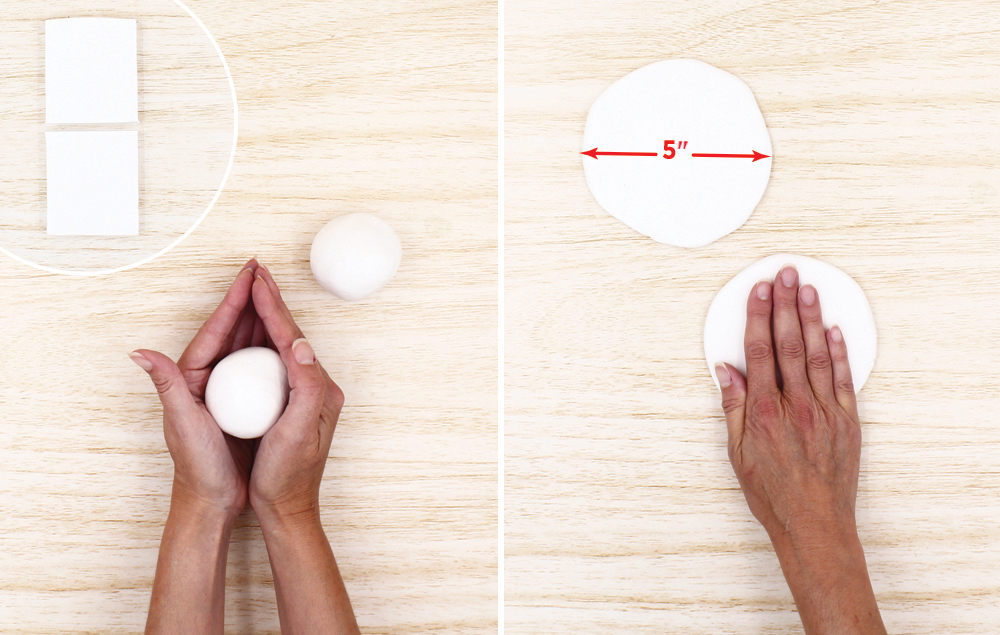
A) Cut a block of clay into two equal sections. Roll each section into a ball.
B) Press each ball of clay out with your fingers to make a flat circle about 5" in diameter.
STEP 5:
Do the following steps for both pieces of clay:
A) Form a 20" x 20" piece of aluminum foil into a ball shape, leaving the center open so that a LED tea light candle can be inserted.
STEP 6:
A) Place the aluminum foil ball in the center of the clay circle. The opening in the foil ball should be facing up.
B) Work the clay up and around the sides of the aluminum foil ball. Cover the ball completely, leaving the center open at the top for the LED tea light. Smooth out any rough areas in the clay with your thumbs.
C) Use a bamboo skewer to make grooves in the pumpkin. To do this, rock the skewer back and forth along the side at random intervals. Tip: Make some sections of the pumpkin fatter and some skinnier for a more natural-looking pumpkin.
Use your finger to smooth out the grooves on the pumpkin\
STEP 7:
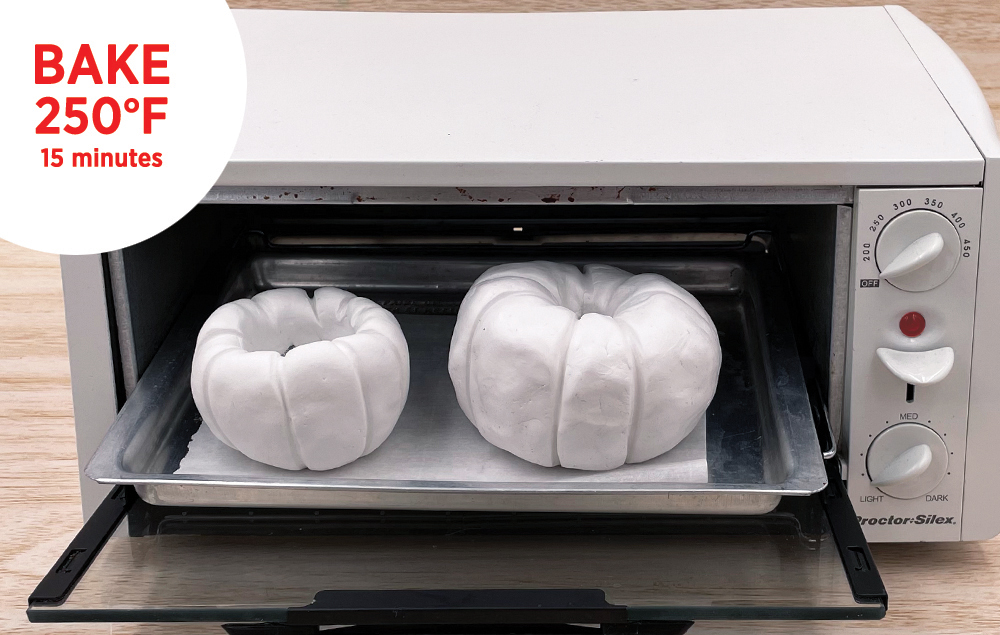
A) Bake the pumpkins at 250 degrees for 15 minutes. Let cool.
STEP 8:
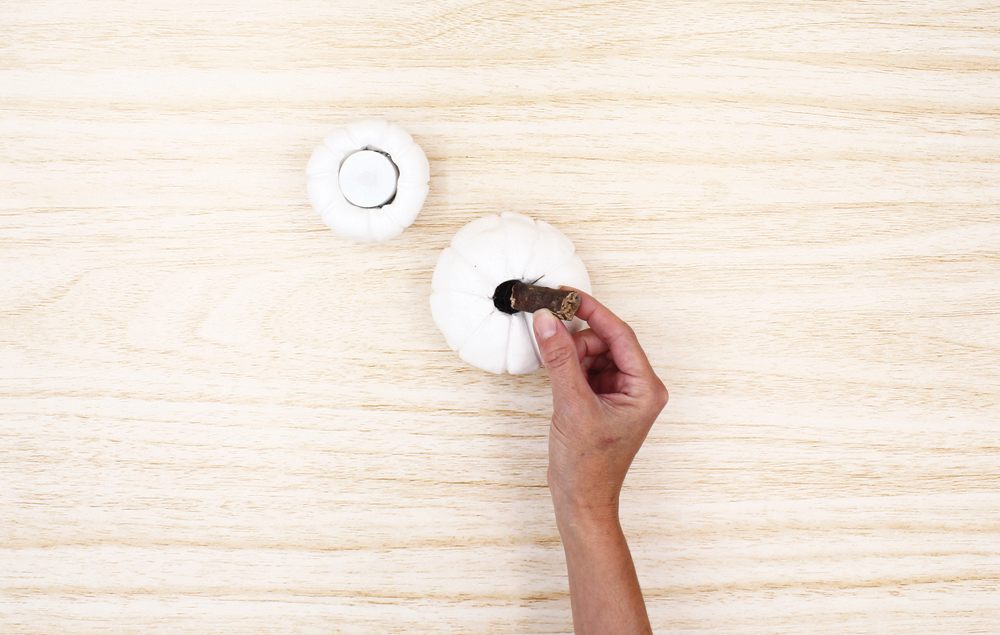
A) Insert a stick for the stem in the larger pumpkin and the LED tea light candles in the smaller pumpkins.