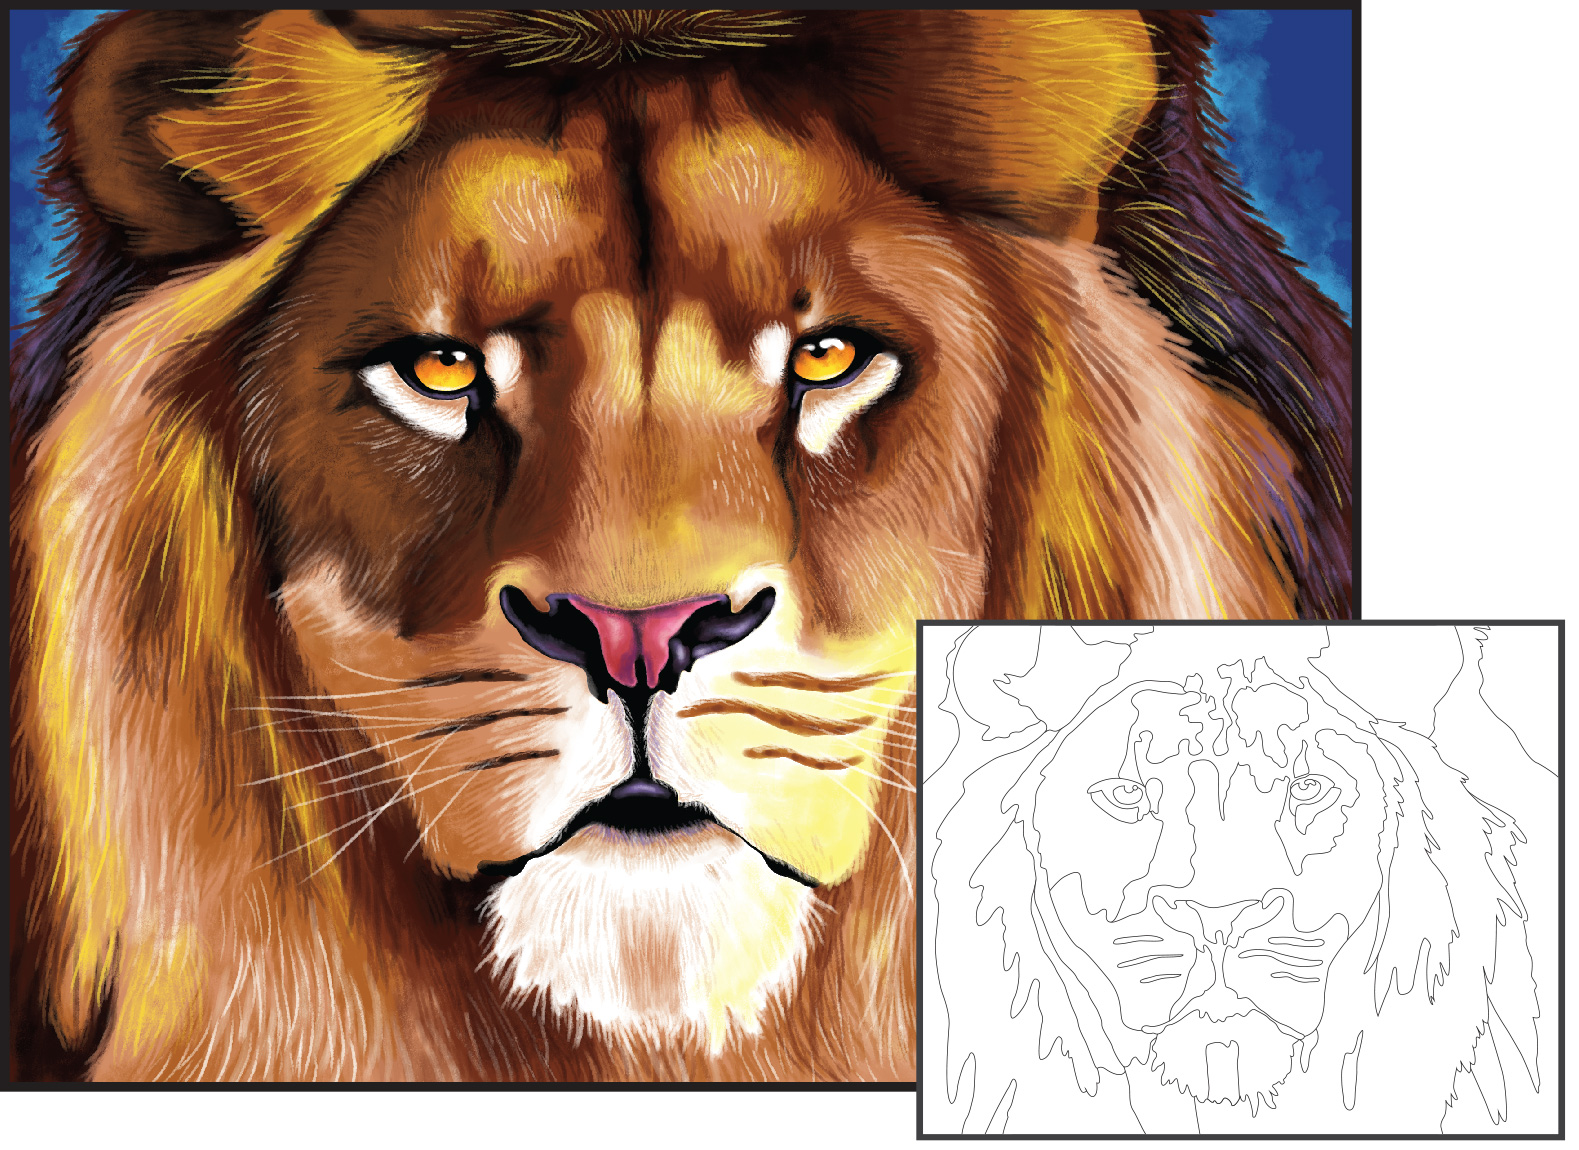
This printable project teaches you the tips and techniques about the smooth Acrylic Paint medium, perfect for artists of any age! Follow the steps below to guide you through and you will quickly be on your way to creating this African Lion.
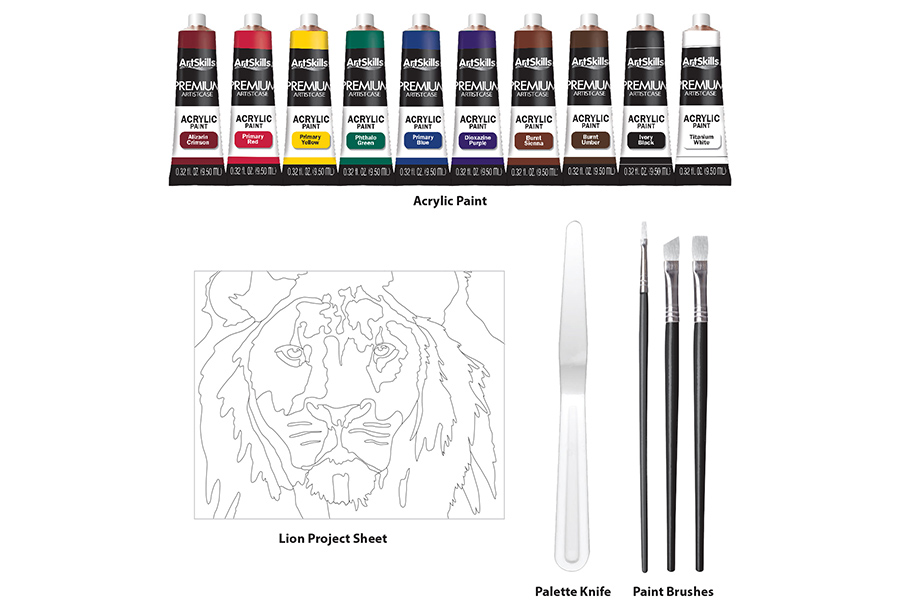
Supplies Needed
This project works best when using the materials shown below. These items can be found in the ArtSkills Premium Artist Case!
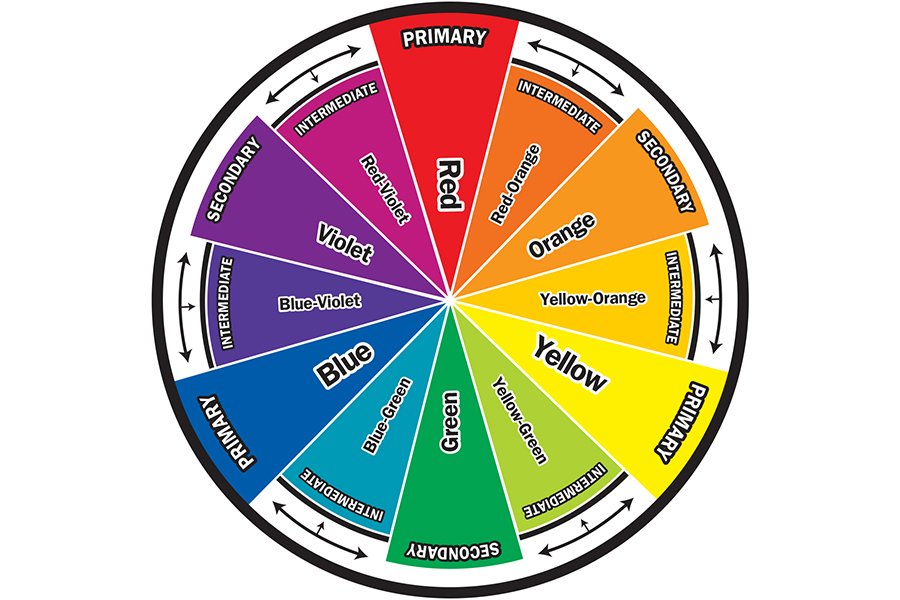
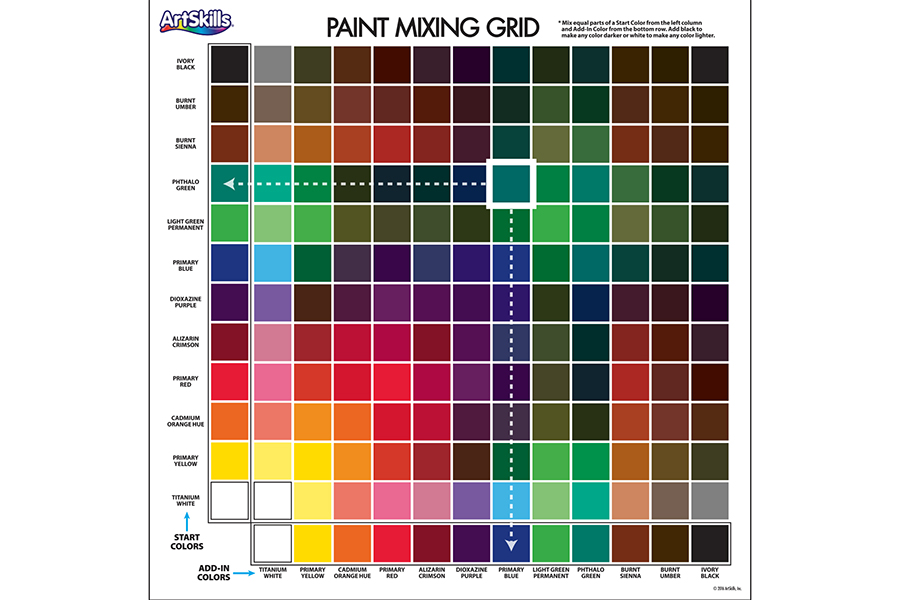
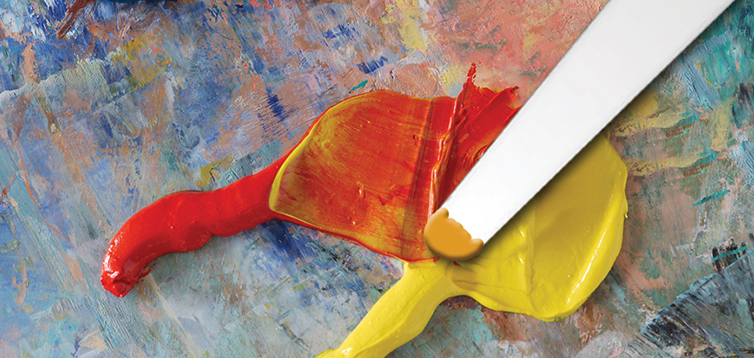
Color Guides Use the color wheel and paint mixing grid to create a variety of hues.
Tips & Tricks
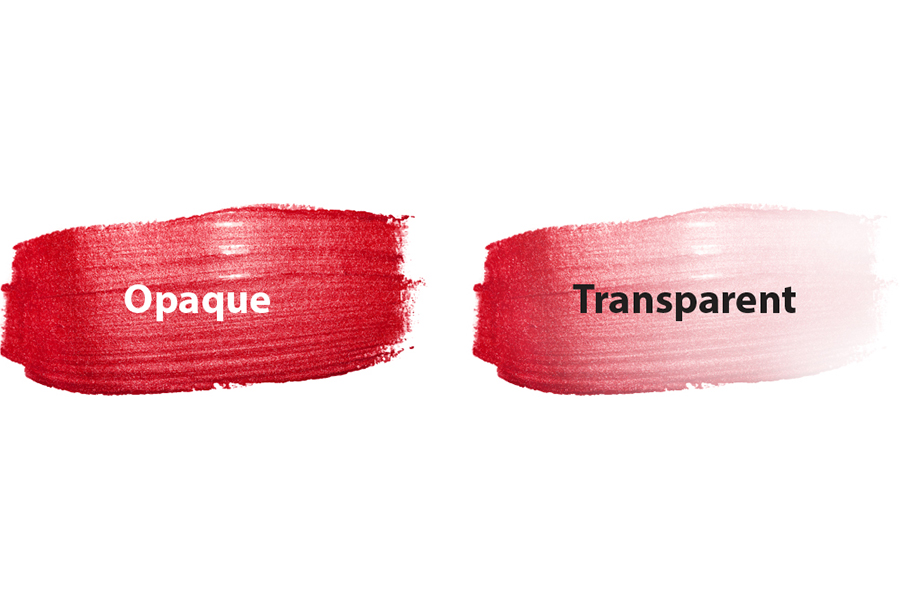
Opaque vs. Transparent Paint Acrylic paint can be used as opaque (non-transparent) if used straight from the tube, but can become transparent by adding water.
Blending Paints Together Acrylics dry very quickly, so be sure to blend your colors immediately after laying them down on your surface. Extend your blending time by spritzing water on your painting with a spray bottle.
Adding Texture to Paintings Using the "impasto technique" will add unique, 3D layers and textures to your painting. To achieve this, use a generous amount of paint on a palette knife and apply thick layers on to your surface.
Let's Get Started!
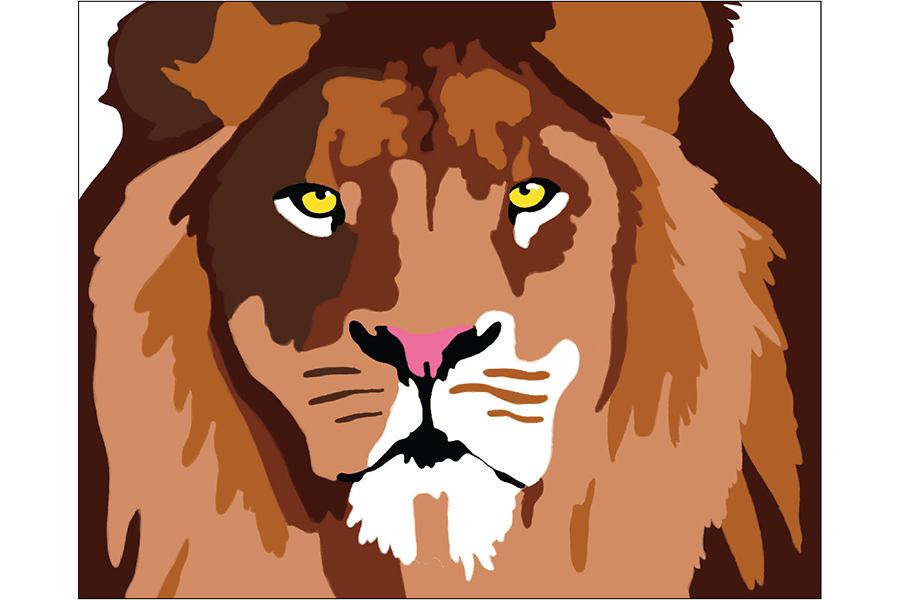
STEP 1: Paint the First Layer of Colors
Begin by painting in the first layer of colors of the lion. Be sure to cover all of the gray line art. Follow the Paint Mixing Grid to make and match your paint colors. (Note: use Burnt Sienna straight from the tube). Use these colors to fill in all of the brown areas of the lion. Use Primary Yellow for the eyes. Paint in Ivory Black for the inner nose, around the eyes, and the mouth. Mix a shade of pink from the Paint Mixing Grid for the lion's nose.
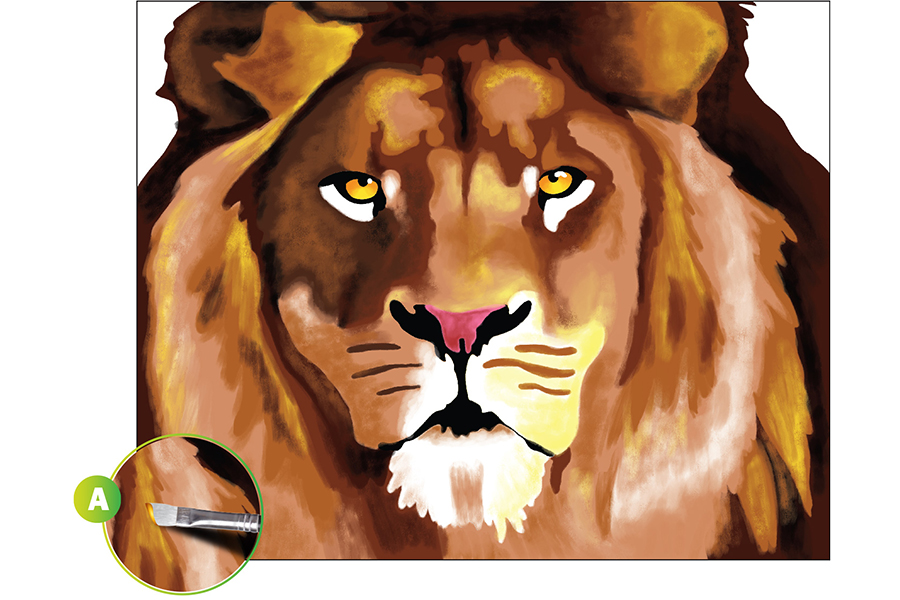
STEP 2: Blend the Different Shades
After the first layer of colors is painted in, start to blend the different shades of brown. While your paint is still wet, use loose, thick strokes to brush colors down onto adjacent colors. Be sure to make your paint strokes go in the natural direction of the lion's fur (see EX. A). Also add orange to the eyes to give them depth, and some dark pink to the nose. Use Primary Yellow for the beginnings of highlights in the fur.
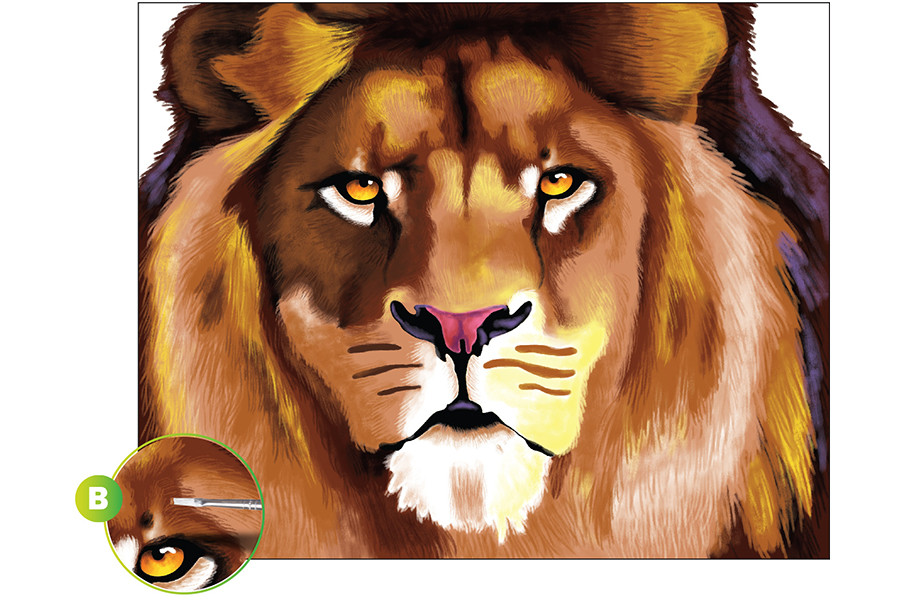
STEP 3: Add Finer Detail
Paint in finer strokes where two fur colors meet (see Ex. B). Use your smallest brush to overlap one color onto the next with loose strokes to achieve a natural, furry-looking texture. Add darker details around the eyes with Ivory Black. Paint more shading in the eyes with shades of orange and yellow. Darken the nose with a mixture of purple. Add light purple to the darkest part of the mane for a dramatic highlight. Do the same with small highlights on the black areas of the nose and mouth.
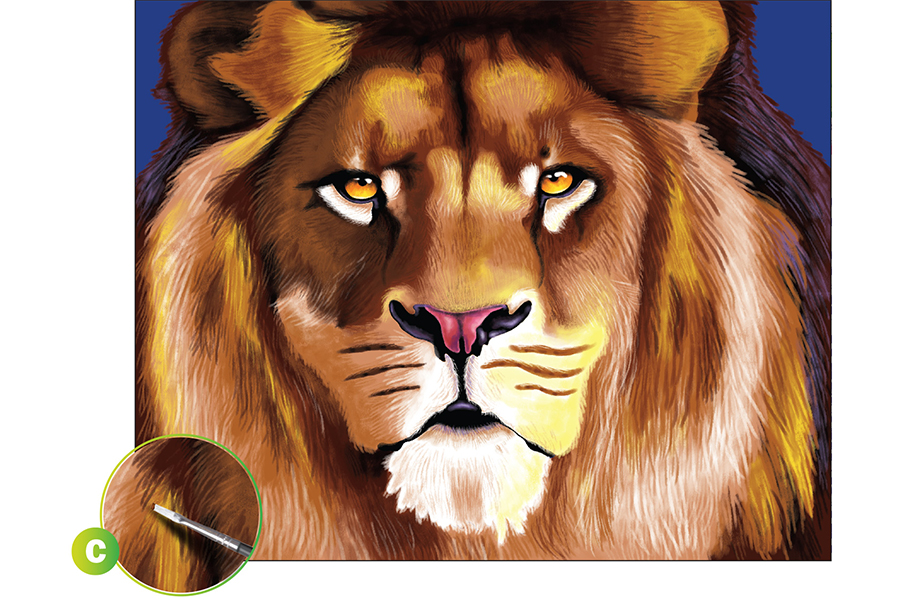
STEP 4: Develop Further Realism
Continue to layer fur stokes for further realism (see Ex. C). Use your smallest brush to paint strokes on the mane, using Burnt Sienna, Titanium White, light brown, and dark brown colors. Paint similar strokes in the face to transition the different fur colors together seamlessly. Build up the final highlights in the eyes, nose, and mouth. Paint Primary Blue in the background.
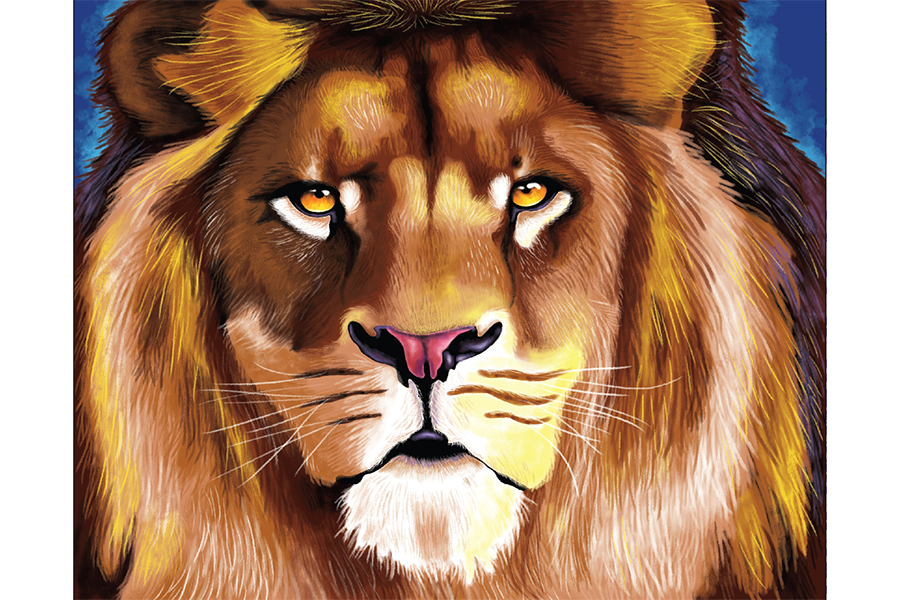
STEP 5: Finalize Your Artwork
To finish the lion, paint the finest details in the mane and face using the smallest brush you have. Use the Primary Yellow and Titanium White paints to add final highlights on the fur. Keep using your smallest brush and make these strokes thin and spread apart; if they are too close, they will blend together and become too thick. Add thin, white whiskers and small fur strokes on the lion's muzzle. Paint detailed fur strokes above the eyes with Ivory Black. Mix a light blue paint and add it to your background around the edges of the lion. If needed, use your smallest brush to then paint delicate, quick strokes on top of the blue to fix the edge of the lion's fur.